- 265 -
4
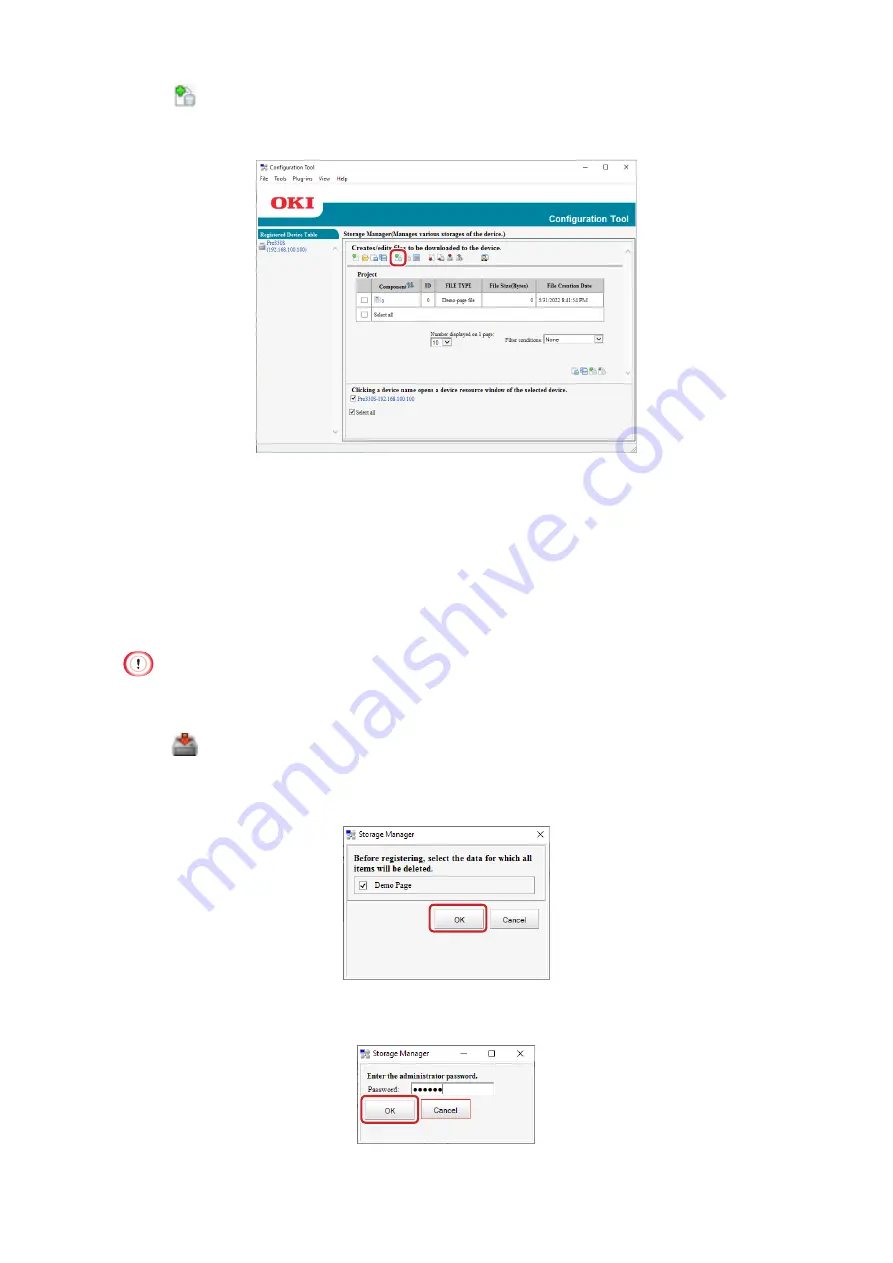
Click
[Add File to Project], and select the created demo page file.
At this time, if you select [Demo page file (*.DMO)] at the lower right
corner of the screen, you will be able to select the created demo page file.
5
Click the demo page file.
6
Input the component name of any demo page in [Component], and click
[OK].
7
Select this machine in the window below the Storage Manager plug-in
screen. By checking multiple machines, you can register the demo page
with these machines.
•
If this machine is not registered with the Configuration Tool, refer to
"Registering this machine" (Page 250)
to register it.
8
Click
[Send project files to printer].
9
Before registration, delete the item registered in this machine.
Select a demo page, and click [OK].
10
Input the admin password, and click [OK].
Содержание PRO330S
Страница 1: ...User s Manual...
Страница 14: ...Unpacking 2 Unpacking 15 Checking the accessories 16 Installing consumables 18...
Страница 102: ...102 8 Close the feeder cover...
Страница 151: ...151 8 Remove the toner cover 9 Close the top cover 10 Open the toner cartridge cover...
Страница 153: ...153 15 Turn on power of the machine For details on how to turn on the power refer to Turning the power on Page 34...
Страница 162: ...162 8 Close the top cover...
Страница 172: ...172 15 Close the top cover...
Страница 178: ...178 7 Install the image drum back to the machine 8 Close the top cover...
Страница 182: ...182 11 Close the top cover...
Страница 254: ...254 5 Click Backup settings 6 Input the folder name select the folder to save the le and click Save...
Страница 263: ...263 10 Input the admin password and click OK 11 Con rm the setting result and click Back...
Страница 266: ...266 11 Con rm the setting result and click Back...
Страница 280: ...EE8001 2750Z002 Rev1...


