Configuring the Network Settings
- 49 -
Se
tup
1
2
Select the [
Computer Name
] tab and
then click [
Change
].
3
Enter the name in [
Computer Name
] in
C-1 of the Setup Information Form.
4
Click [
Cancel
] to close the window.
For Windows 2000
1
Click [
Start
] > [
Settings
] > [
Control
Panel
].
2
Double-click [
System
].
3
Select the [
Network Identification
]
tab and then click [
Properties
].
4
Enter the name in [
Computer Name
] in
C-1 of the Setup Information Form.
5
Click [
Cancel
] to close the window.
For Mac OS X
1
From the Apple menu, select [
System
Preferences
].
2
Click [
Share
].
3
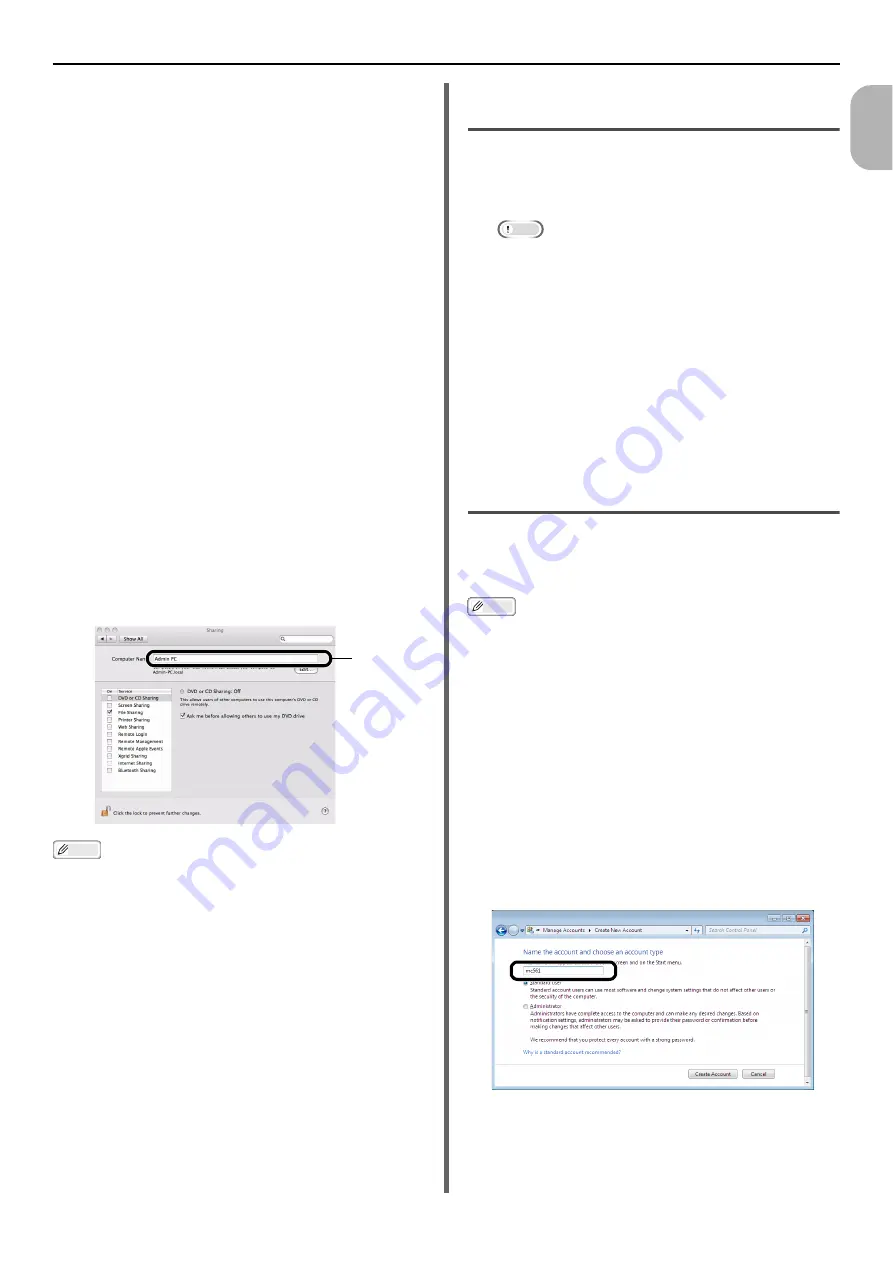
Enter the name in [
Computer Name
] in
C-1 of the Setup Information Form.
Memo
If the computer name is over 16 characters, for Mac OS X
10.4.11 enter the first 15 characters in C-1. For Mac OS X
10.5-10.6, select the network service you are using from
[
System Environment Settings
] > [
Network
], and
enter the NetBios field name into C-1 within WINS in
Detailed Settings.
4
Close [
Share
].
Determining the Names of the Items
Required for Scan To Network PC
Determine the names of the following items and
fill in C-2 to C-6 on the Setup Information Form.
User name to log into the destination computer (C-2)
Note
If the username is managed on the domain, enter
"Username@Domainname" in C-2. To check the
domain name, click on [
Change
] within the
[
Computer Name
] tab in the [
System Properties
]
dialogue box.
Password to log into the destination computer (C-3)
Profile name to register the settings on your
machine (C-4)
Shared folder name on the destination computer
(C-5)
File name of the scanned data (C-6)
Configuring the Computer for Scan
To Network PC
With the setup information form, create an
account and shared folder for the machine in the
computer.
Memo
If the computer is in a domain, the procedure of adding a
user account may be different to the procedure below.
Refer to the Microsoft Windows manual.
For Windows 7, Windows Server
2008 R2, Windows 2008 and Win-
dows Vista
1
Click [
Start
] > [
Control Panel
].
2
Select [
Add or remove user
accounts
].
3
Select [
Create a new account
].
4
Enter the information in C-2 in the text
box.
C-1


