- 79 -
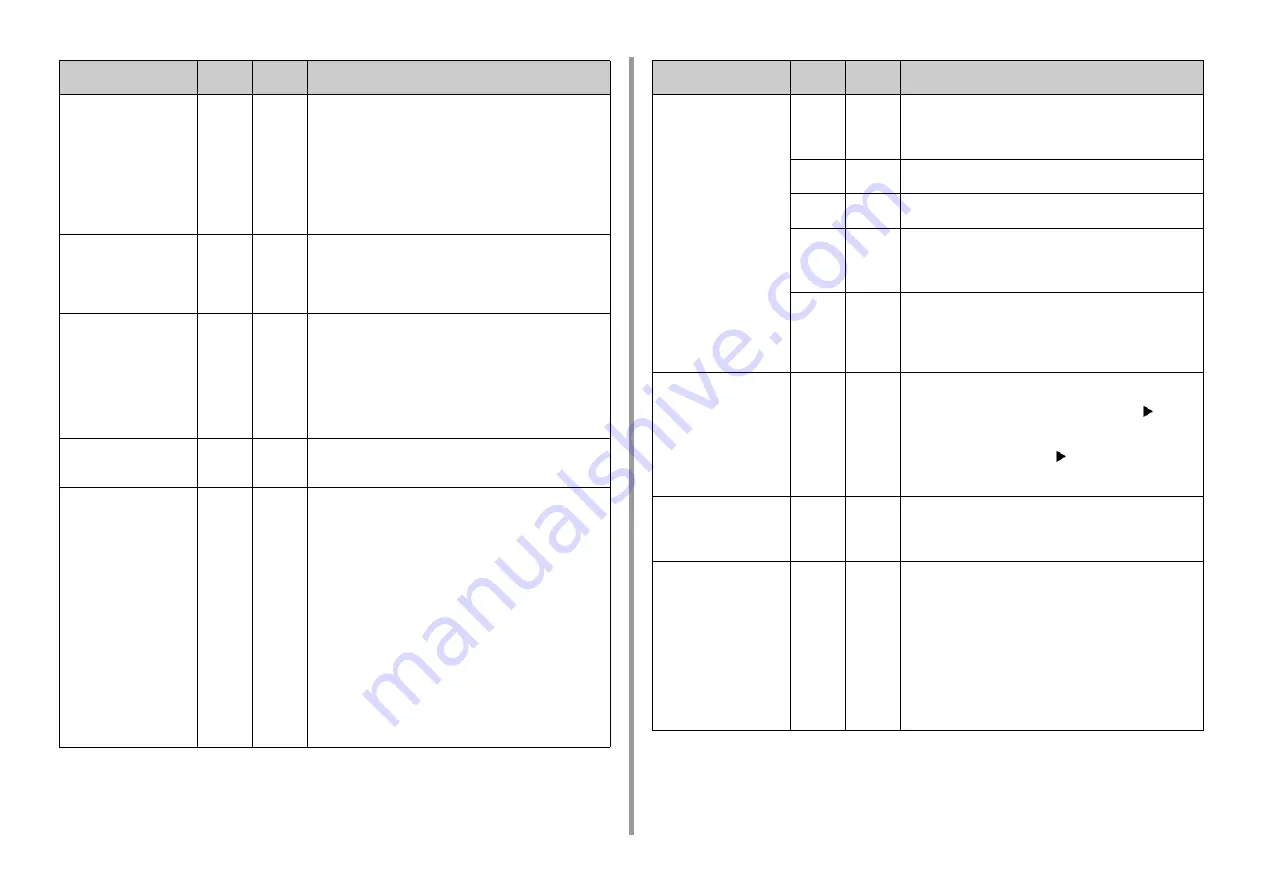
6. Troubleshooting
Non Recommended Toner
%COLOR%
Please see HELP for details
549, 550,
551, 552,
553, 554,
555, 556,
557, 614,
615, 616,
617, 620,
621, 622,
623
Blinks
The indicated toner cartridge is not optimum.
We recommend using an optimum toner cartridge.
550, 554, 614, 620: Yellow
551, 555, 615, 621: Magenta (red)
552, 556, 616, 622: Cyan (blue)
549, 553, 557, 617, 623: Black
Toner Not Installed
%COLOR%
Please see HELP for details
610, 611,
612, 613
Blinks
The supplied starter toner cartridges are installed in the
consumable image drums.
Install the consumable toner cartridges in the consumable
image drums.
610: Yellow, 611: Magenta (red), 612: Cyan (blue), 613: Black
Non Recommended Image
Drum
%COLOR%
Please see HELP for details
684, 685,
686, 687,
690, 691,
692, 693,
700, 701,
702, 703,
704, 705,
706, 707
Blinks
The indicated image drum is not optimum.
We recommend using an optimum Image Drum.
684, 690, 700, 704: Yellow
685, 691, 701, 705: Magenta (red)
686, 692, 702, 706: Cyan (blue)
687, 693, 703, 707: Black
Image Drum Not Installed
%COLOR%
Please see HELP for details
694, 695,
696, 697
Blinks
The indicated image drum is not installed.
Install the image drum.
694: Yellow, 695: Magenta (red), 696: Cyan (blue), 697: Black
Caution: Non-Genuine
Consumable detected
Check user's manual
"Trouble Shooting" to
restore machine operation
709
Blinks
This error means that a non-OKI Original consumable has been
installed in the machine.
The warranty is applicable when the product is used with its
designated OKI Original consumables. Use caution when
choosing other consumables. The entire risk as to the quality
and performance of the product due to the use of non-OKI
Original consumables is with you. Should the product prove
defective due to non-OKI Original consumables, you assume
the cost of all necessary servicing, repair or correction, as our
warranty may not cover these defects.
To accept these risks and to restore function:
1) Turn off your printer.
2) Turn the machine on. Press the «CANCEL» button when
[PLEASE WAIT] is displayed.
3) Release the «CANCEL» button when [Ready To Print] is
displayed.
Note: This operation will be recorded for future reference.
Message
Error
code
Indicato
r
Cause/Solution
Paper jam occurred
Paper remained in %NUM%
place(s)
Remove the paper
Press Help for details
632, 633,
634, 635
Blinks
A paper jam has occurred and paper remains in the paper input
area.
Remove the jammed paper.
632: Tray2, 633: Tray3, 634: Tray4, 635: Tray5
637
Blinks
Paper has jammed around the front cover. Open the front cover
and remove the jammed paper.
638
Blinks
Paper has jammed under the image drum.
Remove the jammed paper.
639, 640
Blinks
A paper jam has occurred and paper remains near the fuser
unit.
Remove the jammed paper.
639, 640: Fuser unit
641, 642
Blinks
A paper jam has occurred and paper remains near the duplex
unit.
Remove the jammed paper.
641: Duplex unit, Backside of the duplex unit
642: Duplex unit, Middle part of the duplex unit
Toner Sensor Error
%COLOR%
Please see HELP for details
540, 541,
542, 543
Blinks
The toner cartridge of the indicated color is not locked properly.
Check to make sure the blue lever (toner cartridge lock lever) of
the toner cartridge is turned until it lines up with the
in the far
end.
If the error occurred in Cyan and the toner cartridge lock lever is
turned until it is lined up with the
in the far end, check if the 2
blue knobs on the belt unit are properly locked.
540: Yellow, 541: Magenta (red), 542: Cyan (blue), 543: Black
Check Paper
Paper Multi Feed
%TRAY%
Please see HELP for details
401
Blinks
The indicated tray fed multiple sheets of paper at a time.
Remove the cassette from the tray, and then load paper again.
After loading, open and close the front cover to release the error.
Check Paper
Paper Size Error
%TRAY%
Please see HELP for details
400
Blinks
Paper size error has occurred in the indicated tray. Make sure
that the size made by paper loaded in the tray matches the
setting made by the paper size dial in the paper cassette. Load
paper according to the paper size and direction set for the paper
size dial.
If the setting made by the paper size dial is wrong, cancel
printing first, set the paper size dial, and then print again.
Make sure that the cassette does not feed multiple sheets of
paper at a time after starting printing. If it happens, remove
paper, and then load paper correctly.
Open and close the front cover to release the error.
Message
Error
code
Indicato
r
Cause/Solution
Содержание C824
Страница 1: ...C824 C834 C844 ES8434 User s Manual...
Страница 4: ...1 Before starting For Your Safety About This Manual Preface Trademarks License...
Страница 15: ...15 2 Setup Side view...
Страница 65: ...65 4 Print 2 Unfold the paper support 3 Open the sub support...
Страница 158: ...8 Appendix How to open printer folder Menu List of the Operator Panel Options Specifications...
Страница 175: ...175 8 Appendix 5 Select the total number of trays for Available Tray and then click OK...
Страница 180: ...180 8 Appendix When options are attached...
Страница 188: ...47095302EE Rev4...


