Print & Go Media Installation
12/9/04
3-19
6.
From the front of the printer, push/pull the media towards the drive roller, making sure
it passes between the heat deflector and the drive roll (see Figure 3-11 on page 3-9). Use
the +/- buttons to add more or less media during installation.
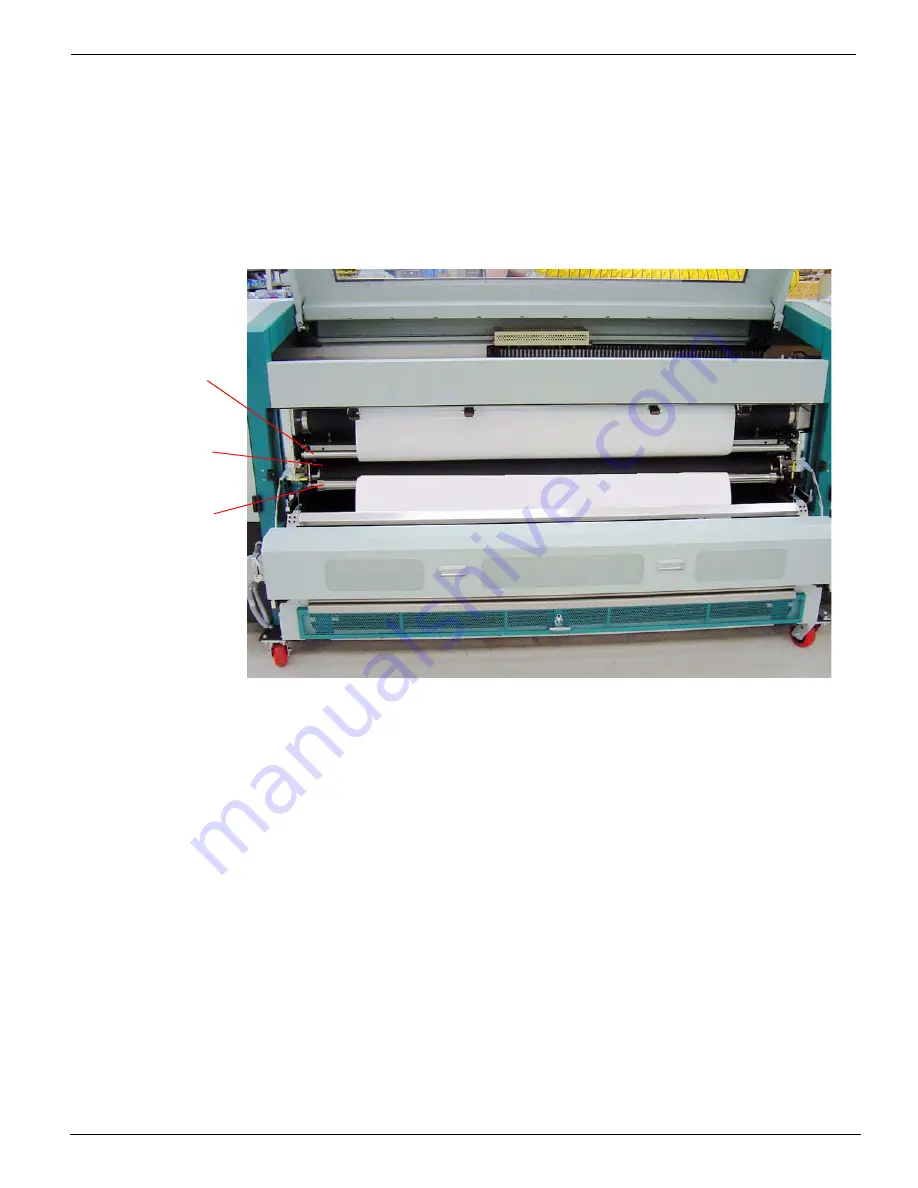
7.
Route the media over the take-up dancer, behind the Print & Go drive roll, and up
and in-between the pinch roller bar and the Print & Go drive roll (see Figure 3-16
on page 3-19).
Before proceeding to step 8, walk behind the machine and verify that the left edge of
the media is straight on the core and that no coning or sliding has occurred.
Figure 3-16 Media Routing
Take-up
Dancer
Print & Go
Drive Roller
Pinch
Roller Bar
Содержание Arizona 600
Страница 1: ...Oc Arizona 600 User Manual Revision E December 9 2004 Using ColorBlend six color printing technology...
Страница 2: ...Oc Display Graphics Systems 2004 All Rights Reserved...
Страница 6: ...Oc Ordering Printer Supplies vi...
Страница 34: ...Oc Media System 3 6 Figure 3 6 Secure the Mandrel Media Assembly...
Страница 58: ...Oc Media System 3 30...
Страница 110: ...Oc Printer Maintenance 5 20...
Страница 118: ...Oc Error Messages and Troubleshooting 6 8...
Страница 120: ...Oc Menus A 2 Figure A 1 Copies Reprints Menu...
Страница 121: ...12 9 04 A 3 Figure A 2 Print Parameters Menu...
Страница 122: ...Oc Menus A 4 Figure A 3 Test Prints Menu...
Страница 123: ...12 9 04 A 5 Figure A 4 Maintenance Menu Part 1...
Страница 124: ...Oc Menus A 6 Figure A 5 Maintenance Menu Part 2...
Страница 126: ...Oc Menus A 8 Figure A 7 About Printer Menu...
Страница 127: ...12 9 04 A 9 Figure A 8 Units Menu...
Страница 128: ...Oc Menus A 10 Figure A 9 Set Clock Menu...
Страница 129: ...12 9 04 A 11 Figure A 10 Ink Menu...
Страница 130: ...Oc Menus A 12 Figure A 11 Configure I O Menu...
Страница 137: ...12 9 04 B 7 Photo 2 Photo 3...
Страница 138: ...Oc Printer Maintenance B 8 Photo 4...
Страница 148: ...Oc Index Index 4...


