


OnTime Clock
Installation and User Guide
Firmware Version 1
All claims based on information publicly available at time of printing. All other product or service names mentioned
in this document may be trademarks of the companies with which they are associated.
© 2015 Novanex, Inc. | All rights reserved | page 25
7.
The clock’s telnet prompt appears:
iclock-### />
(This is
actually the clock’s
hostname, which by default is
‘iclock
-
###’ where ‘###’ are the last three characters of
the clock’s MAC
address.)
8.
You are now ready to set configuration using the telnet commands.
For help with a specific telnet command, at the prompt, type
help
followed by the
desired command. For example, to see help for the display option, type
help display.
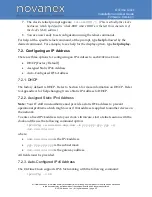
7.2. Configuring an IP Address
There are three options for configuring an IP Address to each OnTime Clock:
•
DHCP [Factory Default]
•
Assigned Static IPv4 Address
•
Auto-Configured IPv6 Address
7.2.1. DHCP
The factory default is DHCP. Refer to Section 6 for more information on DHCP. Refer
to Appendix A for help changing from a Static IP Address to DHCP.
7.2.2. Assigned Static IPv4 Address
Note:
Your IT staff must authorize and provide a static IPv4 address to prevent
operational problems which might occur if that address is applied to another device on
the network.
To enter a fixed IPv4
address into your clock’s fi
rmware, start a telnet session with the
clock and the use the following command option:
ipconfig -a
xxx.xxx.xxx.xxx
-m
yyy.yyy.yyy.yyy
-g
zzz.zzz.zzz.zzz
where:
•
xxx.xxx.xxx.xxx
is the IPv4 address
•
yyy.yyy.yyy.yyy
is the subnet mask
•
zzz.zzz.zzz.zzz
is the gateway address.
All fields must be provided.
7.2.3. Auto-Configured IPv6 Address
The OnTime Clock supports IPv6 Networking with the following command:
ipconfig
–
v v6