


January 2007
RAID operations
703t Server Maintenance and Diagnostics
187
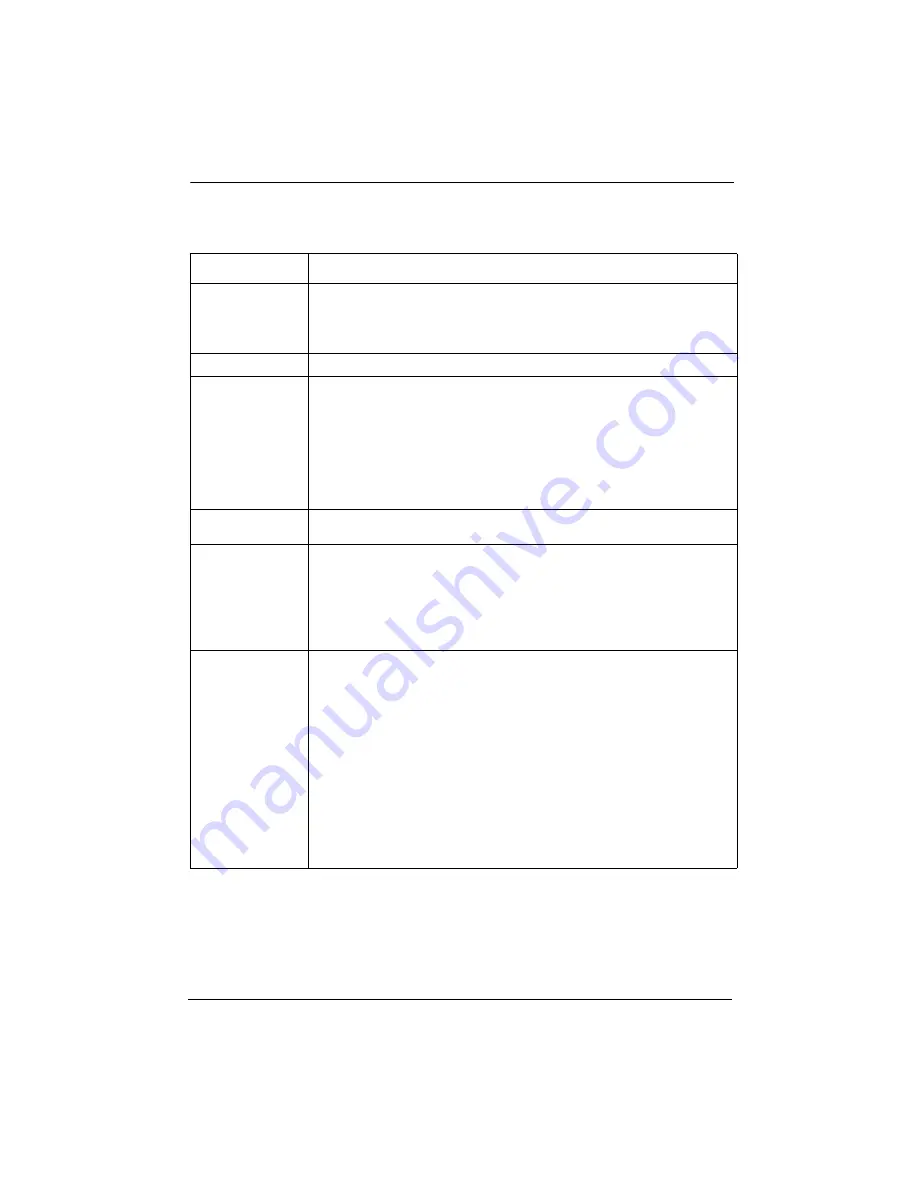
Task summary for RAID splitting
Note:
Use this summary only after reviewing the more detailed procedures and warnings in this chapter
.
What to do
How to do it
Ensure that your
system is fully
working and the RAID
hardware is properly
configured.
The most important thing to verify is that the RAID channel 1 is connected to the first hard
drive (top as facing the machine) and channel 2 is connected to the second drive (bottom).
Open the lid and follow the cables or remove one hard drive and observe which drive is
marked dead by the system. If the drive matches the graphic location on the Windows
MegaRAID console, proceed with the next step.
Full data backup
Do a full data backup before RAID splitting is performed as an extra precaution.
RAID splitting
Note:
Because the 703t
has only one physical
drive per channel, the
RAID splitting can be
done using the
Windows MegaRAID
console without risk of
CallPilot database
corruption.
1
Load the Windows MegaRAID console. Ensure all drives are in ONLINE state
(GREEN).
2
Right click the Channel 2 first drive (i.e (0) A1-2-Onln).
Select Tools
➝
Fail Drive. A warning message will pop-up. Ignore it and press OK. The
drive status will change to FAILED and the color of the icon should change to RED. The
alarm should start beeping.
Note:
The alarm can be silenced, but under no circumstances should it be disabled.
Select Adapter
➝
Alarm Control
➝
Silence Alarm.
Technically the drive that is marked FAILED is now the Backup Drive.
Perform CallPilot
software upgrade
Let the system boot. The system will still run after Channel 2 of the RAID card was taken
out of service and will boot to Windows. Perform the software upgrade.
RAID synchronizing
for upgrade
successful
WITHOUT
shutting down the server, in the Physical Devices section of the MegaRAID
console, right click the Channel 2 first drive (i.e Channel 2 (0) A1-2-Failed). From the right
mouse pop-up menu select Rebuild. When Rebuild is done, the drive status will change to
ONLINE and the color of the icon should change to green. The alarm should stop beeping
unless it was temporarily silenced. The process can take up to one hour.
DO NOT
shut
down the machine before the rebuild is complete. If you do reboot or power down during
this process, you need to do ‘RAID synchronizing for upgrade NOT successful’, then start
again. You can monitor the rebuild by opening the Windows MegaRAID console.
RAID synchronizing
for upgrade NOT
successful
If the software upgrade has failed, the system needs to be returned to the original
configuration.
1
Restart the server and enter the Ctrl+M utility.
2
Select Objects
➝
Physical Drive
➝
FAIL Drive for the drive on Channel 1.The drive will
show as FAIL after this step.
3
Select the drive on Channel 2 (previously taken offline or the Backup drive) and make it
ONLINE. Ignore the warning message.
At this point the drive on the Channel 2 is ONLINE and the one on Channel 1 is marked
FAILED.
4
Exit the utility and reboot. The system will boot up to the original configuration before the
software upgrade and an audible alarm will indicate the state CRITICAL for the drives. At
this time, you can silence the alarm but DO NOT disable it.
5
Once the system is fully operational, open the Windows MegaRAID console and rebuild
the FAIL drive on Channel 1 using the same process indicated in “RAID synchronizing for
upgrade successful”. Reverting to original from a failed software upgrade is now complete.
The audible alarm, if left on, should automatically stop.
Содержание 703t
Страница 6: ...Standard 1 06 6 CallPilot...
Страница 8: ...8 CallPilot Publication history Standard 1 06...
Страница 12: ...Task List Standard 1 06 12 CallPilot...
Страница 16: ...Contents Standard 1 06 16 CallPilot...
Страница 64: ...Using Windows online diagnostic tools Standard 1 06 64 CallPilot...
Страница 76: ...Using serial port diagnostic tools Standard 1 06 76 CallPilot...
Страница 118: ...Using CallPilot system utilities Standard 1 06 118 CallPilot Figure 13 Legend Help tab...
Страница 144: ...Replacing basic chassis components Standard 1 06 144 CallPilot...
Страница 150: ...Replacing media drives Standard 1 06 150 CallPilot Figure 25 Hard drive installation overview G101771...
Страница 170: ...Replacing media drives Standard 1 06 170 CallPilot...
Страница 188: ...RAID operations Standard 1 06 188 CallPilot...
Страница 196: ...Replacing or adding voice processing boards Standard 1 06 196 CallPilot...
Страница 247: ......


