


OneTouch AT 10G
User Manual
158
6
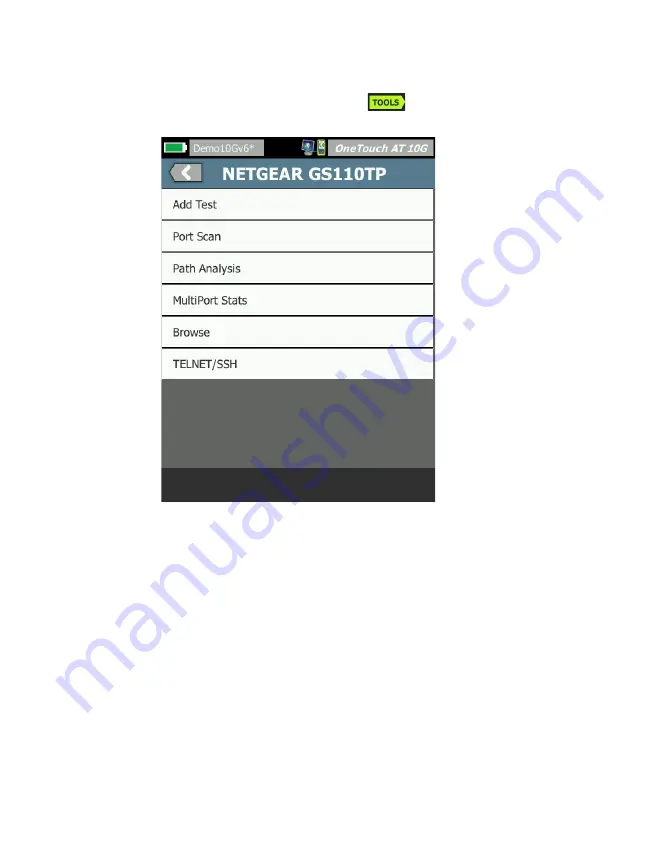
Tap the wired analysis TOOLS button .The
wired
analysis
tools menu is displayed.
Figure 56. Wired Analysis Tools Menu
7
Tap the Path Analysis button.
The OneTouch AT 10G analyzer runs layer 2 and layer 3 path
analysis to the target device and displays the results.
Each device along the path is shown on a button.
The results screen is updated as each hop completes.
The analyzer is the first device on the list.
Each device's best name is shown at the top of the button and
its IP address is shown below. Best name is described on page
Each queried device's response time is shown at the right side
of the button.
Содержание OneTouch AT 10G
Страница 14: ...OneTouch AT 10G User Manual xii...
Страница 135: ...Chapter 5 User Tests Video RTSP Test 133 launch a browser against the target server or Telnet SSH to the server...
Страница 146: ...OneTouch AT 10G User Manual 144...
Страница 172: ...OneTouch AT 10G User Manual 170...
Страница 173: ...171 Chapter 8 Tools Tap the TOOLS icon on the HOME screen to access the TOOLS screen Figure 64 Tools Screen...
Страница 222: ...OneTouch AT 10G User Manual 220...
Страница 225: ...Chapter 11 Maintenance Remove and Install the Battery 223 GVO003 EPS Figure 86 Remove and Install the Battery...
Страница 226: ...OneTouch AT 10G User Manual 224...
Страница 234: ...OneTouch AT 10G User Manual 232...
Страница 240: ...OneTouch AT 10G User Manual 238...
Страница 246: ...OneTouch AT 10G User Manual 6...
Страница 247: ...7 Notes...


