background image

Administration

31

 N750 Wireless Dual Band Gigabit Access Point WNDR4300-TN

Manage the Configuration File

The configuration settings of the access point are stored within the access point in a 
configuration file. You can back up (save) this file to your computer, restore it, or reset it to 
the factory default settings.

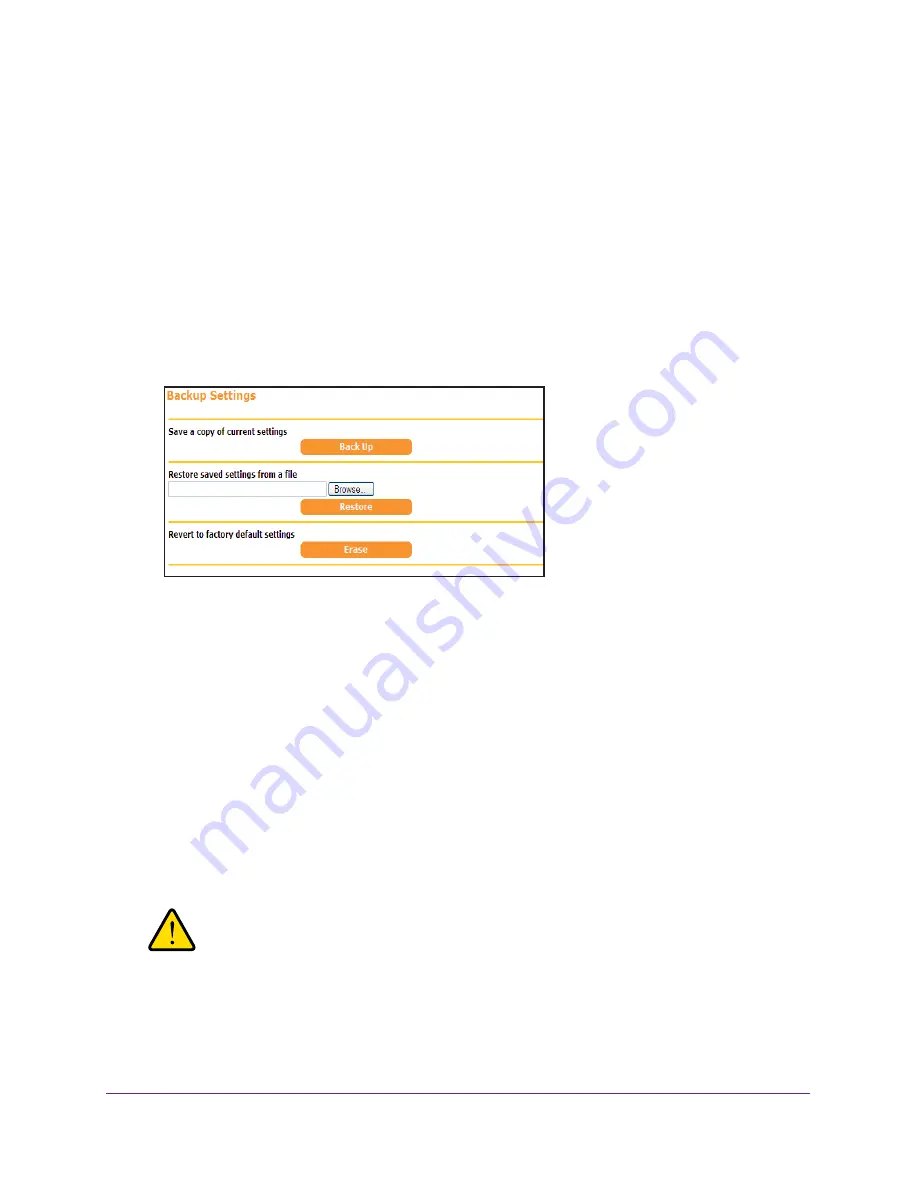
Back Up Settings

To back up the access point’s configuration settings:

1.

Select 

ADVANCED > Administration >


Backup Settings

.

The following screen displays:

2.

Click the 

Back Up Settings

 button.

3.

Specify a location to store the 

.cfg

 file that is on a computer on your network.

A copy of the current settings is saved.

Restore Configuration Settings

To restore configuration settings that you backed up:

1.

Select 

ADVANCED > Administration >


Backup Settings

.

2.

Click the 

Browse

 button to find and select the 

.cfg

 file. 

3.

Click the 

Restore

 button.

The file is uploaded to the access point and the access point reboots.

WARNING:

Do not interrupt the reboot process.

Содержание WNDR4300-TN

Страница 1: ...350 East Plumeria Drive San Jose CA 95134 USA September 2013 202 11267 01 N750 Wireless Dual Band Gigabit Access Point WNDR4300 TN User Manual...

Страница 2: ...ration of Conformity visit http support netgear com app answers detail a_id 11621 Trademarks NETGEAR the NETGEAR logo and Connect with Innovation are trademarks and or registered trademarks of NETGEAR...

Страница 3: ...Network 12 Manual Method 12 Wi Fi Protected Setup Method 13 BASIC Wireless Settings 13 Wireless Network 14 Security Options Settings 15 Attached Devices 16 Chapter 3 NETGEAR genie ADVANCED Home NETGE...

Страница 4: ...t Wireless Access by MAC Address 36 Chapter 7 Troubleshooting Quick Tips 38 Power LED 38 Check Ethernet Cable Connections 38 Wireless Settings 38 Network Settings 38 Troubleshoot with the LEDs 39 Powe...

Страница 5: ...to the Internet through a gateway If you have not already set up your new access point using the installation guide that comes in the box this chapter walks you through the hardware setup This chapte...

Страница 6: ...and access point setup instructions If any parts are incorrect missing or damaged contact your Internet service provider Hardware Features Before you cable your access point take a moment to become fa...

Страница 7: ...f The 5 GHz wireless radio is off LAN 1 4 Solid green The LAN port detected a 1 Gbps link with an attached device Solid amber The LAN port detected a 10 100 Mbps link with an attached device Off The g...

Страница 8: ...mber MAC address Serial number Restore Factory Settings Default password WiFi network name Figure 3 Label on access point For information about restoring factory settings see Factory Settings on page...

Страница 9: ...n that follows these guidelines Near the center of the area where your computers and other devices operate and preferably within line of sight to your wireless devices Accessible to an AC power outlet...

Страница 10: ...Verify that your access point is cabled correctly by checking the access point LEDs Turn on the access point by pressing the On Off button on the back The Power LED lights amber when the access point...

Страница 11: ...11 2 2 NETGEAR genie Basic Settings This chapter contains the following sections BASIC Home Screen Join Your Wireless Network BASIC Wireless Settings Attached Devices...

Страница 12: ...nd online help The following selections are available on this screen Home This dashboard screen displays when you log in to the access point Wireless View or change the wireless settings for your acce...

Страница 13: ...ss the WPS button on your wireless device or follow the WPS instructions that came with the device The WPS process automatically sets up your wireless computer with the network password and connects y...

Страница 14: ...our wireless devices and computers to make sure that they can connect wirelessly If they do not check the following Is your wireless device or computer connected to your network or another wireless ne...

Страница 15: ...WiFi Standard Select N 5 G to A N or 2 4 G to B G N If the WiFi standard is set to A in 5 GHz or B G in 2 4 GHz the access point works at 20 MHz WiFi Standard The WiFi standard determines the link rat...

Страница 16: ...rity For help with WPA settings on your wireless computer or device see the instructions that came with your product You can change the security option and password Best practice is not change the sec...

Страница 17: ...fields provide information about connected devices number The order in which the device joined the network IP Address The IP address that the access point assigned to this device when it joined the n...

Страница 18: ...tions NETGEAR genie ADVANCED Home Screen WPS Wizard Setup Menu LAN Setup Some selections on the ADVANCED Home screen are described in separate chapters Security See Chapter 4 Security Administration S...

Страница 19: ...nistration menu WPS Wizard The WPS Wizard helps you add a WPS capable client device a wireless device or computer to your network On the client device either press its WPS button or locate its WPS PIN...

Страница 20: ...ee LAN Setup on page 20 Jumbo frames Setup Jumbo frames are Ethernet frames with more than 1500 bytes of data The Jumbo frames feature is disabled by default LAN Setup The access point is shipped prec...

Страница 21: ...2 Enter the settings that you want to customize IP Address The LAN IP address of the access point IP Subnet Mask The LAN subnet mask of the access point Combined with the IP address the IP subnet mask...

Страница 22: ...urity This chapter explains how to use daylight saving time settings and security event email notifications This chapter includes the following sections Daylight Savings Time Security Event Email Noti...

Страница 23: ...dule The following screen displays 2 Check the Automatically adjust for daylight savings time check box 3 Click the Apply button Your settings are saved Security Event Email Notifications To receive l...

Страница 24: ...dress is also used for the From address If you leave this field blank log and alert messages are not sent 5 If your outgoing email server requires authentication select the My mail server requires aut...

Страница 25: ...ngs for administering and maintaining your access point and home network This chapter includes the following sections Upgrade the Firmware View Access Point Status View Logs of Web Access or Attempted...

Страница 26: ...se button Locate and select the firmware file you downloaded the file ends in img 3 Click the Upload button The access point begins the update WARNING To avoid the risk of corrupting the firmware do n...

Страница 27: ...Mode The operation mode of this device The device is an access point AP LAN Port The following information displays MAC Address The Media Access Control address This is the unique physical address th...

Страница 28: ...smitted on this port since reset or manual clear RxPkts The number of packets received on this port since reset or manual clear Collisions The number of collisions on this port since reset or manual c...

Страница 29: ...fault channel is Auto When Auto displays the access point finds the best operating channel available WiFi Standard For 2 4 GHz either B G 54 Mpbs or B G N 130 300 Mbps For 5 0 GHz either A 54 Mpbs or...

Страница 30: ...shows the following information Date and time The date and time the log entry was recorded Source IP The IP address of the initiating device for this log entry Action Whether the access was blocked or...

Страница 31: ...ettings 1 Select ADVANCED Administration Backup Settings The following screen displays 2 Click the Back Up Settings button 3 Specify a location to store the cfg file that is on a computer on your netw...

Страница 32: ...NCED Administration Backup Settings 2 Click the Erase button The factory default settings are restored The user name is admin the password to password and the LAN IP address is 192 168 0 51 DHCP is en...

Страница 33: ...ide answers to them 4 Click the Apply button Your changes are saved To recover your password 1 In the address field of your browser type www routerlogin net A login window displays 2 Click Cancel If p...

Страница 34: ...eatures of your access point The information is for users with advanced networking knowledge who want to set the access point up for unique situations This chapter includes the following sections Adva...

Страница 35: ...tion of the access point When the wireless radio is disabled other members of your household can use the access point by connecting their computers to the access point with an Ethernet cable Enable Wi...

Страница 36: ...MAC address using the network configuration utilities of the computer You might also find the MAC addresses in the Attached Devices screen To restrict access based on MAC addresses 1 Select ADVANCED A...

Страница 37: ...iagnose and solve problems you might have with your access point This chapter contains the following sections Quick Tips Troubleshoot with the LEDs Cannot Log In to the Access Point Changes Not Saved...

Страница 38: ...et cable the corresponding numbered access point LAN port LED is lit Wireless Settings Make sure that the wireless settings in the computer and access point match exactly For a wirelessly connected co...

Страница 39: ...sly the access point firmware is corrupted This can happen if a firmware upgrade is interrupted or if the access point detects a problem with the firmware If the error persists you have a hardware pro...

Страница 40: ...as Java JavaScript or ActiveX enabled If you are using Internet Explorer click the Refresh button to be sure that the Java applet is loaded Try quitting the browser and launching it again Make sure th...

Страница 41: ...wireless device finds the network but you cannot join the network check to make sure that your wireless device is compatible with the network that you selected 2 4 GHz or 5 GHz Does your wireless dev...

Страница 42: ...n This appendix provides factory default settings and technical specifications for the N750 Wireless Dual Band Gigabit Access Point WNDR4300 TN The appendix includes the following sections Factory Set...

Страница 43: ...ess 192 168 0 51 Subnet mask 255 255 255 0 Time zone GMT 01 00 Time zone adjusted for daylight saving time Disabled Allow a registrar to configure this router Enabled Wireless Wireless communication E...

Страница 44: ...47 LAN 10BASE T or 100BASE Tx or 1000BASE T RJ 45 Wireless Maximum wireless signal rate complies with the IEEE 802 11 standard See the footnote for the previous table Radio data rates Auto Rate Sensin...

Страница 45: ...io links in France and in some areas the RF output power may be limited to 10 mW EIRP in the frequency range of 2454 2483 5 MHz For detailed information the end user should contact the national spectr...

Страница 46: ...dance with FCC multi transmitter product procedures Cet appareil et son antenne s ne doit pas tre co localis s ou fonctionnement en association avec une autre antenne ou transmetteur For operation wit...

Страница 47: ...cesser d mettre en cas d absence d informations transmettre ou une d faillance op rationnelle Notez que ce n est pas l intention d interdire la transmission des informations de contr le ou de signalis...

Страница 48: ...equipment and household appliances to reduce interference in feet and meters Household Appliance Recommended Minimum Distance in feet and meters Microwave ovens 30 feet 9 meters Baby monitor analog 20...

Отзывы: