


Upgrading Your System 4-7
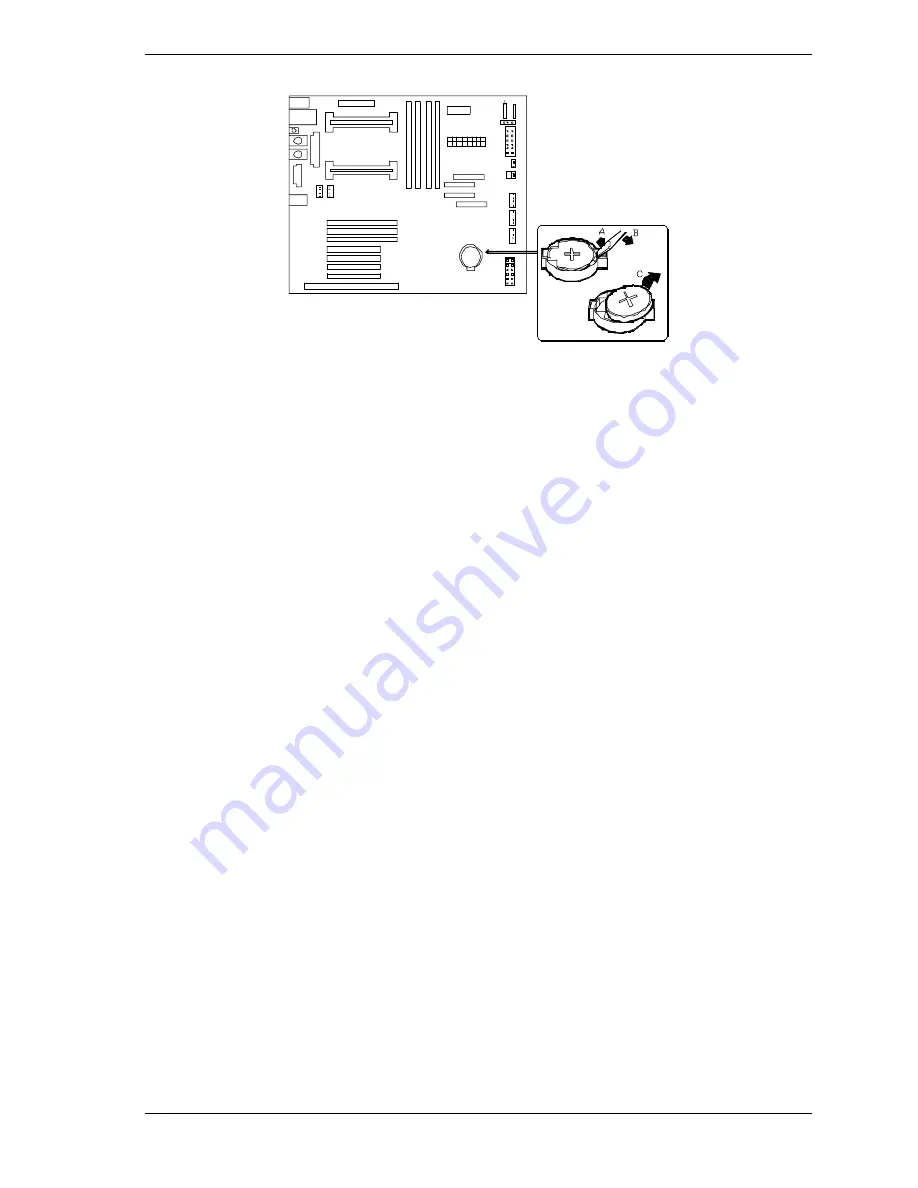
Replacing the Real-Time Clock Battery
1.
Power off the system and remove the left side panel as described earlier in
this chapter.
2.
If present remove the protective plastic cover located over the top of the
lithium battery socket.
3.
Insert the tip of a small flat-bladed screwdriver or equivalent opposite the
spring clip (A in figure).
4.
Gently push down on the screwdriver to lift the battery (B).
5.
Remove the battery from its socket (C).
6.
Dispose of the battery according to local ordinance.
7.
Remove the new lithium battery from its package, and, being careful to
observe the correct polarity, insert it in the battery socket.
8.
Reinstall the plastic cover over the top of the lithium battery socket.
9.
Replace the side panel, plug in the system power cord, and turn on the
system.
10.
Run the BIOS Setup to restore the configuration settings to the real-time
clock.
Содержание Express5800/120Mc2 series
Страница 1: ... U s e r s G u i d e EXPRESS5800 120Mc2 ...
Страница 2: ...xxx ...
Страница 3: ... U s e r s G u i d e EXPRESS5800 120Mc2 ...
Страница 50: ...2 18 Setting Up the System ...
Страница 106: ...4 34 Upgrading Your System Plugging in the AC Power Cords ...
Страница 125: ...A System Cabling System Cabling Before You Begin Static Precautions Standard Configuration RAID Configuration ...
Страница 129: ...System Cabling A 5 A Ultra 160 M SCSI cable 68 pins B IDE cable 40 pins Standard System Cable Routing ...
Страница 132: ...A 8 System Cabling A Ultra 160 M SCSI cable 68 pins B IDE cable 40 pins RAID System Cable Routing ...
Страница 154: ...B 22 Management Workstation Application ...
Страница 155: ...C System Status Hardware Support Information ...
Страница 166: ...10 Glossary ...
Страница 171: ...xx ...
Страница 172: ... 456 01524 000 ...


