background image

RC6 novo

20

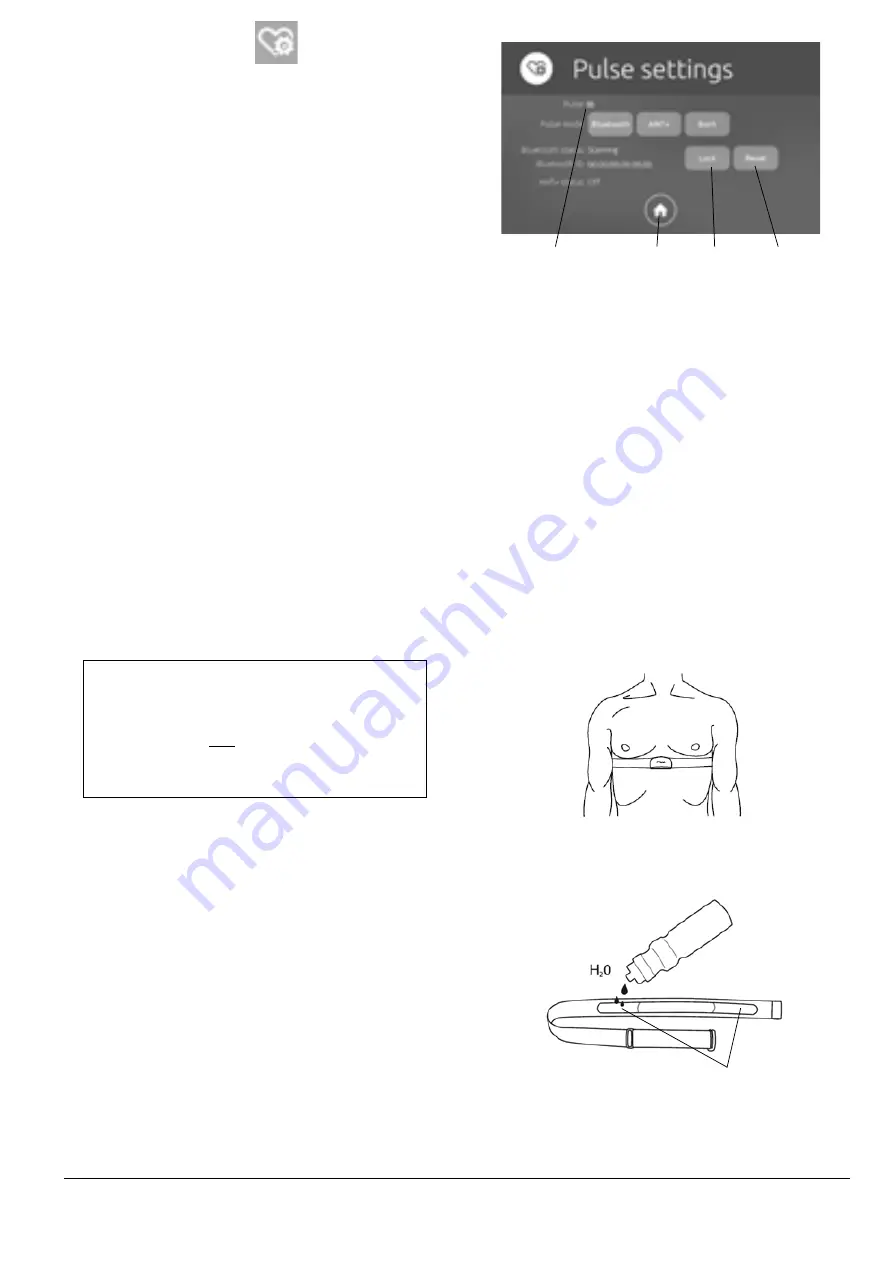
Pulse settings

Here you can choose what heart rate standard you 
want the bike to search for, Bluetooth SMART, ANT+ 
or both. 

Current 

heart rate

Lock to 

bluetooth

Lock up 

bluetooth

Home

ANT+

(ANT+ is always active) 

ANT+ uses "proximity pairing" which means that 
you should be close to the display for it to start 
listening to it. When the display and the heart rate 
monitor is paired, you can be relatively far from the 
bike with retained function. This process ensures that 
the display is listening on the correct belt. 

If you have connected to an ANT+ heart rate monitor 
it says "connected" at "ANT+ status:" and the current 
heart rate is displayed at "Pulse". 

The person's heart rate ("pulse") can be measured 
by, for example, a chest belt that detects your pulse 
from your heart and sends the pulse to the bike with 
Bluetooth SMART or ANT+ technology.   

Fig: Placement chest belt

Fig: Moistening the electrodes

The images above are used with permission of Polar Sweden. 

Bluetooth SMART 

When the bike and a Bluetooth SMART heart rate 
monitor have been paired the heart rate monitor 
Bluetooth ID and the current heart rate is displayed 
at "Pulse". You can choose to actively lock the heart 
rate monitor by pressing "Lock". Then the bike is 
only searching for that particular heart rate monitor. 
Press "Reset" if you want to release the lock to only 
a specific heart rate monitor and lock with a new or 
continue to search freely. 

You can use several Bluetooth SMART heart rate 
monitors to the bike, but you can only lock to one at 
a time.

The bike locks to the heart rate monitor that it finds 
first (within 10 m). If more heart rate monitors are 
used, we therefore recommended to lock into a 
specific Bluetooth ID to ensure that the correct heart 
rate appears. 

NOTE!

 (for Bluetooth SMART)

It must be ensured that no other belts in 
addition to the belt that should be paired to 
the bike is active OR that any other device (cell 
phone, bike computer, etc.) that could connect 
to the belts are active during the process! 

If you use chest belt

Heart rate registration requires that the heart rate 
monitor is positioned correctly. When it is correctly 
fitted the logo on the belt will be central and readable, 
outward and upright, by another person. Before 
putting on the belt, clean the skin where the belt is 
to be placed. The chest belt should be secured at a 
comfortable tension around the mid section, just 
below the breast muscle, see 

Fig: Placement chest belt.


Moisten the electrodes before use, see 

Fig: Moistening 

the electrodes.

Содержание novo

Страница 1: ...MANUAL RC6 novo EN...

Страница 2: ......

Страница 3: ...et commando type for the RS232 port 13 Monark test software 13 Other external PC software 13 Terminal mode PC 13 Monark novo Display Unit 14 Start training 14 Stop pause training 15 Workload control 1...

Страница 4: ...f of precision reliability strength and service Those are the reasons why we now are the world leader in ergometer bikes and the market leader in Scandinavia in transport bikes We manufacture develop...

Страница 5: ...according to user requirements RC6 novo is a great bike as it is with additional equipment it can be even better Force is a strong word which has many associations For us force is interesting when it...

Страница 6: ...ig Overview at page 8 The bike can be used at maximum load without any time limit PC software Software to control the bike and to do different tests is available to download from our website www monar...

Страница 7: ...ower adaptor Recumbent settings When you ride on the recumbent you should adjust the distance to the pedals so that you get a comfortable seating position You can adjust the seat longitudinally by lif...

Страница 8: ...C6 novo 8 Overview Fig Overview 1 Monark novo Display Unit 2 Recumbent handlebar 3 Lever for turning the seat 4 Opening in the side cover for the connection of external equipment 5 Serial number on re...

Страница 9: ...ike For information about how respective control units work see section Connection to external control unit Here are instructions for connection and options for connection to external devices If advan...

Страница 10: ...r unusual sounds Adjust if necessary Adjust the handlebar and saddle and make sure they are securely attached and that the adjustment is working properly Make sure the support legs are in position by...

Страница 11: ...ation of force Monark Test Software MTS Start Monark Test Software it is available for free download from our web site www monarkexercise se and select a test programme from the menu Test In the dialo...

Страница 12: ...The parts in Ergoline protocol that handle blood pressure and its parameters are not implemented The two free ports can have different settings When connecting to multiple devices it is important to...

Страница 13: ...port In default 0 you do not hear a short beep but at normal Ergoline setting 2 you hear two short beeps after the long beep 0 A long beep 2 A long beep followed by two short beeps 3 A long beep foll...

Страница 14: ...tarts counting If autostart is enabled the time starts count ten seconds after you have started to pedalling without you have to press Start Autostart is set in Settings general This is Normal mode th...

Страница 15: ...No Stop pause training If you want to stop training press Pause or just stop pedalling After you have pressed Pause or about 10 seconds after you have stopped pedalling the display is changed to Worko...

Страница 16: ...returns to Normal mode If you press Home the display returns to normal mode without any changes If you press Locked mode in the view Set unit you lock the display to show only the current rpm instead...

Страница 17: ...distance a specific time or a specific amount of calories consumed set the value and then the bike counts down up When you train against a specific target a target bar is showed in the display It show...

Страница 18: ...20 km h others rpm linear 1 rpm 2 5 km h 1 km h 5 2 rpm Target bar appears in the display Home Start Step back Home Start Step back Home Home Set time target Here you can choose how long time you wan...

Страница 19: ...heel Average power Max power Min power Total time Average workload Max workload Min workload Total distance Average rpm Max rpm Min rpm Calories Average speed Max speed Min speed End heart rate Averag...

Страница 20: ...to actively lock the heart rate monitor by pressing Lock Then the bike is only searching for that particular heart rate monitor Press Reset if you want to release the lock to only a specific heart rat...

Страница 21: ...This is mainly used by service personnel ID Device ID control unit Display Unit version Display software version Control unit version Control unit software version Pot value Potentiometer value kpscal...

Страница 22: ...for another heart rate monitor new or old You can use several heart rate monitors on the same bike but it may only activate one monitor at a time within range Connection to heart rate monitor with se...

Страница 23: ...he command pulsebleid in the terminal window and this will register and lock to the specified id note that it should be around the id If you want to return to automatically pair with the first compati...

Страница 24: ...d it there a while to loosen it Check that the pointer on the pendulum is in line with the scale 0 index see section Scale adjustment adjust very precisely if necessary Calibration weight 4 kg Art No...

Страница 25: ...ee Fig 2 kp Wait for a beep 7 Move the pendulum pointer to 4 kp see Fig 4 kp Wait for a beep 8 Move the pendulum pointer to 6 kp see Fig 6 kp Wait for a beep Move the pendulum to 0 again The value at...

Страница 26: ...owest position Let the test person pedal at a low work load to experience how it feels to hold a steady RPM Finally the chest belt shall be put on see Fig Placement chest belt for correct placement Ch...

Страница 27: ...e maximum oxygen consumption based on a submaximal workload while all others report the oxygen consumption required by the final workload The estimated maximum oxygen consumption derived from some of...

Страница 28: ...humbs and click on the electrodes a low clicking sound will be heard at the battery cover not chest belts with Bluetooth technology alternatively that the heart rate is displayed in the PC software If...

Страница 29: ...re is a click noise when pedalling increases with the weight The pedals are not tight Tighten them or change pedals The crank is loose Check tighten The base bearing is loose Contact your dealer for s...

Страница 30: ...ses fast wearing and with that follows a highly reduced lifetime Check that the flywheel is placed in the center and with plane rotation Grind the brake belt contact surface see section Brake belt con...

Страница 31: ...ove it from the bike Attach the new brake belt and assemble the bike in reverse order NOTE When replacing the brake belt it is recommended to clean the brake surface See Brake belt contact surface Bra...

Страница 32: ...the hub nuts 2 should be loosened Loosening or tightening the nuts on the chain adjusters 1 will then move the hub and axle forward or backward Then tighten the nuts on the hub axle again See Fig Chai...

Страница 33: ...he flywheel Remove the axle nut washer chain adjuster and spacer on the freewheel side Replace sprocket adaptor and assemble the new parts in reverse order according to the above The sprocket should b...

Страница 34: ...133 Locking knob 5 1 9310 71 Lock to front cover 16 1 9311 125 Swivel module 6 1 9310 20 Front cover 17 1 9326 97 Lever for length adjustment 7 1 9310 630 1 Side cover left 18 2 9311 142 Stop 8 1 930...

Страница 35: ...sion complete 3 1 9310 45 Pendulum 7 kp complete 10 1 9311 84 Sensor with bracket complete 1 9310 43 Pointer 11 1 9311 906 Monark novo control unit RC6 1 9326 88 Spring 12 1 9300 430 Crank set steel 5...

Страница 36: ...KROONS V G 1 SE 780 50 VANSBRO SWEDEN MONARKEXERCISE SE TEL 46 0 281 59 49 40 FAX 46 0 281 719 81 Version 1710 Art No 7950 406...

Отзывы: