Monacor WAP-202RS Скачать руководство пользователя страница 27

27

Italiano

at the first station. (If required, turn 

the knob CONTROL SELECT for a 

fine  adjustment  of  the  frequency 

in  50 kHz  increments.)  To  search 

for the next station, press the knob 

again. To change the direction of 

the scan, turn the knob briefly into 

the direction desired (left = reverse 

scan; right = forward scan) before 

you start the scan. 

To start the scan via the remote 

control,  keep  the  button 



I

  (for

-

ward scan) or 

I



 (reverse scan) 

pressed until the scan starts.

Indication during replay:

 If the sta

-

tion  broadcasts  RDS  information 

(Radio  Data  System, 

R

.

D

.S

  indi

-

cated), the display will show the sta

-

tion name instead of the frequency 

(this may take a few minutes). Some 

stations  also  provide  information 

concerning the programme and /or 

current music title. Press the button 

INFO repeatedly to show more in

-

formation. The symbols in the lower 

line have the following meaning:

 Replay in stereo mode
  Indication of the signal strength 

received

4) To save a station and to call 

up  a  station  saved:

  The  pro

-

cedure  for  saving  a  station  and 

for  calling  up  a  station  saved 

is  the  same  as  in  the  operating 

mode  “Internet  radio”: 

  steps  4


and 5 in chapter 4.1.

5) 

Replay in mono mode:

 To reduce 

the noise of stations with poor re

-

ception,  select  the  mono  mode: 

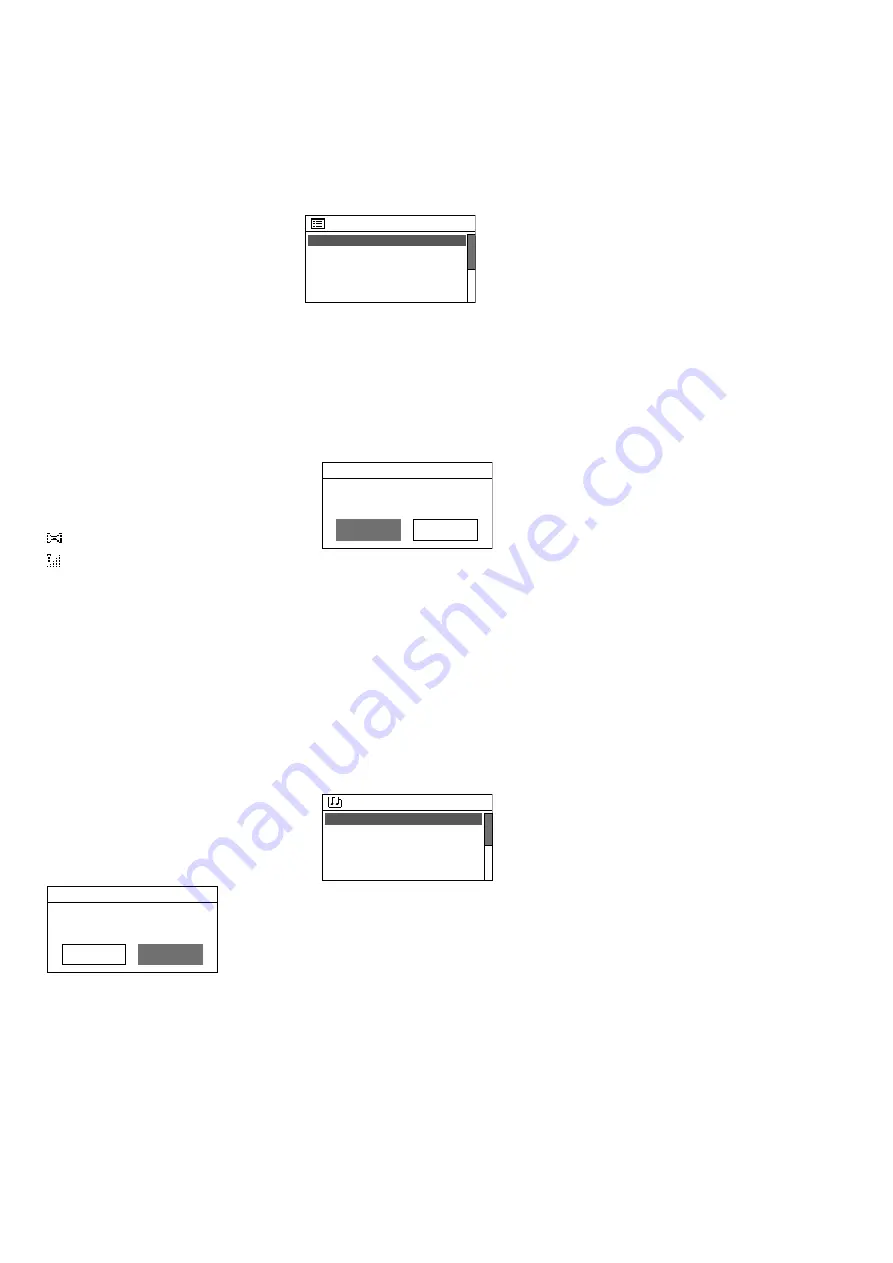
Press the button MENU. The menu 

“FM”  will  appear  on  the  display 

(fig. 38). Select and confirm  

Audio set-

ting

  .  The  following  confirmation 

prompt will be shown:

YES

FM weak reception

Listen in Mono only?

NO*

Select and confirm the setting 

YES

 . 

Then all stations will be replayed in 

mono mode.

4.4 Music player

The  music  player  is  able  to  replay 

audio files in the formats MP3, AAC /

AAC+, WMA, WAV or FLAC from a 

USB storage medium (USB flash drive 

or USB hard disk) or from a unit in the 

local network (e. g. computer).

Note:

 Due to the large number of storage 

device manufacturers and device drivers, 

it cannot be guaranteed that all storage 

media  are  compatible  with  the  music 

player.

Press  the  button  MODE  repeatedly 

until 

Music   player

  appears  on  the  dis

-

play. Then, the menu “Music player” 

will appear:

Music player

Shared media

USB playback
My playlist
Repeat play: Off
Shuffle play: Off

>

>

4.4.1 Replay via the USB 

connection

1) Connect a USB flash drive or a hard 

disk to the USB port. When a USB 

storage  medium  is  connected  to 

the port, the following confirmation 

prompt will appear:

USB playback

USB disk attached -

Open folder? 

NO

YES

YES

 is selected. To call up the USB 

storage  medium,  press  the  knob 

CONTROL SELECT .

As an alternative, a USB storage 

medium can also be called up via 

the menu “Music player”: Turn the 

knob CONTROL SELECT to select 

the line  

USB playback

 and then press 

the knob to confirm.

2) Once the USB storage medium has 

been called up, the contents of the 

medium are shown:

USB playback

Blues

Country
POP
Beat Machine - Come...
DoMan - Go! 

>

>
>

Turn the knob CONTROL SELECT to 

select a title and then press the knob 

to start the replay. To select a title 

from a folder (indicated by 

>

), first 

turn the knob to select the folder and 

then press the knob to call it up. In 

the folder, select and replay the title 

desired.

3) To return to the previous selection 

level  in  the  menu,  turn  the  knob 

CONTROL SELECT or press the but

-

ton BACK (with the remote control: 

press the button 

 , 

 or 

). From 

this level, it is possible to select a 

different title or, by means of the 

button BACK or 

, to go back further 

in the menu.

An  overview  of  the  operating 

functions and displays can be found 

in chapter 4.4.4.

4.4.2 

Replay via the network

The  unit  in  the  local  network  from 

which WAP-202RS obtains the audio 

files must support the UPnP stand

-

ard (Universal Plug and Play) and it 

must be possible to use it as a media 

server, e. g. a computer on which the 

Windows Media Player  (version 10 

or higher) is installed or a router with 

media server functionality to which a 

USB storage medium with audio files 

can be connected.

Windows is a registered trademark of Mi

-

crosoft Corporation in the United States and 

other countries.

1) Set up the unit that provides the 

audio  files  in  such  a  way  that  it 

works as a media server (e. g. make 

the  required  sharing  and  media 

streaming settings at the computer). 

Please refer to the instructions or 

software documentation of the re

-

spective unit.

2) In the menu “Music player” (fig. 41), 

select  the  menu  item 

Shared Media


by means of the knob CONTROL 

 SELECT and then press the knob to 

call up the menu item: The name of 

the media server will be shown. If 

multiple media servers are shown, 

select  the  media  server  desired 

and then press the knob to open its 

media archive.

3) The menu structure of the media ar

-

chive depends on the media server 

used. Turn the knob CONTROL SE

-

LECT to select categories  /  folders 

and titles and then press the knob to 

call them up. When the title desired 

is called up, it will be replayed.

4) To return to the previous selection 

level  in  the  menu,  turn  the  knob 

CONTROL SELECT or press the but

-

ton BACK (with the remote control: 

press the button 

 , 

 or 

). From 

this level, it is possible to select a 

different title or, by means of the 

button BACK or 

, to go back further 

in the menu.

An  overview  of  the  operating 

functions and displays can be found 

in chapter 4.4.4.

Note:

  The  following  applies  to  media 

servers that have once been connected 

to WAP-202RS and support the function 

“Wake on LAN” (e. g. a computer accord

-

ingly  configured):  When  they  currently 

are not available in the network (e. g. be

-

cause they have been switched off or dis

-

Содержание WAP-202RS

Страница 1: ...CTRONICS FOR SPECIALISTS ELECTRO Ricevitore radio Internet con sintonizzatore FM e DAB lettore musicale Bluetooth Internet Radio Receiver with FM and DAB Tuner Music Player Bluetooth Interface WAP 202...

Страница 2: ......

Страница 3: ...ltiroom tramite app 15 5 1 2 Impostazioni Multiroom sul dispositivo 16 6 Controllo tramite l interfaccia RS 232 16 7 Dati tecnici 16 Panoramica delle modalit operative e della struttura del menu 17 En...

Страница 4: ...offre anche Ricezione di stazioni FM e stazioni radio digitali DAB DAB Riproduzione di file audio da un supporto di memorizzazione USB o da un server multimediale nella rete locale ad es computer Ripr...

Страница 5: ...o 6 MODE Passaggio tra le modalit ope rative Internet Radio Lettore musicale DABRadio FMRadio UKW Bluetooth Audio Aux in MENU Richiama il menu tornaallivellosuperioredelmenu Esci dal menu Seleziona la...

Страница 6: ...di sistema Fig 9 ruotare la manopola CONTROL SELECT fino a selezionare l assistente di configurazione e confermare la sele zione premendo la manopola Daylight savings Daylight savings ON OFF 2 S sele...

Страница 7: ...se il router trasmette automatica mente le impostazioni di rete al dispositivo tramite DHCP d La funzione DHCP sul router di sattivata o non disponibile selezi onare DHCP inattivo confermare ed effet...

Страница 8: ...spositivo in modalit standby Puoi scegliere tra i livelli di luminosit medio e basso e spegnere l illuminazione spento 3 Utilizzare il timeout per impostare il tempo che deve trascorrere dopo il pas s...

Страница 9: ...apitolo 3 3 1 punto 2 Imposta fuso orario Selezione della fascia oraria come per la configurazione guidata capitolo 3 3 1 punto 3 fig 13 Orario estivo invernale Impostazione ora legale solare come per...

Страница 10: ...e selezionare e richiamare la sta zione desiderata dall elenco degli ultimi ascoltati 7 Salva stazione Nelle dieci posizioni di memoria possono essere memorizz ate dieci stazioni Una volta richiamata...

Страница 11: ...3 pu essere utilizzata per correggere l allinea mento dell antenna ricevente e o per po sizionare pi favorevolmente il dispo sitivo se la ricezione di una stazione scarsa Per richiamare l elenco dei c...

Страница 12: ...attached Open folder NO YES S selezionato Premere la manopola CONTROL SELECT per accedere al dispositivo di archivia zione USB In alternativa possibile richiamare anche un supporto di memoria USB nel...

Страница 13: ...i brani nella cartella corrente vengono riprodotti una volta in ordine casuale Repeat Tutti i brani della cartella corrente vengono riprodotti all infinito uno dopo l altro e Riordina e Ripeti Tutti i...

Страница 14: ...nte ALARM Il disposi tivo torna in modalit standby Nota Se l allarme non termina il dispo sitivo torna automaticamente in moda lit standby dopo 60 minuti 5 In standby la sveglia pu essere attivata e d...

Страница 15: ...dell equalizzatore separata toccare la rispettiva icona dell equalizzatore 4 1 2 Impostazioni multiroom sul dispositivo Il funzionamento multiroom possibile anche senza l utilizzo dell app UNDOK Le se...

Страница 16: ...i riserviamo il diritto di apportare mo difiche Se il controllo via rete non funziona controlla i seguenti punti Il dispositivo non deve essere spento con l interruttore POWER Sul dispositivo deve ess...

Страница 17: ...Multi room Auxiliary input 11 45 Mode Mode related menus System settings Main menu Submenus ENTER BACK another submenu Equaliser Normal Flat Jazz Rock Movie Classic Pop News My EQ My EQ profile setup...

Страница 18: ...ter and high air humidity The admissible ambient temperature range is 0 40 C Do not place any vessels filled with liquid on the product e g a drinking glass The heat produced inside the prod uct must...

Страница 19: ...bat tery should leak 3 2 1 Function overview Most of the functions are available via the remote control They are not always additionally described in the following chapters and are therefore listed i...

Страница 20: ...isk automatic time up date via the Internet The other options are Automatic time update via DAB sta tion or FM station or manual time setting No update Note The time will only be updated au tomaticall...

Страница 21: ...router select and confirm DHCP disa ble and then in the following menus make the appropriate settings for IP address subnet mask gateway address and DNS If the unit is connected to the network via cab...

Страница 22: ...he corresponding menu items of the menu System settings This menu also provides ad ditional setting and display options An overview of the options provided by the menu System settings can be found in...

Страница 23: ...the setup wizard chapter 3 3 item 4 Time Date To set date and time Set Time Date To set the time date manually as by means of the setup wizard chapter 3 3 item 3 fig 10 Auto update To update the time...

Страница 24: ...ode desired In each operating mode and in the standby mode network connection is indicated by means of a symbol wireless LAN symbol or LAN sym bol depending on the type of con nection or connected or...

Страница 25: ...e location number of the station desired for the station 6 10 first press SHIFT and then one of the buttons 1 5 6 To go to a different station To re turn to the previous selection level in the menu tu...

Страница 26: ...ation saved is the same as in the operating mode Internet radio steps 4 and 5 in chapter 4 1 6 Toremoveinactivestationsfromthe station list Stations that currently do not broadcast signals can be remo...

Страница 27: ...ck and then press the knob to confirm 2 Once the USB storage medium has been called up the contents of the medium are shown USB playback Blues Country POP Beat Machine Come DoMan Go Turn the knob CONT...

Страница 28: ...d by means of a bar graph and the total playing time are shown Four replay modes are available or not shown All titles of the current folder are replayed one after the other Shuffle All titles of the...

Страница 29: ...n at the alarm time The unit can be switched to standby with the button SLEEP so that the alarm will sound again after 5 minutes To change the alarm in terval repeatedly press the button SLEEP 5 10 15...

Страница 30: ...group tap the speaker icon to the left of the slider To make set tings separately for individual group members click the multi speaker icon to the right of the slider a new page will be opened where y...

Страница 31: ...Multi room Auxiliary input 11 45 Mode Mode related menus System settings Main menu Submenus ENTER BACK another submenu Equaliser Normal Flat Jazz Rock Movie Classic Pop News My EQ My EQ profile setup...

Страница 32: ...MONACOR INTERNATIONAL GmbH Co KG Zum Falsch 36 28307 Bremen Germany...

Отзывы: