


25
Italiano
call up the station. When a wrong
selection has been made, the but
-
ton BACK can be used any time to
return to the previous step.
To search for a specific station,
select the line
Search stations
and
confirm your selection. The menu
for entering the station name will
appear:
Stations
CANCEL
BKSP
OK
0
123456789 ABCD
EFGHIJKLMNOPQRS
TUVWXYZ
Turn the knob CONTROL SELECT to
select the characters and the
three fields; press the knob to
confirm (with the remote con
-
trol: selection via the arrow but
-
tons, confirmation via the button
ENTER).
BKSP
= to delete the last charac
-
ter
OK
= to confirm the name
CANCEL
= to return to the previous
menu
Note:
To select the fields
BKSP
,
OK
and
CANCEL
, turn the knob backwards be
-
yond the digit
0
or forwards beyond
the character
Z
. With the remote con
-
trol: at the beginning of a line, press
or, at the end of a line, press
; then
use
or
to select the field desired.
– via
Local [country
name]
:
the stations listed are assigned to
the location where your unit has
been connected to the Internet.
The stations are arranged in var
-
ious categories. Select the station
desired from a category and then
call it up.
Indication during replay:
The dis
-
play will show the station name
and information concerning the pro
-
gramme and / or current music title:
Internet radio
21:05
Radio ABC
Artist
Title
Press the button INFO repeatedly to
show additional information.
3) To select stations most recently
listened to:
Call up the menu item
Last listened
and select and call up a
station from the list of the stations
most recently listened to.
4)
To save a station:
Ten stations
can be saved to the ten storage lo
-
cations: When the station desired
has been called up, keep the but
-
ton PRESET pressed until the menu
“Save to Preset” appears:
Save to Preset
1.
[Not set]
2. [Not set]
3. [Not set]
4. [Not set]
5. [Not set]
Turn the knob CONTROL SELECT
to select the storage location and
then press the knob to confirm. With
the remote control: Use the button
or
to select the storage location
and then confirm with the button
ENTER .
Once the station has been saved,
the menu will be exited. In the lower
line, the display will show
P
and the
storage location number for the sta
-
tion saved.
5)
To call up a station saved:
Briefly
press the button PRESET. The menu
“Recall from Preset” will appear,
listing the stations saved. Turn the
knob CONTROL SELECT to select
the station desired and then press
the knob to call it up. With the re
-
mote control: Use the button
or
to select the station and then use
ENTER to call it up.
It is also possible to call up the
station directly by means of the
remote control: Press the number
button that corresponds to the stor
-
age location number of the station
desired; for the station 6 – 10, first
press SHIFT and then one of the
buttons 1 – 5.
6)
To go to a different station:
To re-
turn to the previous selection level in
the menu, turn the knob CONTROL
SELECT or press the button BACK.
(With the remote control: Press the
button
,
or
.) From this level,
it is possible to select and call up a
different station or, by means of the
button BACK or
, to go back further
in the menu, e. g. to select a station
from a different category.
To return directly to the highest
menu level (fig. 28) and to make a
new selection from there, press the
button MENU.
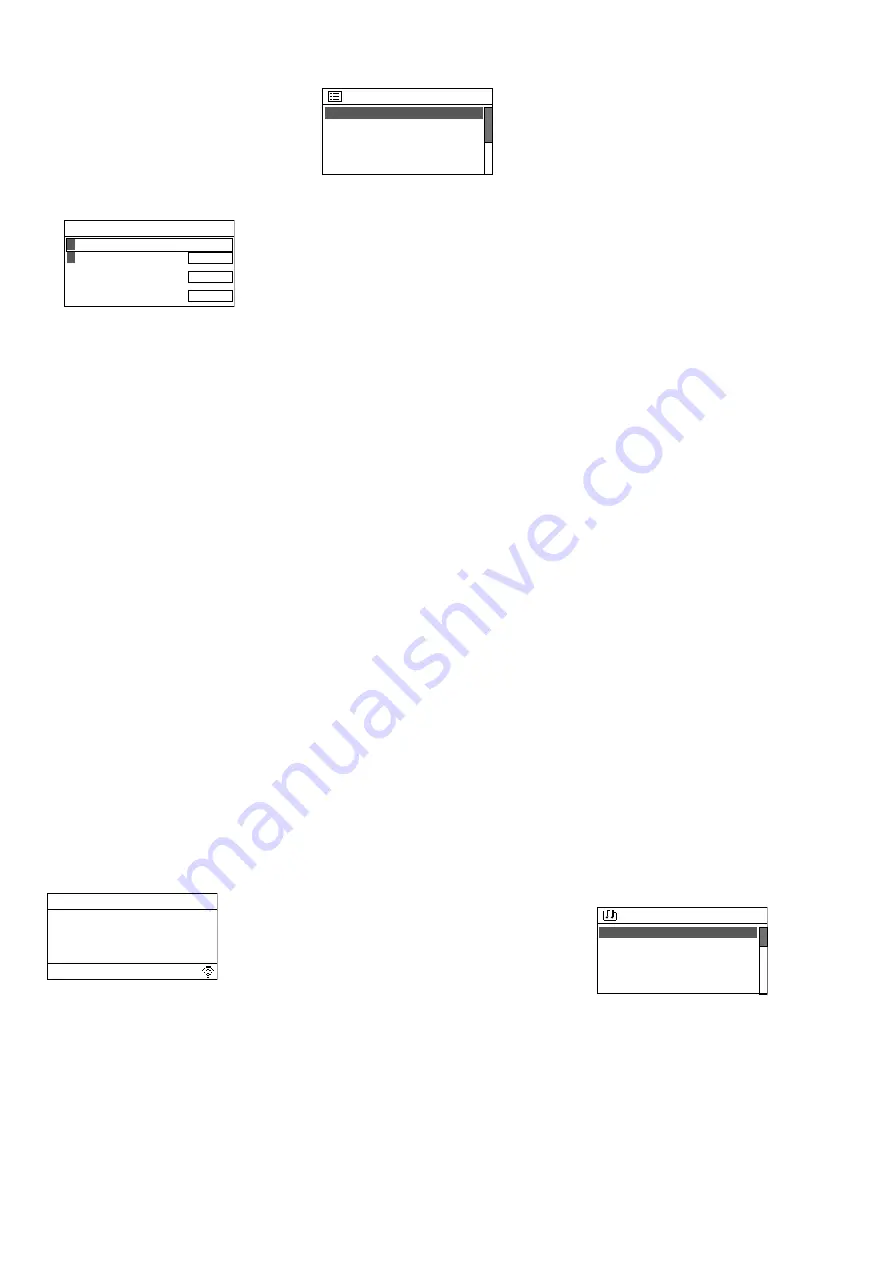
7)
To select a podcast:
Call up
Station
list
: The menu shown in fig. 29 will
appear. Select the line
Podcasts
and
confirm your selection. Then it is pos
-
sible, as it is in the menu
Stations
, to
search for the podcast desired via its
location, genre or name. The proce
-
dures for saving a podcast, calling up
a saved podcast and going to a dif
-
ferent podcast are the same as for
stations.
4.1.1
Free-of-charge registration
in the Internet radio portal
The unit will access the database
of the Internet radio portal “Frontier
Nuvola Smart Radio”. Once a user ac
-
count has been created on this portal,
stations and podcasts can be defined
as favourites on the computer and
managed there. The favourites de
-
fined can be called up at the unit via
the menu item
My Favourites
(fig. 29).
Via this account, it is also possi
-
ble to add stations / podcasts that
are not included in the database: as
“Personal Stream” via their name and
their Internet address (URL). The sta
-
tions / podcasts added in this way can
be called up at the unit via the menu
item
My added Stations
(fig. 29).
1) At the computer, call up the website
of the portal:
https: //smartradio.frontier-nuvola.
net /
(or: http://nuvola.link /sr)
or
www.wifiradio-frontier.com
2) On the start page of the portal, click
the button “Manage Favourites”:
The login window will appear. To
create a new account, click “Sign
up”. A new window will appear;
take the appropriate steps for initial
sign-up to the system.
3) Once the account has been created
and confirmed, register the unit on
the portal: In the corresponding
login window, enter the access
code of the unit and a name for the
unit (the name can be defined as
desired).
The code will be shown on the menu
page
Help
(in the operating mode “In
-
ternet radio”, use the button MENU
to call up the menu
Station list
Help
)
Help
For
support
or
to
regis
http://nuvola.link/sr
Access Code: XXXXXXX
Valid for 10 minutes
Note:
As long as the unit has not been
registered, the code will also be shown
via the menu items
My Favourites
und
My added Stations
.
The code will become invalid if reg
-
istration with this code is not com
-
pleted within 10 minutes. In this
case, call up the menu
Help
again to
generate a new code.
Via the same account, it is possible
to register additional units that use
Содержание WAP-202RS
Страница 2: ......
Страница 32: ...MONACOR INTERNATIONAL GmbH Co KG Zum Falsch 36 28307 Bremen Germany...


