


20
Italiano
Button Function
* function available depending on the Blue
-
tooth source used
Fig. 3
Functions of the remote control
3.2.2
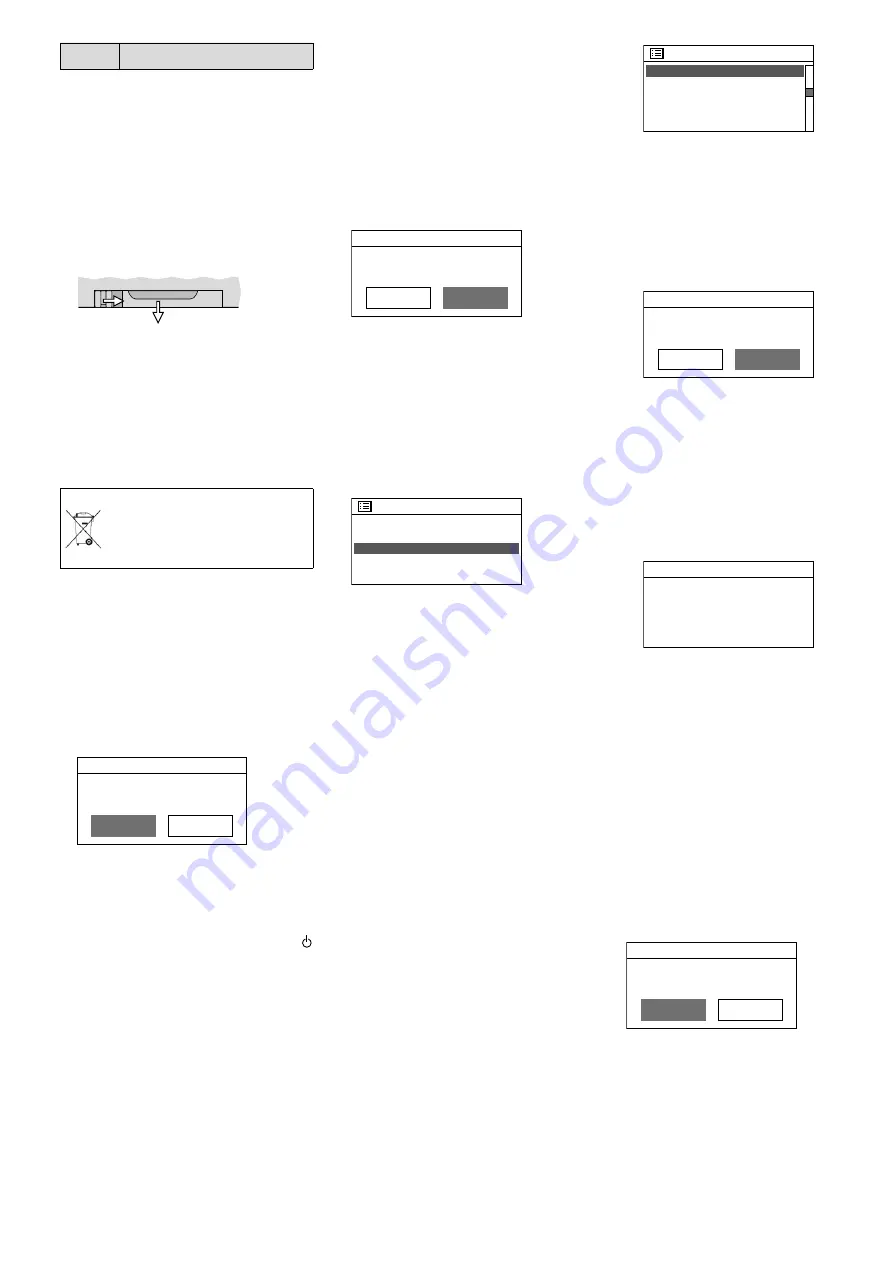
Inserting / Replacing the
battery
1) Push the latch of the battery sup
-
port to the right (first arrow in fig.
4) and pull out the support (second
arrow).
1.
2.
Fig. 4
Battery support
2) When replacing the battery, remove
the discharged battery.
3) Insert the new battery in the sup
-
port, positive pole facing upwards.
Push the support back into the re
-
mote control.
Never put batteries in the
household waste. Always dis
-
pose of the batteries in accord
-
ance with local regulations.
3.3
Initial switch-on and making
settings with the setup
wizard
1) Use the switch POWER to switch
on the unit. The message
WELCOME
and a bar graph will be shown on
the display. Then the setup wizard
will appear:
Setup wizard
Start now?
NO
YES
Notes:
1. The unit is in the stand-by mode if only
the date and the time are shown on
the display after the switch POWER
was used. In this case, switch on the
unit with the button STANDBY (or
on the remote control).
2 . If
Network settings
Please wait
Connectin
g.
appears on the display, press the but
-
ton MENU, turn the knob CONTROL
SELECT to select the line
System set-
tings
and press the knob to call up the
menu “System settings”. In the menu
“System settings”, turn the knob to
select the line
Setup wizard
and press
the knob to call up the setup wizard.
Then continue with step 2.
3. Instead of English, a different menu
language can be set (see chapter
3.4.1).
4. The wizard can be called up any time
via the menu “System settings”.
2)
YES
is selected. Press the knob CON
-
TROL SELECT to confirm; the wizard
will start and the menu “Date / Time”
will appear:
Date/Time
12/24 hour format
12
24*
The 24-hour format is selected for
the time (indicated by the asterisk
*
).
If desired, turn the knob CONTROL
SELECT to select the 12-hour for
-
mat. Press the knob to confirm the
format selected.
3) The menu for the automatic time
update will appear:
Auto update
*
Update from DAB
Update from FM
Update
from
Network
No update
The current setting is indicated by
the asterisk
*
(automatic time up
-
date via the Internet).
The other options are:
Automatic time update via DAB sta
-
tion or FM station or manual time
setting (
No update
).
Note:
The time will only be updated au
-
tomatically when a corresponding sta
-
tion is received. Therefore select the set
-
ting that corresponds to the operating
mode most frequently used: If you listen
to the digital radio for most of the time,
for example, select
Update from DAB
, or if
you mainly listen to the Internet radio,
leave the setting
Update from Network
un
-
changed.
Confirm the current setting or se
-
lect and confirm a different setting.
Depending on the setting selected,
one of the following menus will be
shown:
Update from DAB
or
FM
No additional time settings are
required. Continue with step 4.
The menu shown there (fig. 11)
will appear.
Update from Network
The menu “Set timezone” will
appear:
Set timezone
*
UTC +00:00: Dublin, Lon
UTC
+00:30:
UTC
+01:00:
Madrid,
A...
UTC
+01:30:
UTC
+02:00:
Athen,
Kai
...
For Great Britain, the correct set
-
ting has been selected:
UTC +00:00: Dublin, London
Confirm this setting or, for a dif
-
ferent country, first select the
appropriate time zone and then
confirm your selection. The menu
“Daylight savings” will appear:
Daylight savings
Daylight savings
ON
OFF*
During the standard time, confirm
the setting
OFF
; for the daylight
saving time, select and confirm
the setting
ON
. Continue with step
4. The menu shown there (fig. 11)
will appear.
No update
The menu for the manual time
setting will appear:
Set Time/Date
01-01-2007
00:00
The digits for the day will flash.
Turn the knob CONTROL SELECT
to set the day and then press the
knob to confirm. The digits for the
month will start flashing. Proceed
in the same way to set the month,
the year, the hours and the min
-
utes (and
AM
or
PM
if the 12-hour
format has been selected). To re
-
turn to the previous setting, press
the button BACK.
4) When the final time setting has
been confirmed, the menu for per
-
manent connection to the network
will appear:
Network settings
Keep network connected?
NO
YES*
If
YES
(factory setting) is selected,
the connection to the network will
always be maintained (required
when the unit is to be controlled
via the network, e. g. by means of
the app UNDOK™). If
NO
is selected,
the connection to the network will
be disconnected when it is not re
-
Содержание WAP-202RS
Страница 2: ......
Страница 32: ...MONACOR INTERNATIONAL GmbH Co KG Zum Falsch 36 28307 Bremen Germany...


