52
••••••••••••••••••••••••••••••••••••••••••••••••••••••••••••••••••••••••••••••••••••••••••••••••••••••••••••••••••••••••••••••••••••••••••••••••••••••••••
<INITIAL SET UP/INFORMATION> (continued)
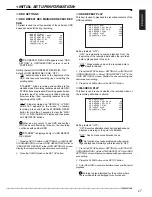
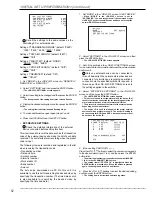
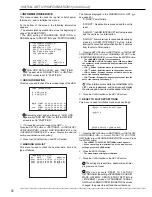
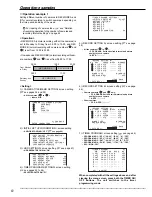
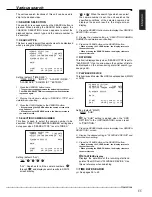
<RS-232C SETTINGS>
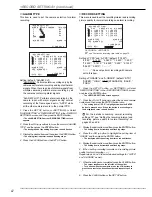
>>TRANSMISSION MODE 9600
DATA BIT LENGTH 8BIT
PARITY BIT NONE
STOP BIT LENGTH 1BIT
DELIMITER CR
Set all the settings to the same values as the
controlling PC or external device.
Setting of “TRANSMISSION MODE” (default: “9600”)
“1200,” “2400,” “4800,” “9600,” “19200”
Setting of “DATA BIT LENGTH” (default: “8BIT”)
“8BIT,” “7BIT”
Setting of “PARITY BIT” (default: “NONE”)
“NONE,” “ODD,” “EVEN”
Setting of “STOP BIT LENGTH” (default: “1BIT”)
“1BIT,” “2BIT”
Setting of “DELIMITER” (default: “CR”)
“CR,” “CR•LF”
1. Set “MODE” in the <RS-232C> screen to “REMOTE A,”
“REMOTE B,” or “REMOTE C.”
2. Select “SETTINGS” and then press the ENTER button.
• The <RS-232C SETTINGS> screen appears.
3. Select the setting to be changed and then press the ENTER
button.
• The background of the setting item turns red and flashes.
4. Display the desired setting item and then press the ENTER
button.
• The setting item is determined and flashing stops.
5. To make additional changes, repeat steps 3 and 4.
6. Press the CLEAR button or the SET UP button.
• EXT.DEVICE SETTINGS
Check the detailed information of the external
device connected before setting this item.
This item is used to record the data such as the transaction
code of the external device and make the list of such data
received. The unit starts alarm recording when the preset
code is input.
The following items are recorded and registered in the list
when receiving the transaction code:
• Transaction number
• Date and time
• Account number
• Alarm list number
• Work station ID
• Bank number
• Amount
The list can be downloaded via PC. On this unit, it is
available to use this list for searching the desired video by
specifying the transaction number. (The time date search
is also available for searching the desired video by
specifying the time and date.)
1. Set “MODE” in the <RS-232C> screen to “EXT.DEVICE.”
• When “MODE” in the <RS-232C> screen is set to
“EXT.DEVICE,” the unit recognizes all the commands input
via RS-232C as the transaction code and does not accept the
normal RS-232C commands.
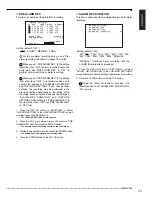
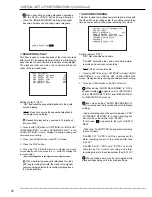
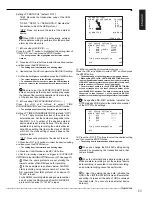
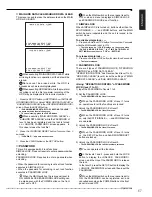
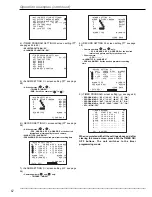
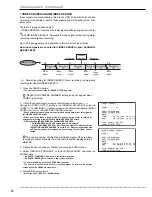
<RS-232C>
>>MODE EXT.DEVICE
SETTINGS
EXT.DEVICE SETTINGS
2. Select “SETTINGS” in the <RS-232C> screen and then
press the ENTER button.
• The <RS-232C SETTINGS> screen appears.
3. Set all the settings in the <RS-232C SETTINGS> screen
for the correct data communiction between the external device
and this unit.
Only one external device can be connected to
this unit basically. When plural external devices are
connected for simultaneus recording operations,
connection via the specified switcher is required. In
this case, set the <RS-232C SETTINGS> screen to
the settings applied to the switcher.
4. Select “EXT.DEVICE SETTINGS” in the <RS-232C>
screen and then press the ENTER button.
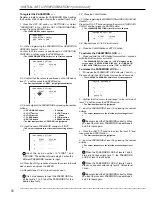
• The <EXT.DEVICE SETTINGS> screen appears.
• This screen is used to set the protocol and the device ID of
the external device connected for the recording operation of
plural external devices of which format are different.
• The protocol is used to set the format of the external device
depending on the manufacturer.
• The device ID is used to distinguish the plural external
devices of which protocol are same. The device ID setting is
not necessary for NCR-0 and NCR-1 because these protocol
do not have the device ID.
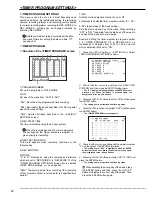
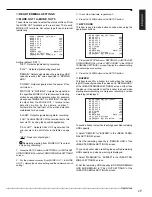
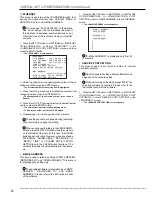
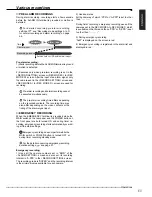
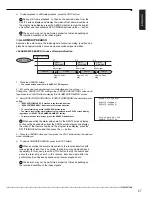
<EXT.DEVICE SETTINGS>
ALARM PROTOCOL DEVICE ID
>>1 OFF
*****
2 OFF
3 OFF
4 OFF
TIME SYNCHRONIZATION OFF
DTP OFF
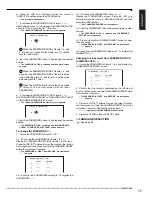
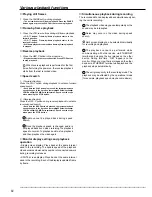
5. (When setting PROTOCOL • • • )
Press the JOG , buttons to select the number corresponds
to the desired alarm input (1 to 4) and then press the ENTER
button twice.
• The alarm input number corresponds to the number (ALARM
1 to 4) in the <ALARM SETTING> screen.
• The setting item of “PROTOCOL” is highlighted when the
ENTER button is pressed once. When the button is pressed
again, the background turns red and flashes.
6. Press the JOG , buttons to select the desired setting
and then press the ENTER button.
• The setting item is determined and flashing stops.

