– 35 –
6-3 Setting Schedules
Weekly schedule for each group can be set. When a license is registered, it is possible to set different weekly (5 types)/annual/today's
schedules for each group.
* When multiple AG-150A controllers are connected by connecting an Expansion controller to the system, schedule settings for the
groups should be made only on one of the AG-150A controllers.
6-3-1
Setting the schedule without a registered license
If a license has not been acquired, only the weekly schedule functions are available.
• Setting the Weekly Schedule
Touch the menu item [Schedule Settings] and touch [Weekly] in the sub menu to display the Weekly Schedule setting screen. To set a
weekly schedule, firstly you must select what will be the target of this schedule and then set the schedule details from Sunday right
through to Saturday.
Note: When the contents of an operation are executed as part of a schedule these contents will continue to be in effect until they are
changed by a schedule or browser etc. Therefore, if you are setting a schedule that is only for a particular day, be sure to set your
schedule in a way that will not impact on the next day’s operation.
For example, if you wish to prohibit operations being performed from the remote controller after 17:00, set a Prohibit operation for
17:00 and set an Enable operation for 23:59.
Note: The weekly schedules of the groups whose schedule settings are Not Available from the control screen will not be executed.
(Refer to section 6-2.)
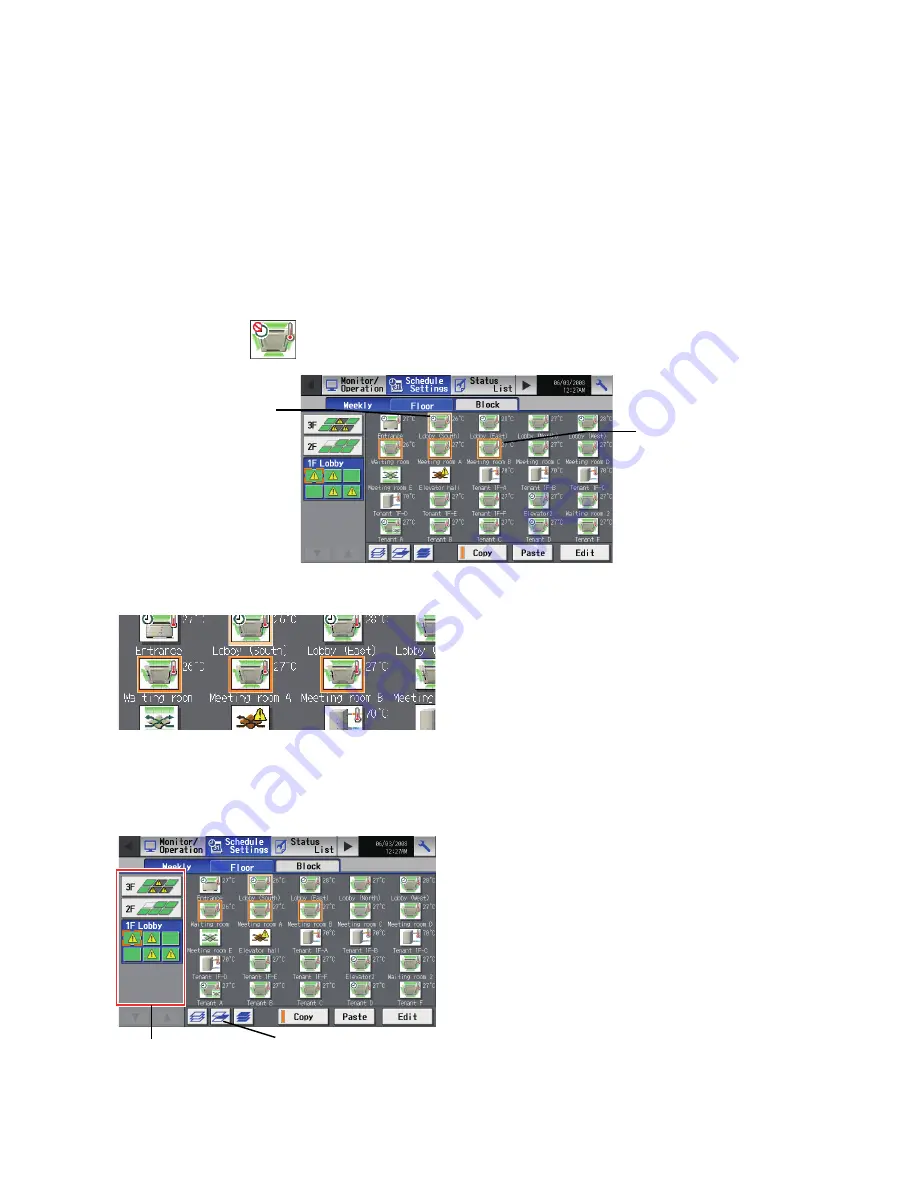
(1) Select the type of schedule settings to make.
(1-1) Group
(1-2) Floor
Copy destination frame
A pale orange frame
appears around the copy
destination unit.
Item selection frame
An orange frame appears
around the selected unit(s).
To make the settings for a group, select the group by touching the
corresponding icon on the weekly schedule setting screen (floor
layout or block display). Multiple groups can be selected. An orange
frame appears on the group that has been selected. Selection can be
cancelled by touching the icon again. Touch the Cancel button to
deselect all.
After making the selection, touch the [Edit] button at the right bottom
corner of the screen to bring up the weekly schedule screen.
* Each group is represented with an icon and a group name.
Floor selection button
Select-all-units-on-the floor button
To make the settings for all groups on a given floor, select the floor on
the floor layout screen under the weekly schedule setting screen
menu, and touch the Select-all-units-on-the floor button. An orange
frame will appear around the icons of all groups on the selected floor,
and also around the floor selection button. Only a single floor can be
selected at a time.
After making the selection, touch the [Edit] button at the right bottom
corner of the screen to bring up the weekly schedule screen.
WT05369X15.book Page 35 Wednesday, November 7, 2012 10:33 AM


