2-19
2
2
2
2
Test Printing
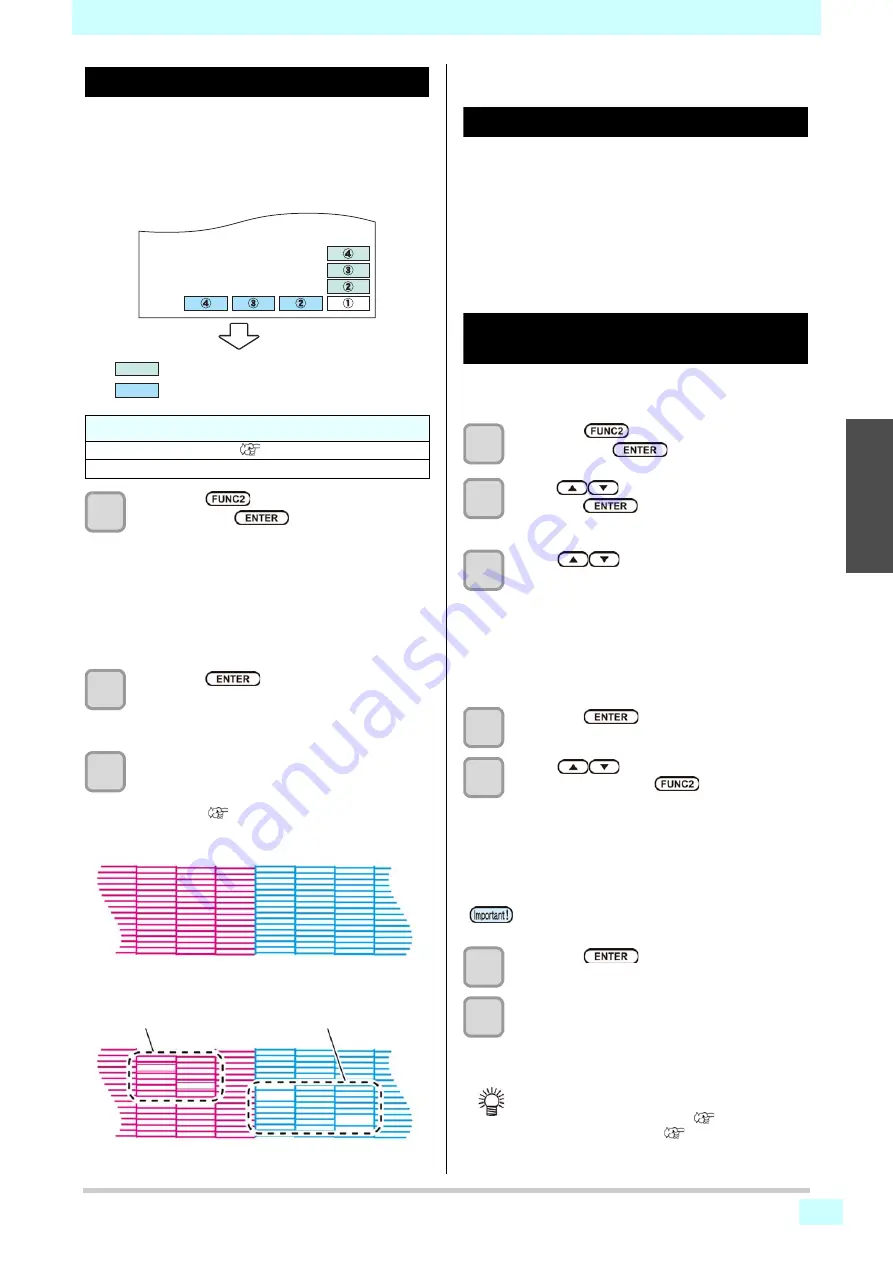
Print a test pattern to check that there are no discharging
defects such as nozzle missing (slight touching of ink or
nozzle missing).
In addition, you can select the orientation of the test
pattern to print from two types in order to perform test
printing repeatedly. Select one depending on your use.
1
Press the
(TEST PRINT/CLEANING)
,
and press the
key in LOCAL.
• TEST PRINT MENU appears.
• Press [
][
] to change the test pattern
orientation.The orientation selected here will be
reflected on when you will print next time.
• When performing test printing after having
changed the orientation from "SCAN DIR." to
"FEED DIR.", the line is fed to the position of the
first test printing.
2
Press the
key.
• Test printing starts.
• When the printing has been completed, the
screen returns to LOCAL.
3
Check the printed test pattern.
• When the result is normal, end the operation.
• When the result is abnormal, perform head
cleaning. (
Head Cleaning
About head cleaning
Check the printed test pattern result and perform cleaning
depending on the status.
Select one from the three types below:
Soft
: When lines are bent, when any line is missing
Normal
: When any line is missing, when colors are
mixed
Hard
: When poor image quality cannot be improved
even by Normal or Soft cleaning
Perform head cleaning depending on
the test printing result
There are three types of head cleaning. Use one by
checking the test pattern.
1
Press the
(TEST PRINT/CLEANING)
,
and press the
key in LOCAL.
2
Press
to select “CLEANING”, and
press the
key.
• CLEANING MENU appears.
3
Press
to select the cleaning type.
•
Soft
: When lines are bent, when any line
is missing
•
Normal
: When any line is missing, when
colors are mixed
•
Hard
: When poor image quality cannot be
improved even by Normal or Soft
cleaning
4
Press the
key.
5
Press
to select the cleaning
head, and press the
(
).
• After selecting the head, press the [FUNC2] key
and put a check in the check box.
The head whose box has been checked will be
cleaned.
• To have all head cleaned, put a check in all check
boxes.
6
Press the
key.
7
Perform test printing again, and check the
result.
• Repeat the cleaning and the test printing until the
drawing result becomes in normal.
Check before test printing.
• If a media has been set
• If the origin position has been set
Media-feeding direction
: When the set value is "FEED DIR."
: When the set value is "SCAN DIR."
Abnormal pattern
Clogged with ink
Normal pattern
Nozzles are dirty
In firmware version 1.5 or later, the software
Cleaning is performed for all heads.
When the image quality is not improved after the
head cleaning.
• Clean the wiper and ink cap. (
• Wash the head nozzle. (
Содержание SWJ-320EA
Страница 1: ...MIMAKI ENGINEERING CO LTD https mimaki com D203278 13 Original instructions ...
Страница 72: ...3 24 ...
Страница 116: ...KM FW 1 5 MIMAKI ENGINEERING CO LTD 2018 ...


