Therefore, it is the responsibility of the HMI programmer to ensure the HMI settings are correct
for the PLC range to be used.
8. The
Frame Outline
attribute box allows you to enclose the data in a box. Select from- None, Single,
Double, Thick, Dot, or Dotted Line.
9. The
Font Size
can be 5x8 (width/height), 8x8, 8x12, or 8x16 pixels for each character.
10. Check
Leading Zeroes
to display the number with ‘padded’ zeroes to the left of the number in cases
where the number displayed is smaller than the number of digits allocated.
11. Click
OK
. The Numeric/ASCII Display Object is displayed on the main screen of BlueLeaf as a
numeric value of 0. Multiple 0’s will be displayed if the Leading Zeroes option is checked. If the
Type selected is Signed, than a $ symbol is displayed to indicate the ‘+/-‘ sign. If necessary, use the
mouse to drag the object to the location on the window that you want it. You can also highlight the
object to display the small white perimeter boxes and adjust the size. Move the mouse cursor over the
appropriate white box until the mouse cursor changes to a double-arrow symbol, then click and drag to
change the size.
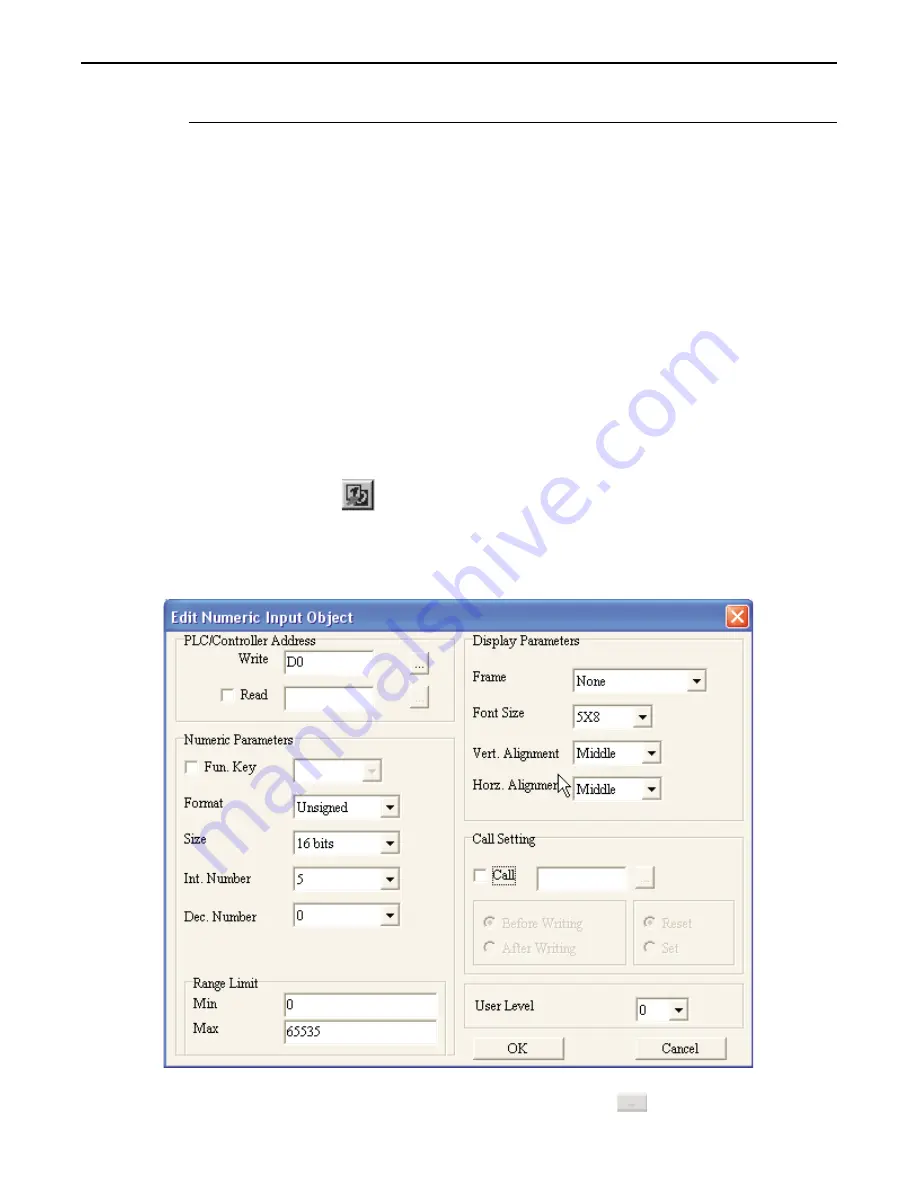
The Numeric Input Object
The Numeric Input Object is used to read and write numeric values to a PLC register. The object continuously reads the PLC
register and displays the corresponding value in the specified format . The PLC register can be a 16-bit or 32-bit word. By
assigning a function key that displays an entry screen, the OIT operator can enter a new value using the arrow keys and/or the
function keys as a numeric entry keypad. The minimum/maximum values can be set and a password can be assigned to
restrict access. You can also use the Call Setting feature to set or clear a PLC coil before or after a new value is written to the
PLC register.
4
To create a Numeric Input Object
1. From the
OBJECTS
menu, click
Numeric Input,
or click the
Numeric Input
icon in the Objects
toolbar. The mouse cursor changes to a crosshair. Select the location on the screen to place the
Numeric Input and left click the mouse to place a Numeric Input object on the screen. Move the
mouse cursor over the Numeric Input object and double-click the Numeric Input object. The Edit
Numeric Input Address dialog box appears.
2. In the
PLC/Controller Address
frame, enter the
PLC
or
controller address
you wish to access in the
1010-0300, Rev 02
Entering & Displaying Numeric/ASCII Characters
97
Содержание BLU300 Series
Страница 1: ......
Страница 64: ...1010 0300 Rev 02 62 Blue Series Installation Operation Manual...
Страница 113: ...1010 0300 Rev 02 112 Blue Series Installation Operation Manual...
Страница 138: ...Appendix B Dimensional Outlines Panel Cutout 1010 0300 Rev 02 Dimensional Outlines Panel Cutout 141...


