122
BA023001-en
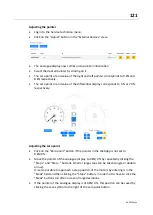
Adjusting the end value
•
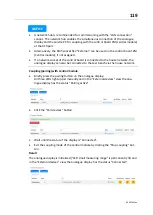
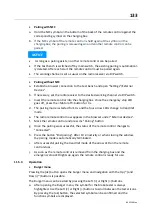
Click on the "End value" button if the pointer in the WebApp is not set to
8 kN/70 %.
•
Move the pointer of the analogue display to 8 kN/70 % by repeatedly clicking the
"Step +" and "Step
–
" buttons. Small or large steps can be taken (single or double
arrow).
It is also possible to approach a step position of the motors by entering it in the
"Steps" field and then clicking the "Steps" button, in order not to have to click the
"Steps" buttons too often in case of large deviations.
•
If the pointer of the analogue display is at 8 kN/70 %, this position can be saved by
clicking the save symbol to the right of the end value button.
Checking zero point and end value
The adjustment can be checked by moving to the zero point and end value by clicking
the "Zero point" and "End value" buttons.
11.3.7
Function test
The function of the pointers and LEDs of the analogue display can be checked with a
function test. The function test can be started either via the "External devices" view or
via the adjustment menu of the analogue display.
Sequence of a function test
•
All LEDs go off
•
Pointer initialisation (pointers move to mechanical zero point and then to 0 kN /
0 %)
•
LED small measuring range goes on
•
Pointers move to 4 kN / 35 %
•
Pointers move to 8 kN / 70 %
•
Pointers move to 0 kN / 0 %
•
"LED ready for braking" flashes three times
Содержание CONNECT Series
Страница 19: ...19 BA023001 en 2 3 2 Set up diagram Set up diagram I ...
Страница 20: ...20 BA023001 en Set up diagram II ...
Страница 22: ...22 BA023001 en 2 4 1 Wiring diagram ...
Страница 23: ...23 BA023001 en 2 4 2 Control cabinet structure Basic variant ...
Страница 24: ...24 BA023001 en 2 4 3 Control cabinet structure Full equipment ...
Страница 25: ...25 BA023001 en ...
Страница 26: ...26 BA023001 en 2 4 4 Connection and termination of the central module ZM Connection of the central module ...
Страница 53: ...53 BA023001 en ...
Страница 138: ...138 BA023001 en 13 Annex 13 1 Naming convention ...


