background image

A

18

ENG 

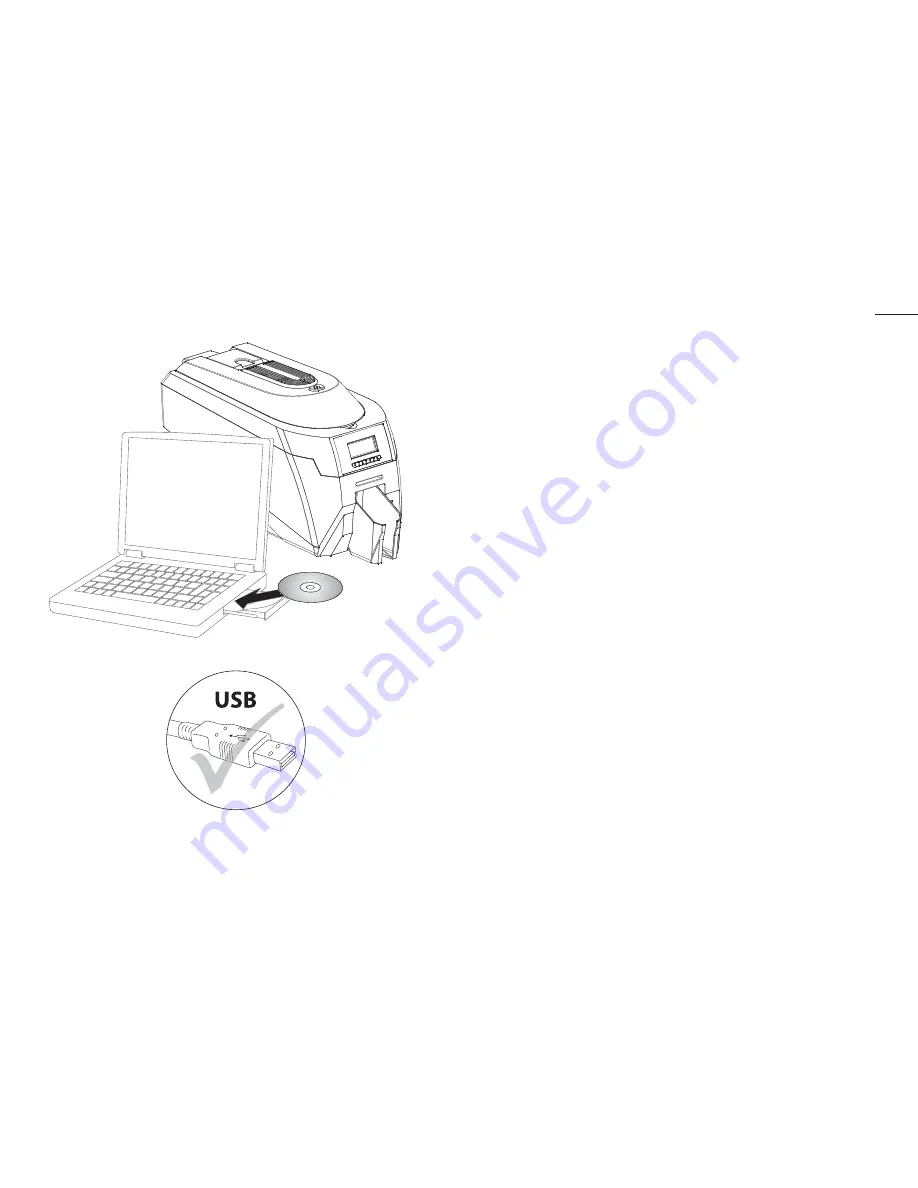
Load CD into PC

• Load the driver CD ROM into the PC. 
• If the CD does not run automatically, click the start button, then click on

“run”. Type “D:\autorun”, where D is the drive letter for your CD drive, then
press the return key. 

• Now follow the on screen instructions to install the printer’s driver. 

• On completion of installation, connect your printer to the PC with the

USB cable. You are now ready to print secure plastic cards.

FRA 

Insérez le CD-ROM dans le lecteur du PC

• Insérez le CD-ROM dans le lecteur du PC. 
• Si le CD ne s’exécute pas automatiquement, cliquez sur « Démarrer », puis

sur « Exécuter... ». Tapez « d:\autorun », où D est la lettre de votre lecteur de
CD, puis cliquez sur le bouton OK. 

• Suivez ensuite les instructions qui s’affichent pour installer le pilote de l’

printer. 

• Lorsque l’installation est terminée, connectez l’imprimante au PC via le

câble USB. Vous êtes maintenant prêt à imprimer des cartes plastiques
sécurisées.

ESP 

Insertar el CD en el ordenador

• Inserte el CD ROM de controladores en el ordenador. 
• Si el CD no se ejecuta automáticamente, haga clic en el botón de inicio y, a

continuación, en «Ejecutar». Escriba «D:\autorun», donde D es la letra de su
unidad de CD; después, pulse la tecla Intro.

• A continuación, siga las instrucciones que aparecen en pantalla para insta-

lar el controlador de printer. 

• Después de terminar la instalación, conecte la impresora al ordenador

mediante el cable USB. Ya está listo para imprimir tarjetas plásticas se-
guras.

POR 

Inserir o CD no PC

• Insira o CD-ROM com os drivers no PC. 
• Se o CD não executar automaticamente, clique no botão Iniciar e, em seguida,

clique em “Executar”. Digite “D:\autorun”, sendo que D corresponde à letra da
unidade da sua unidade de CD e, em seguida, prima a tecla Retroceder.

• Agora, siga as instruções do ecrã para instalar o driver da printer.

• Depois de concluída a instalação, ligue a impressora ao PC com o cabo

USB. Está agora pronto para imprimir cartões de plástico seguros.

ITA 

Inserire il CD nel PC

• Caricare il CD ROM contenente i driver sul PC. 
• Se il CD non viene eseguito automaticamente, fare clic sul tasto start, quindi

su "esegui". Digitare “D:\autorun”, in cui la lettera D identifica l'unità CD, quindi
premere il tasto Invio.

• A questo punto, seguire le istruzioni a schermo per installare i driver della

stampante. 

• Una volta completata l'installazione, collegare la stampante al PC per

mezzo del cavo USB. Ora è possibile iniziare a stampare carte plastiche
di riconoscimento sicure.

DEU 

Legen Sie die CD in das CD-Laufwerk des PC ein.

• Legen Sie die Treiber-CD-ROM in das CD-Laufwerk des PC ein.
• Wenn die CD nicht automatisch läuft, klicken Sie auf die Start-Schaltfläche

und dann auf “Start”. Geben Sie ein “D:\Autostart”, wobei D für Ihr CD-
Laufwerk steht, und drücken Sie dann die Eingabetaste. 

• Befolgen Sie nun die Anweisungen auf dem Bilschirm, um den Treiber für

den zu installieren. 

• Benutzen Sie nach abgeschlossener Installation das USB-Kabel, um Ihren

Drucker an den PC anzuschließen. Sie können jetzt sichere Plastikkarten aus-
drucken.

CHI

将 CD 光盘装入电脑

• 

将驱动程序光盘装入电脑。

• 

如果光盘未自动运行,点击开始按钮,然后点击

“run”

(运行)。输入

“D:\autorun”

表示光盘驱动器, 然后按回车键。

• 

按照屏幕指示装 驱动程序。

• 

安装完成后使用

USB 

接线连接 打印机与

电脑。现在可以开始打印卡片了。

PyC

Установка компакт-диска в ПК 

• Установите компакт-диск с драйвером в ПК. 
• Если компакт-диск не запустится автоматически, нажмите

кнопку «Пуск», затем выберите «Выполнить». Введите
«D:\autorun», где D – обозначение накопителя, в который
установлен компакт-диск, и затем нажмите кнопку «Enter». 

• Теперь для установки драйвера принтера следуйте

инструкциям, выводимым на экран. 

• 

По завершении установки подключите принтер к ПК с

помощью кабеля USB. Теперь Вы готовы к печати

пластиковых карт с защитой.

POL 

Instalowanie sterowników

• Włóż płytę CD ze sterownikami do komputera. 
• Jeśli płyta CD nie zostanie uruchomiona automatycznie, naciśnij przycisk startowy,

a następnie kliknij polecenie „Uruchom”. Wpisz „D:\autorun”, gdzie D oznacza literę
napędu CD, i naciśnij klawisz Enter.

• Następnie postępuj według ekranowych instrukcji instalacji sterownika

printer. 

• Po zakończeniu instalacji, podłącz drukarkę do komputera za pomocą

kabla USB. Teraz można już rozpocząć drukowanie plastikowych kart
identyfikacyjnych z unikatowymi zabezpieczeniami.

NLD 

Laad CD in PC

• Laad de CD ROM met het stuurprogramma op de PC. 
• Als de CD niet automatisch wordt uitgevoerd, klikt u op de startknop en klikt

vervolgens op “uitvoeren”. Typ “D:\autorun”, waarbij D de letter voor het sta-
tion van uw CD is en druk vervolgens op de knop Return. 

• Volg nu de instructies op het scherm om het stuurprogramma van te in-

stalleren. 

• Bij voltooiing van de installatie sluit u uw printer aan op de PC met de

USB-kabel. U bent nu klaar om veilige plastic kaarten af te drukken.

TR

CD’yi PC’ye yükleyiniz

• Sürücü CD ROM’unu PC’ye yükleyiniz. 
• CD otomatik olarak çalışmazsa, start butonuna sonra da “run” (çalıştır) tık-

layınız. CD sürücünüz için sürücünün adının D olduğu yere “D:\autorun”
yazınız, sonra da return (geri) tuşuna basınız. 

• Şimdi Rio pro sürücüsünü yüklemek için ekrandaki talimatlara uyunuz. 

• Kurulum tamamlanınca, printerinizi USB kablosu ile PC’ye bağlayınız.

Artık güvenli plastik kartlar basmaya hazırsınız.

KOR

CD 를 PC 에 업로드 설치

드라이버 CD ROM을 PC에 넣는다

CD 가 자동으로 작동하지 않으면 시작 버튼을 클릭, “실행”을

클릭한다. CD 드라이버가 있는 “D:/autorun”을 입력 후 “돌아가기”

버튼을 누른다

화면에 나타난 지시를 따라 드라이버 설치를 한다

설치 완료후 프린터를 PC에 USB 케이블을 이용하여 연결한다. 이로써

카드 인쇄 관련 준비를 완료했다 

CHT

安裝印卡機驅動程式

•  

將驅動程式的光碟放入電腦中

•  

如果光碟沒有自動執行,請按 [開始] 然後再按 [執行(R)...],輸入 D:\autorun
(D: 表示光碟機所在的磁碟機代號),接著再按 [Enter]

•  

按照螢幕的指示安裝印卡機驅動程式

•  

安裝完成後,插入印卡機與電腦的 USB線,此時系統會自動找到新的硬體,
並自動安裝完成,現在可以開始列印卡片了.

17

Содержание Rio Pro

Страница 1: ...ment No 1236 Issue 1 05 Getting started guide Guide de d marrage Gu a de primeros pasos Guia de introdu o Guida rapida per l utilizzo Inbetriebnahmeanleitung Podr czna instrukcja obs ugi Gids om te be...

Страница 2: ...ti informazioni di carattere legale 41 54 DEU Inhalte Abschnitt A Druckereinrichtung 1 18 Abschnitt B Pflege Ihres Druckers 19 24 Abschnitt C Verbrauchsartikel 25 36 Abschnitt D Custom HoloKote 37 38...

Страница 3: ...Kit di pulizia 2 T card 7 Guida rapida per l utilizzo DEU Entfernen der Verpackung Bitte stellen Sie sicher dass alle aufgelisteten Teile vorhanden sind bevor Sie mit der Installation beginnen 1 Prin...

Страница 4: ...av a el cable USB POR IMPORTANTE N o ligue ainda o cabo USB ITA IMPORTANTE Non collegare ancora il connettore USB DEU WICHTIG Schlie en Sie das USB Kabel noch nicht an CHI USB PyC USB POL WA NE Nie na...

Страница 5: ...o LCD 5 Tasti funzione 6 Alimentazione manuale Ingresso per tessera di pulizia 7 Impilatore capacit 75 carte plastiche 8 Cassetto di alimentazione capacit 100 carte plastiche 9 Porta USB 10 Ethernet 1...

Страница 6: ...ro dotato di Alimentazione di rete con messa a terra Temperatura ambiente compresa tra 10 e 30OC 50 86OF Protezione da agenti chimici e luce solare diretta Umidit relativa 20 70 DEU Anforderungen bez...

Страница 7: ...stampante pu funzionare anche senza impilatore CASSETTO DI ALIMENTAZIONE DI CARTE PLASTICHE Inserire il cassetto di alimentazione di carte plastiche sul retro della stampante e farlo scorrere fino a...

Страница 8: ...ato protettivo dal rullo di pulizia C Il rullo di pulizia blu e ha una superficie appiccicosa NB Per ogni successiva sostituzione del rullo di pulizia fare riferi mento alla pag 32 DEU Vorbereiten der...

Страница 9: ...Inserimento del nastro di stampa Estrarre il nastro dalla confezione Posizionare il rocchetto carico nelle apposite scanalature posteri ori e il rocchetto di raccolta nelle scanalature anteriori Chiu...

Страница 10: ...e adeguato alla regione geografica in cui ci si trova e collegarlo all alimentatore Collegare l alimentatore alla rete elettrica e quindi alla stampante per mezzo dell apposita spina la stampante si a...

Страница 11: ...tasto Invio A questo punto seguire le istruzioni a schermo per installare i driver della stampante Una volta completata l installazione collegare la stampante al PC per mezzo del cavo USB Ora possibil...

Страница 12: ...zzare i tempi di indisponibilit della macchina Raccomanda di pulire i rulli e la testina di stampa ogni volta che viene inser ito un nuovo rocchetto di nastro vedere le pagine 21 24 e 35 36 DEU Pflege...

Страница 13: ...no inserire l estremit pi stretta della tessera nella fes sura di alimentazione delle carte plastiche Il processo di pulizia viene eseguito auto maticamente una volta terminato la tessera viene espuls...

Страница 14: ...stampa Si consiglia di pulire la testina di stampa ogni volta che viene sostituito il nastro di stampa Utilizzare l apposita penna in dotazione con il kit di pulizia Aprire la stampante e servendosi d...

Страница 15: ...o 1000 immagini Il nastro monocromatico disponibile in diversi colori DEU Verbrauchsartikel Farbband Beschreibung 300YMCKO 5 Segment Farbband f r 300 Ausdrucke 250YMCKOK 6 Segment Farbband f r 250 Aus...

Страница 16: ...el Ribon 300 bask 250YMCKOK 6 panel Ribon 250 bask 600KO 2 panel siyah ribon 600 bask Monochrome siyah 1000 bask e itli renklerde monochrome ribon mevcuttur KOR 300YMCKO 5 300 250YMCKOK 6 250 600KO 2...

Страница 17: ...zione 3633 0053 Contiene 10 tessere di pulizia e 1 penna 3633 0054 Contiene 5 rulli di pulizia con 1 barra di metallo DEU Verbrauchsartikel Reinigungsset Beschreibung 3633 0053 Enth lt 10 Reinigungska...

Страница 18: ...HoloPatch Nota bene Introdurre le carte plastiche HoloPatch con il sigillo dorato rivolto verso l alto e posizionato a sinistra visto di fronte DEU Verwendung von HoloPatch Karten Gehen Sie auf Ihrem...

Страница 19: ...he queste siano posizionate con la banda a sinistra rivolta verso il basso guardandola dal lato anteriore della stampante Con la stampante possibile utilizzare carte plastiche a banda magnetica sia Hi...

Страница 20: ...re la stampante ed estrarre il nastro usato A Rimuovere il rullo di pulizia usato B Rimuovere la barra di metallo C Inserire la barra di metallo nel rullo di pulizia nuovo D Staccare con cura lo strat...

Страница 21: ...pante 6 Per evitare di utilizzare Custom HoloKote su ogni card possibile sia disattivare la fun zione nel driver sia rimuovere la card Custom HoloKote dalla stampante DEU Custom HoloKote Custom HoloKo...

Страница 22: ...ta plastica seguire le istruzioni riportate ai punti 1 5 come illustrato Per non in validare la garanzia conservare il rocchetto blu di aggiornamento usato DEU Erweiterung auf doppelseitigen Druck Wic...

Страница 23: ...head warranty Ultra warrants that under normal use and service thermal print heads will be free from defects in material and workmanship for a period of one year 2 years in EU and North America from t...

Страница 24: ...dans ce guide sont susceptibles d tre modifi es sans avertisse ment pr alable Ultra Electronics Limited d cline toute responsabilit pour toute erreur con tenue dans le pr sent document et pour tout do...

Страница 25: ...e Generiche sulle Emis sioni parte 1 BS EN 50 082 1 Compatibilit Elettromagnetica Norme Generiche sulle Emis sioni parte 1 BS EN 60 950 1992 Sicurezza delle apparecchiature di tecnologia dell informaz...

Страница 26: ...dern die von UltraCoverPlus nicht abgedeckt sind 1 Deckung Ultra Electronics Ltd garantiert dass der Magicard Drucker der mit diesem Garantieschein geliefert wird den Herstellerspezifikationen entspri...

Страница 27: ...cy i pr bek zadrukowanych oraz czystych kart identyfikacyjnych w celu sprawdzenia czy defekt kt rego dotyczy roszczenie nie powsta wskutek u ycia no nik w niezatwierdzonych przez firm Ultra b d przez...

Страница 28: ...maakt worden aan derden of voor welk doel dan ook gebruikt worden anders dan waarvoor deze werd geleverd zonder de expliciete schritelijke autoriteit van Ultra Electronics Limited Alle rechten voorbeh...

Страница 29: ...EEC Magicard Card Printer BS EN 50 081 1 1 BS EN 50 081 2 1 BS EN 60 950 1992 53 ID 3 MAGICARD 2 197 276 MAGICARD HOLOKOTE 5 990 918 EP 0 817 726 B1 6 2 16AMP ULTRA UltraCoverPlus 3 UltraCoverPlus 1 W...

Страница 30: ...A A WARNING This is a class A product In a domestic environment this product may cause radio interference in which case the user may be required to take adequate measures...

Отзывы: