Commissioning of the water sampling station
30
© Lutz-Jesco GmbH 2020
BA-42840-02-V03
Water sampling station
EASYPRO COMPACT
Operating instructions
Commissioning of the water sampling station
Password protection
8.6.3.2 Configuring the second overview
Perform the following work steps:
1.
Press the “Main menu” button (bottom left on the display) until the
second overview with the individually-settable windows appears.
2.
A gear wheel icon is displayed in the top right-hand corner of every
window.
Press on the icon to configure the selected window and state the
following information.
3. Name:
Give each window an individual name.
4. Display 1 – 5:
Up to five displays can be configured depending on
the size of the window. You can choose between the measured
values, the virtual values, the outputs, the setpoints, the disturbance
variables, the digital inputs and the external LED outputs.
ü
Configuration of the second overview completed.
8.6.4 Colours of the alarm messages
You can edit the colours of the different messages.
Perform the following work steps:
1.
In the main menu under System > Settings, navigate to the “Alarm
colour” tab.
2.
Look in the “Alarm colour” tab for the message for which you wish to
edit the alarm colour.
3.
Press on the row of the alarm and then on “Edit”.
4
You can chose between four colour fields.
ü
Alarm colour edited.
8.6.5 Save the configuration
You can save your individual configuration and load it later to rectify
problems quickly.
i
Recommendation:
Leave the factory-set configuration file
unchanged and save your personal configuration in a new file.
Given problems with the configuration, this enables you to
return to a functioning configuration quickly.
Perform the following work steps:
1.
In the main menu under System > Settings, navigate to the
“Configuration” tab.
2.
Press “save” and enter an existing file name to overwrite the file or a
new name to generate a new configuration file.
3.
Press on the green checkmark to confirm the entry.
ü
Configuration saved.
8.7 Password protection
The password protection of your device has been deactivated at the
factory. You can provide your device with password protection against
access to specific functions in three levels.
n
1. Level:
Only simple settings are accessible here. This level is
suitable for daily operation.
n
2. Level:
The configuration of the inputs and outputs and the
adjustment of the sensors are accessible here. This level is required
for device configuration and should only be operated by experienced
users.
n
3. Level:
The service menu is accessible here. This level is mainly
required for maintenance work such as changing the sensor,
performing software updates or network settings.
i
The following passwords are factory-set:
1. Level: 0001
2. Level: 0002
3. Level: 0003
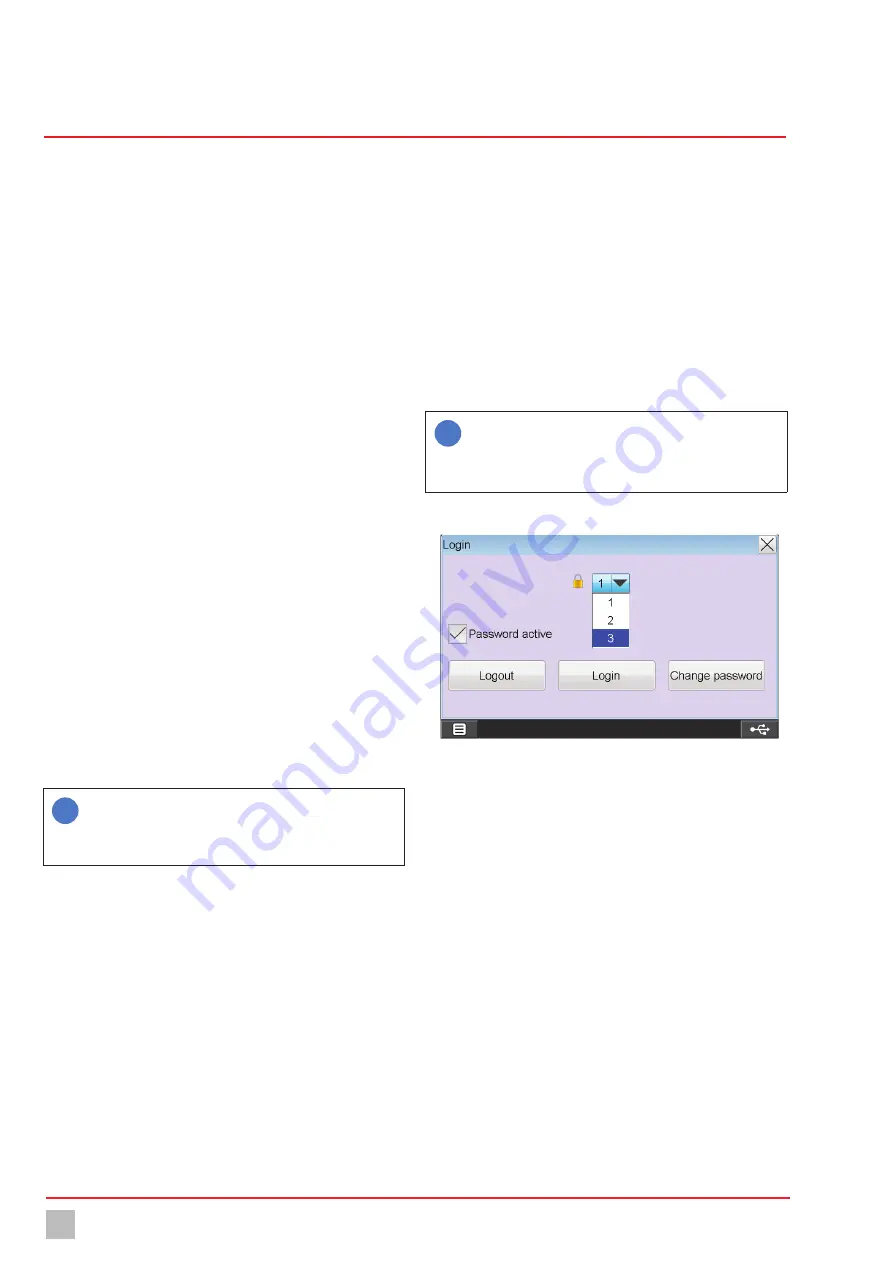
Configuring the password protection
Fig. 25: Configuring the password protection
Perform the following work steps:
1.
Press the lock icon in the left-hand upper corner to configure the
password protection.
2. Password active:
Select whether password protection should be
activated or deactivated. Password protection can only be deactivat-
ed if you are logged in to level 3.
4
Password protection must be activated to unlock the following
steps.
3.
Select one of the three password levels into which you wish to log on.
4. Login:
Login with the password for the password level previously
selected.
5. Change password:
You can edit the password of the level in which
you are logged in.
ü
Password protection configured.


