background image

Section 3 


        KVM Switch Operation


18 


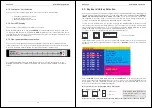
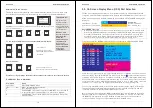
The OSD Menu displays further OSD configuration menus when selecting F1 from the main 

OSD menu. 

From the F1 Menu further submenus can be selected to configure the switch settings. In the 

submenus you can either use the cursor up/down keys or the mouse for navigation or simply 
press the number of the further option menu. You can go one layer back by clicking on the   

symbol with the mouse.  ESC key quits the OSD completely.  


Select 01 LANGUAGE – for Supervisor only – to set the 

OSD language to either: English, French, German, Italian, 

Spanish, Japanese, Chinese or Russian. 


Select 02 PORT NAME EDIT – for Supervisor only – to 

change / assign names to the computers attached to the 

appropriate ports. The names can be up to 10 characters 

long, all upper case. 


Select  03 PORT SEARCH – all users – to search for any 

computer name as assigned. If you type only a few 

characters, all computers and ports will be displayed that 

contain the typed characters. 


Select 04 USER SECURITY – for Supervisor only – to 

assign the Supervisor password and users and their 

passwords. For both up to 8 characters can be used. 


Select 05 ACCESS LIST – for Supervisor only – to assign access restrictions to users for 

certain ports. Default  setting is no access restriction. To disable a user from access to a certain 

port go to the appropriate user and port and select the option with the ENTER key. The sign in 

the matrix list will change from 0 to X to indicate the access restriction. 


Select 06 HOTKEY – for Supervisor only – to change the hotkey to any of the following: Scroll 

Lock / Caps Lock / Left Ctrl / Right Ctrl / Left Alt / Right Alt / Left Win / Right Win. This hotkey 

will be permanently changed. 


Select 07  TIME SETTINGS – for Supervisor only – to set the Autoscan time interval from 5 

seconds up to 99 seconds. 


Select 08 OSD MOUSE – for Supervisor only – to set the speed of the mouse movement in 

OSD menu. There are 3 choices: slow, medium and fast. Use the appropriate setting for your 

mouse. 


You can close almost any OSD window by simply pressing the ESCAPE key.  


User and supervisor can only log out via OSD menu when pressing F2 key. 


MAIN MENU                

SELECT OPTION 

01  LANGUAGE 
02  PORT NAME EDIT 
03  PORT SEARCH 
04  USER SECURITY 
05  ACCESS LIST 
06  HOTKEY 
07  TIME SETTINGS 
08  OSD MOUSE 


19 


Section 4 


Cat.5 Extender  

Access  

& Operation 


Содержание 32530

Страница 1: ...he required optional IP or Cat 5 access modules can be purchased separately and are simply installed into the back of a U8 16 Modular KVM Switch This manual also covers the KVM Switch U8 16 C another...

Страница 2: ...witch Operation 13 3 2 Keyboard Hotkey Selection 15 3 3 On Screen Display Menu OSD Port Selection 17 Section 4 19 4 1 Cat 5 KVM Extender Features 20 4 2 Cat 5 KVM Extender Installation 20 4 3 Cat 5 KV...

Страница 3: ...6 IP Local Console Remote Access Remote local control of multiple computers Section 1 Introducing the U8 16 IP 5 The U8 16 IP provides a non intrusive solution for remote access and control because th...

Страница 4: ...ically restored when switching between computers LED Display for easy status monitoring Buzzer sound for port switching confirmation Uses special single connector USB PS 2 VGA KVM cables with 15 Way H...

Страница 5: ...or the attached computer is not switched on Shift Button This button allows ports 9 to 16 to be selected Bank Select Button Pressing this button switches banks and allows the computers connected to sl...

Страница 6: ...to the console ports of the U8 16 MASTER KVM Switch Step 2 Connect the first Slave Use the daisy chain cable to connect the daisy chain port of the MASTER previous KVM Switch and the other end to the...

Страница 7: ...itch without having to power it off as long as it is currently not connected to the console In most cases the PS 2 mouse and keyboard signals will be maintained and will not be lost b The mouse driver...

Страница 8: ...the keyboard is in hotkey mode If you have not pressed any key in hotkey mode within 2 seconds the keyboard will return back to Operating System control status For the U series KVM switches it is pos...

Страница 9: ...your password a STATUS OSD display will be displayed System 02 102 Bank 1 Port 02 System PC name Scroll Lock recent hotkey 02 selected port Auto LOGOUT function During normal operation if no input fro...

Страница 10: ...users and their passwords For both up to 8 characters can be used Select 05 ACCESS LIST for Supervisor only to assign access restrictions to users for certain ports Default setting is no access restr...

Страница 11: ...ing the dedicated KVM system cable included with the Cat 5 KVM Extender Finally connect the Cat 5 5e 6 cable and the power supply unit The KVM cable provided can be used to connect either PS 2 or USB...

Страница 12: ...U processing time Transporting large amounts of data over TCP IP requires a high bandwidth connection Limited bandwidth may restrict or limit the possible screen resolutions and colour depths which ca...

Страница 13: ...Type config and press the Enter key Wait a few seconds for the configuration information to appear As you proceed the following questions will appear on the screen To accept the default values shown i...

Страница 14: ...o the keyboard settings Remote Mouse Settings A common problem with KVM devices is the synchronization between the local and remote mouse cursors The U8 16 IP addresses this problem with an intelligen...

Страница 15: ...Mode where only the remote mouse pointer is visible Activate this mode in the open Remote Console and click into the window area The local mouse pointer will be hidden and the remote one can be contro...

Страница 16: ...e host system using a securely encrypted connection you need a browser that supports the HTTPS protocol Strong security is only assured by using a key length of 128 Bit Some older browsers do not have...

Страница 17: ...that runs over this connection is neither HTTP nor HTTPS but RFB Remote Frame Buffer Protocol RFB needs to establish a connection to port number 443 Your local network environment has to allow this c...

Страница 18: ...menu A short description of the each of the options follows Monitor Only Toggles the Monitor only filter on or off If the filter is switched on no remote console interaction is possible but monitoring...

Страница 19: ...es Reset all settings to the factory made defaults Save Changes Save changes permanently Section 5 IP Access Configuration Operation 37 Undo Changes Restore last settings Soft Keyboard Opens up the su...

Страница 20: ...oding is enabled a value in brackets displays the compressed transfer rate For more information about Monitor Only and Exclusive Access settings see the relevant sections on page 35 Section 5 IP Acces...

Страница 21: ...t interface is entirely controlled with the appropriate functions of the web interface Once you have successfully logged into the U8 16 IP a command line will be presented and you can enter management...

Страница 22: ...output in the specified output file tmp floppy image Adjust both parameters exactly to your needs input device etc Section 5 IP Access Configuration Operation 43 Windows Windows users should use the t...

Страница 23: ...our hard disk For example with Nero choose Copy and Backup Then navigate to the Copy Disc section Select the CD ROM or DVD drive you would like to create an image from Specify the filename of the imag...

Страница 24: ...SAMBA SAMBA must be set up properly You may either edit the SAMBA configuration file etc samba smb conf or use the Samba Web Administration Tool SWAT or WebMin to set the correct parameters Section 5...

Страница 25: ...tion 49 1 Choose the drive you wish to redirect from the drop down list Enter your user name and password and click OK 2 Access the host computer from the Remote Console window You will see that the r...

Страница 26: ...r account has only the permission to open and use the Remote Console The default password for both accounts is pass Ensure you change the passwords as soon as you have installed and accessed the U8 16...

Страница 27: ...timized adjustment of compression and colour depth for the indicated network speed Section 5 IP Access Configuration Operation 53 Manually Allows adjustment of both compression rate and colour depth i...

Страница 28: ...ly catching this keystroke already Typical examples are Control Alt Delete in Windows and DOS which is always caught or Control Backspace on Linux for terminating the X Server The syntax to define a n...

Страница 29: ...nput signal A large filter setting needs less network traffic and leads to a faster video display but small changes in some display regions may not be recognized immediately A small filter displays al...

Страница 30: ...ion The maximum network traffic generated through the U8 16 IP s Ethernet device Value in Kbit s Enable Telnet access Set this option to allow access to ARA express using the Telnet Gateway see the Se...

Страница 31: ...rver Check time The U8 16 IP registers itself in the Dynamic DNS server at this time Check interval This is the interval for reporting again to the Dynamic DNS server by the U8 16 IP Section 5 IP Acce...

Страница 32: ...n machine with the Download CSR button see the illustration on the next page 2 Send the saved CSR to a CA for certification You will get the new certificate from the CA after a more or less complicate...

Страница 33: ...needs to be connected to the serial interface of the U8 16 IP Connecting to the U8 16 IP using a telephone line allows you to set up a dedicated point to point connection from your console computer to...

Страница 34: ...virtually every IP address is possible but you must make sure it is not interfering with the IP settings of the U8 16 IP switch and your console computer The default value will work in most cases Pas...

Страница 35: ...and is available after the U8 16 IP has been started If the U8 16 IP loses power or a hard reset is performed all logging data will be lost To avoid this use one of the log methods described below Se...

Страница 36: ...ser s its IP address from which host the user comes from and its activity status is displayed RC means that the Remote Console is open If the Remote Console is opened in exclusive mode the term exclus...

Страница 37: ...the appearance of the web interface is correct To do this in Internet Explorer select Tools Internet Options General Delete Files Tick the check box Delete all offline content and click OK Tip Should...

Страница 38: ...guarantee that the U8 16 IP will work with all known mice especially those developed and produced after the U8 16 IP s introduction Avoid moving the mouse or pressing the mouse buttons when switching...

Страница 39: ...F1 F2 F3 F4 F5 F6 F7 F8 F9 F10 F11 F12 PRINTSCREEN SCROLL LOCK BREAK INSERT HOME PAGE UP DELETE END PAGE DOWN UP LEFT DOWN RIGHT NUM LOCK NUMPAD0 NUMPAD1 NUMPAD2 NUMPAD3 NUMPAD4 NUMPAD5 NUMPAD6 NUMPAD...

Страница 40: ...pour le recyclage de tout quipement lectrique et lectronique Chaque Etat membre de l Union Europ enne a mis en application la nouvelle r glementation WEEE de mani res l g rement diff rentes Veuillez...

Отзывы: