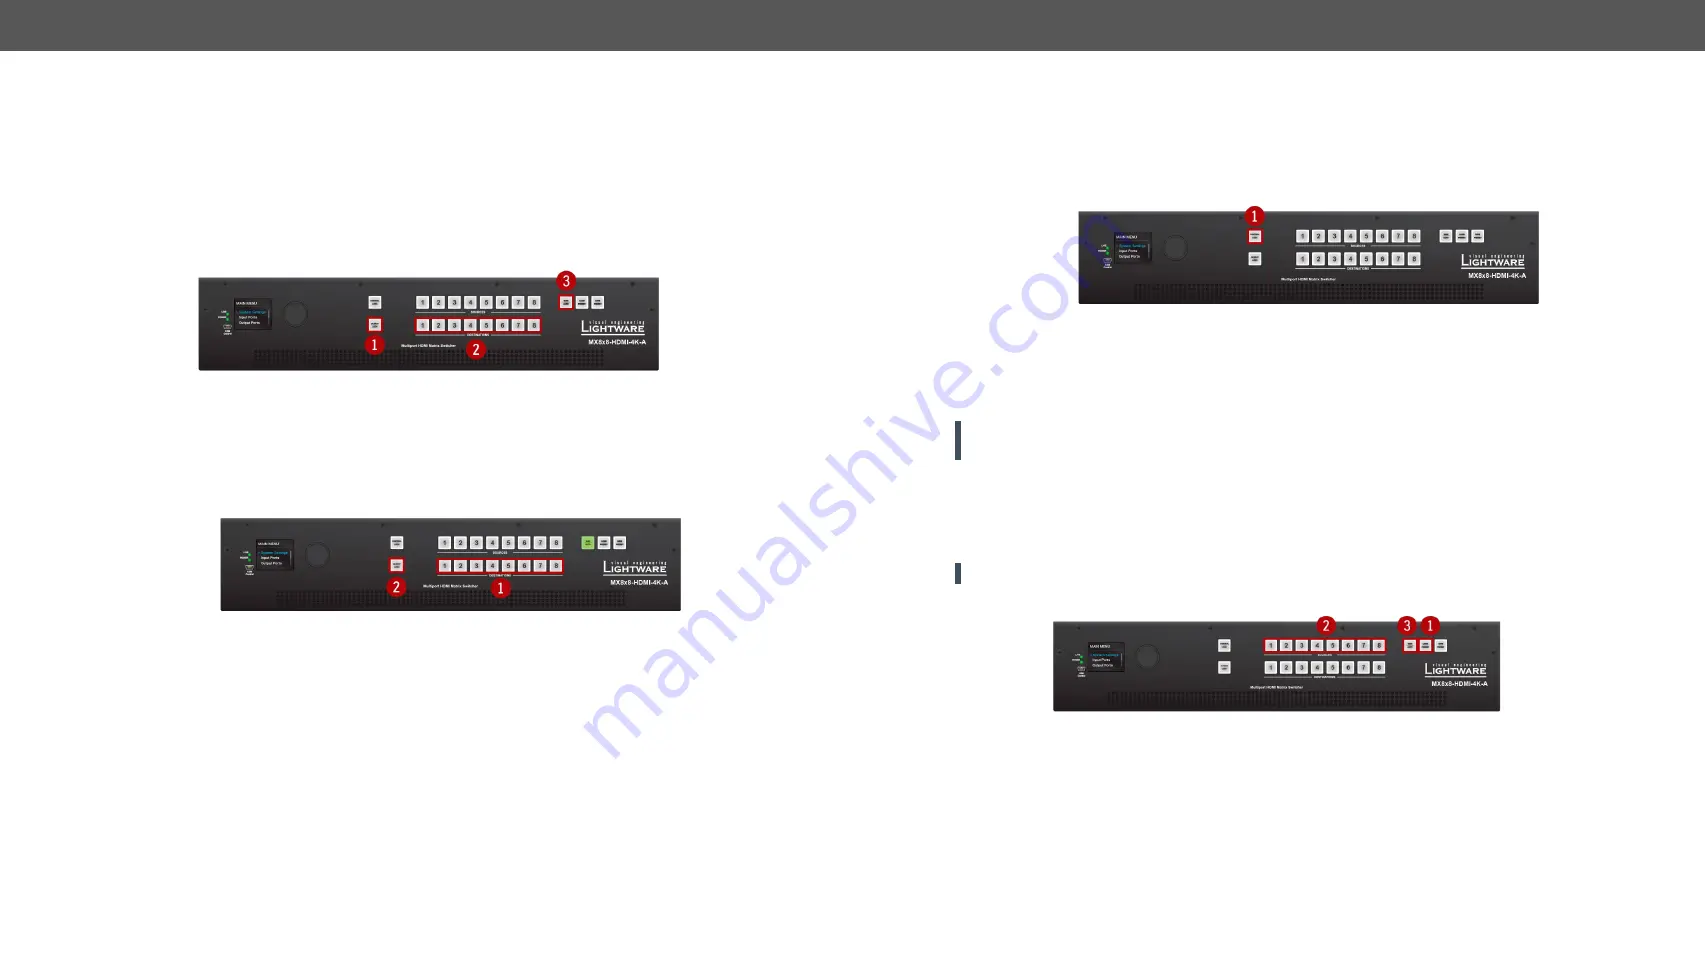
3. Front Panel Control
MMX8x4-HT series – User's Manual
25
Applied firmware package: v1.2.2b5 | LDC software: v2.2.1
Destinations can be independently locked or unlocked. Locking a destination does not affect other
destinations.
Output Lock in Take Mode
Step 1.
Press and release the
Output Lock
button; it starts to blink and all the buttons of any locked destinations
light up (view state).
Step 2.
Press and release a
destination button
; it starts to blink (more destinations can be selected sequentially).
Step 3.
Press and release
Take
button. The selected destinations are now locked.
Output Lock in Autotake Mode
Step 1.
Press and release the required
destination button
. Now the selected destination button and the currently
configured source button light up (view mode).
Step 2.
Press and release the
Output Lock
button; it lights up in red, and lock function is activated at once. No
source can be changed at the locked destination.
#buttonlock #lockbutton
3.3.6.
Control Lock
Front panel button operation can be enabled or disabled using
Control Lock
button, while the remote control
is still enabled. If the button is unlit, front panel button operation is enabled. If the button is continuously
illuminated in red the front panel operations are not possible. Press and keep the
Control Lock
button pressed
for three seconds to toggle between the control lock states.
#buttonlock #lockbutton
3.3.7.
Save or Load a Preset
The matrix can store user-programmable presets. Each preset stores a configuration regarding all input
connections for all outputs. All presets are stored in a non-volatile memory; the router keeps the presets
even in the case of a power down. Please note, that preset operations can be followed on the LCD during
front panel preset operations.
ATTENTION!
Eight of the memory slots are available by the Source buttons; see
for the
details.
Saving a Preset in Take Mode
Step 1.
Press and release
Save Preset
button.
Step 2.
Press and release the desired
source (memory address) button
(source 1 to 8).
Step 3.
Press and release the
Take
button. Now the current configuration is stored in the selected memory.
ATTENTION!
Preset save action always stores the current configuration for all outputs.


