Diagnostic information
2-5
7525-63
x
Go Back
Previous
Next
Error codes and messages
User status and attendance messages
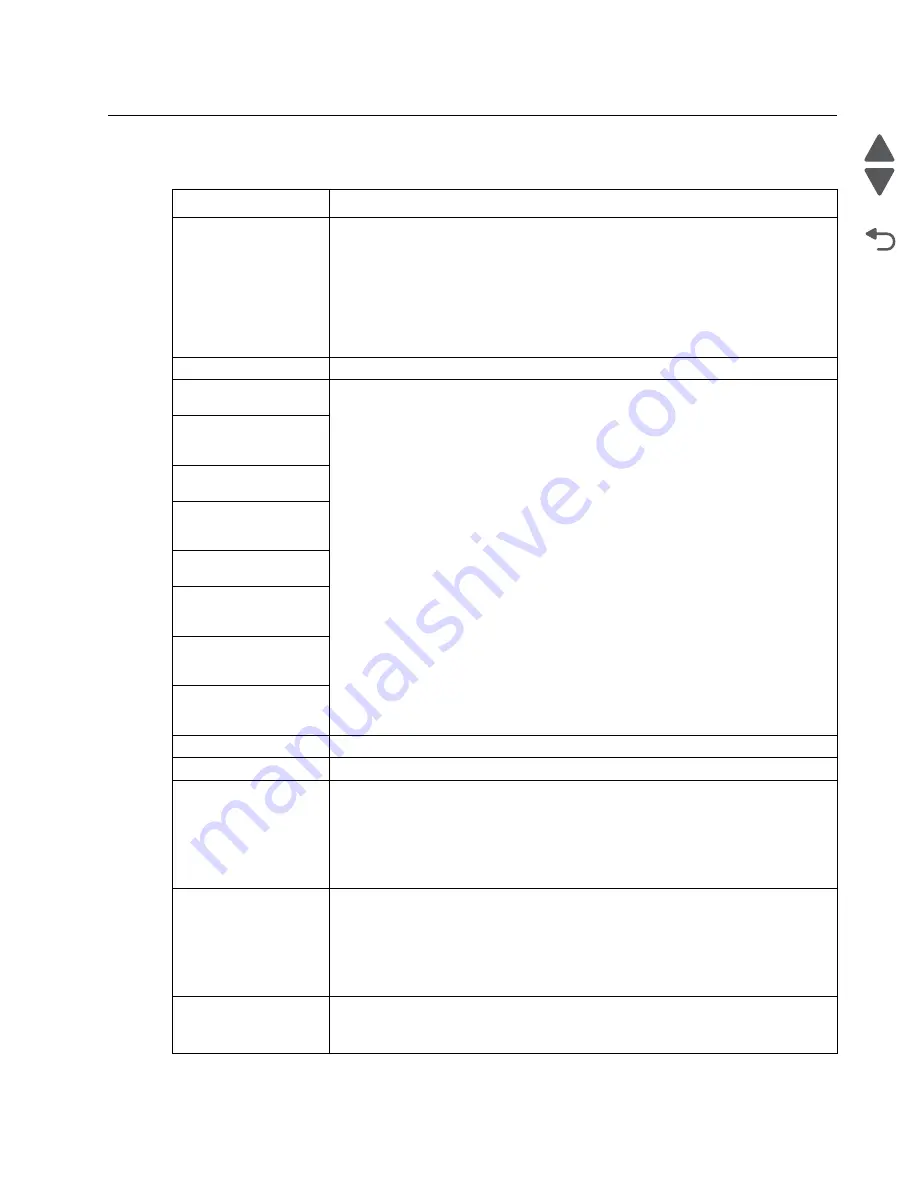
User primary message Explanation
290–294 ADF scanning
jams
The scanner failed to feed one or more pages through the ADF.
1. Remove all original documents from the ADF.
Note:
The message clears when the pages are removed from the ADF.
2. Do not fold or crease original documents. Straighten the edges on a level
surface.
3. Load the original documents in the ADF.
4. Adjust the ADF guides.
5. Touch
Continue, jam cleared
.
Adjusting color
Wait for the process to complete.
Change [paper source]
to [custom type name]
Try one or more of the following:
• Touch
Use current [paper source]
to ignore the message and print from the
selected tray.
• Load the correct paper size and type in the tray, verify the paper size and type
settings are specified in the printer control panel Paper menu, and then touch
Paper changed, continue
.
• Touch
Cancel job
to cancel the print job.
Change [paper source]
to [custom type name]
load [orientation]
Change [paper source]
to [custom string]
Change [paper source]
to [custom string] load
[orientation]
Change [paper source]
to [paper size]
Change [paper source]
to [paper size] load
[orientation]
Change [paper source]
to [paper size] [paper
type]
Change [paper source]
to [paper size] [paper
type] load [orientation]
Close front door
Close the front door of the printer.
Insert Tray [x]
Insert the specified tray into the printer.
Fax Station Name not
set up. Contact system
administrator.
The Fax Station Name has not been entered. Sending and receiving faxes is
disabled until fax is configured properly.
Try one or more of the following:
• Touch
Continue
to clear the message.
• Complete the Analog Fax Setup. If the message appears again, then contact
your system support person.
Fax Station Number not
set up. Contact system
administrator.
The Fax Station Number has not been entered. Sending and receiving faxes is
disabled until fax is configured properly.
Try one or more of the following:
• Touch
Continue
to clear the message.
• Complete the Analog Fax Setup. If the message appears again, then contact
your system support person.
Memory full, cannot
print faxes
There is not enough memory to print the fax job.
Touch
Continue
to clear the message without printing. Held faxes will attempt to
print after the printer has been restarted.
Содержание X548 Series
Страница 10: ...x Service Manual 7525 63x Go Back Previous Next...
Страница 15: ...Notices and safety information xv 7525 63x Go Back Previous Next...
Страница 16: ...xvi Service Manual 7525 63x Go Back Previous Next...
Страница 22: ...xxii Service Manual 7525 63x Go Back Previous Next...
Страница 44: ...1 22 Service Manual 7525 63x Go Back Previous Next...
Страница 116: ...2 72 Service Manual 7525 63x Go Back Previous Next...
Страница 191: ...Repair information 4 5 7525 63x Go Back Previous Next 4 Remove the three screws A on the rear side of the left cover A...
Страница 200: ...4 14 Service Manual 7525 63x Go Back Previous Next 9 Remove the two springs D 10 Remove the two screws E on the bottom D...
Страница 212: ...4 26 Service Manual 7525 63x Go Back Previous Next b Rotate the tab into position and replace the three screws A A...
Страница 300: ...4 114 Service Manual 7525 63x Go Back Previous Next 6 Remove the user interface controller card...
Страница 302: ...5 2 Service Manual 7525 63x Go Back Previous Next Rear Part name 1 Power 2 Line 3 Extension 4 Ethernet 5 USB 1 2 5 4 3...
Страница 303: ...Locations 5 3 7525 63x Go Back Previous Next Print engine interior view...
Страница 316: ...5 16 Service Manual 7525 63x Go Back Previous Next HVPS...
Страница 318: ...5 18 Service Manual 7525 63x Go Back Previous Next LVPS...
Страница 324: ...6 4 Service Manual 7525 63x Go Back Previous Next...
Страница 326: ...7 2 Service Manual 7525 63x Go Back Previous Next Assembly 1 Covers 7 11 9 8 1 2 3 4 5 6 10...
Страница 328: ...7 4 Service Manual 7525 63x Go Back Previous Next Assembly 2 Scanner 2 1 4 3 5 6 8 10 11 12 7 13 9...
Страница 330: ...7 6 Service Manual 7525 63x Go Back Previous Next Assembly 3 Operator panel 1 2 3 4 7 8 5 6 9...
Страница 332: ...7 8 Service Manual 7525 63x Go Back Previous Next Assembly 4 Paperpath 5 2 4 7 6 1 3 8 9 3 10...
Страница 334: ...7 10 Service Manual 7525 63x Go Back Previous Next Assembly 5 Electronics 1 2 3 4A 4B 5 6 4C 4D 7 8...
Страница 336: ...7 12 Service Manual 7525 63x Go Back Previous Next Assembly 6 Electronics 2...
Страница 338: ...7 14 Service Manual 7525 63x Go Back Previous Next Assembly 7 Media drawers and trays 1 3 2 4 2...
Страница 344: ...I 4 Service Manual 7525 63x Go Back Previous Next...
Страница 347: ...Part number index I 7 7525 63x Go Back Previous Next...


