3-2
Service Manual
7525-63
x
Go Back
Previous
Next
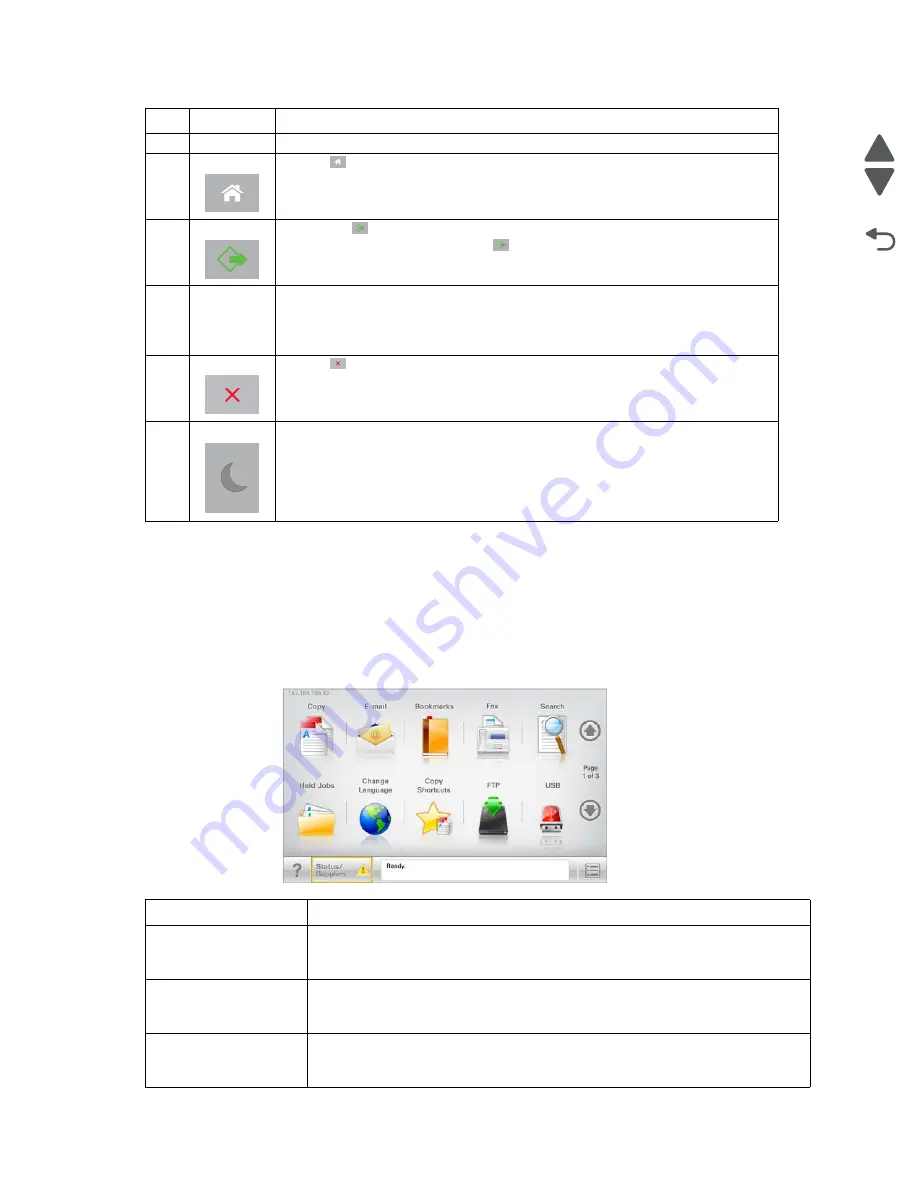
Understanding the home screen
When the printer is turned on, the display shows a basic screen, referred to as the home screen. Touch the
home screen buttons and icons to initiate an action such as copying, faxing, or scanning; to open the menu
screen; or to respond to messages.
Note:
Your home screen, icons, and buttons may vary depending on your home screen customization settings,
administrative setup, and active embedded solutions.
5
USB port
Insert a flash drive to send data to the printer or to scan a file to the flash drive.
6
Home Press
to return to the home screen.
7
Submit • Press
to initiate the current job indicated on the display.
• From the home screen, press
to start a copy job with the default
settings.
• If pressed while a job is scanning, then the button has no effect.
8
Indicator
light
•
Off
—The printer is off.
•
Blinking green
—The printer is warming up, processing data, or printing.
•
Solid green
—The printer is on, but idle.
•
Blinking red
—Operator intervention is needed.
9
Stop Press
to stop all printer activity.
A list of options is offered once
Stopped
appears on the display.
10
Sleep
Press to put printer into or out of Sleep Mode.
Icon/Button
Function
Copy
Access the Copy menus and make copies.
Access the E-mail menus and send e-mails.
Fax
Access the Fax menus and send faxes.
Item
Function
Содержание X548 Series
Страница 10: ...x Service Manual 7525 63x Go Back Previous Next...
Страница 15: ...Notices and safety information xv 7525 63x Go Back Previous Next...
Страница 16: ...xvi Service Manual 7525 63x Go Back Previous Next...
Страница 22: ...xxii Service Manual 7525 63x Go Back Previous Next...
Страница 44: ...1 22 Service Manual 7525 63x Go Back Previous Next...
Страница 116: ...2 72 Service Manual 7525 63x Go Back Previous Next...
Страница 191: ...Repair information 4 5 7525 63x Go Back Previous Next 4 Remove the three screws A on the rear side of the left cover A...
Страница 200: ...4 14 Service Manual 7525 63x Go Back Previous Next 9 Remove the two springs D 10 Remove the two screws E on the bottom D...
Страница 212: ...4 26 Service Manual 7525 63x Go Back Previous Next b Rotate the tab into position and replace the three screws A A...
Страница 300: ...4 114 Service Manual 7525 63x Go Back Previous Next 6 Remove the user interface controller card...
Страница 302: ...5 2 Service Manual 7525 63x Go Back Previous Next Rear Part name 1 Power 2 Line 3 Extension 4 Ethernet 5 USB 1 2 5 4 3...
Страница 303: ...Locations 5 3 7525 63x Go Back Previous Next Print engine interior view...
Страница 316: ...5 16 Service Manual 7525 63x Go Back Previous Next HVPS...
Страница 318: ...5 18 Service Manual 7525 63x Go Back Previous Next LVPS...
Страница 324: ...6 4 Service Manual 7525 63x Go Back Previous Next...
Страница 326: ...7 2 Service Manual 7525 63x Go Back Previous Next Assembly 1 Covers 7 11 9 8 1 2 3 4 5 6 10...
Страница 328: ...7 4 Service Manual 7525 63x Go Back Previous Next Assembly 2 Scanner 2 1 4 3 5 6 8 10 11 12 7 13 9...
Страница 330: ...7 6 Service Manual 7525 63x Go Back Previous Next Assembly 3 Operator panel 1 2 3 4 7 8 5 6 9...
Страница 332: ...7 8 Service Manual 7525 63x Go Back Previous Next Assembly 4 Paperpath 5 2 4 7 6 1 3 8 9 3 10...
Страница 334: ...7 10 Service Manual 7525 63x Go Back Previous Next Assembly 5 Electronics 1 2 3 4A 4B 5 6 4C 4D 7 8...
Страница 336: ...7 12 Service Manual 7525 63x Go Back Previous Next Assembly 6 Electronics 2...
Страница 338: ...7 14 Service Manual 7525 63x Go Back Previous Next Assembly 7 Media drawers and trays 1 3 2 4 2...
Страница 344: ...I 4 Service Manual 7525 63x Go Back Previous Next...
Страница 347: ...Part number index I 7 7525 63x Go Back Previous Next...


