background image

Any questions regarding this compliance information statement should be directed to:

Director of Lexmark Technology & Services
Lexmark International, Inc.
740 West New Circle Road
Lexington, KY 40550
(859) 232–3000

Modular component notice

Wireless-equipped models contain the following modular component(s):

Lexmark regulatory type/model LEX-M04-001; FCC ID:IYLLEXM04001; IC:2376A-M04001

Noise emission levels

The following measurements were made in accordance with ISO 7779 and reported in conformance with ISO 9296.

Note: 

Some modes may not apply to your product.

1-meter average sound pressure, dBA

Printing

53 dBA

Ready

N/A

Values are subject to change. See 

www.lexmark.com

 for current values.

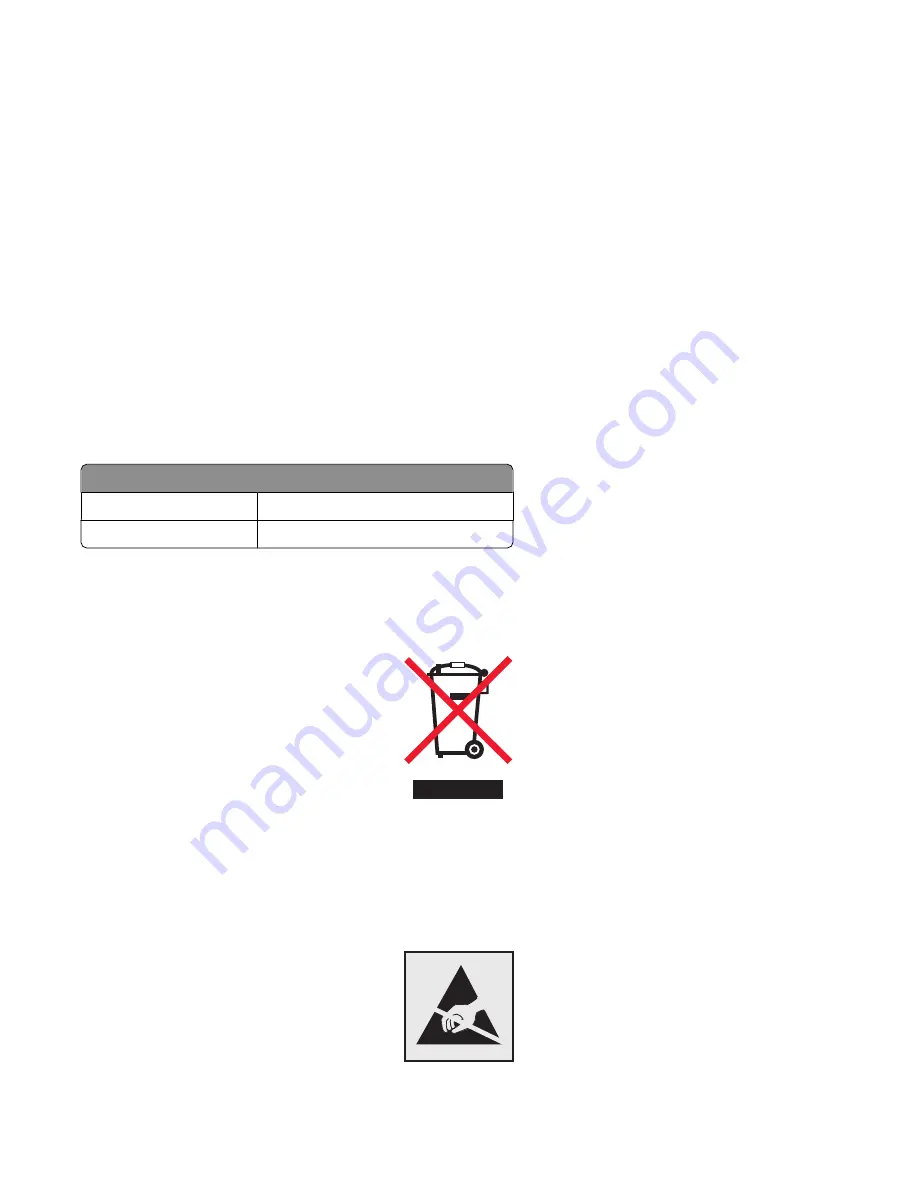
Waste from Electrical and Electronic Equipment (WEEE) directive

The WEEE logo signifies specific recycling programs and procedures for electronic products in countries of the
European Union. We encourage the recycling of our products. If you have further questions about recycling options,
visit the Lexmark Web site at 

www.lexmark.com

 for your local sales office phone number.

Static sensitivity notice

Notices

129

Содержание E360D 420

Страница 1: ...Lexmark E360d and E360dn Series User s Guide January 2010 www lexmark com Machine type s 4513 Model s 420 430...

Страница 2: ...Attaching cables 22 Verifying printer setup 23 Setting up the printer software 23 Minimizing your printer s environmental impact 26 Saving paper and toner 26 Saving energy 27 Recycling 29 Loading pape...

Страница 3: ...mputer 82 Ordering supplies 83 Replacing supplies 84 Moving the printer 88 Administrative support 89 Finding advanced networking and administrator information 89 Using the Embedded Web Server 89 Check...

Страница 4: ...Solving basic printer problems 110 Printer control panel display is blank or displays only diamonds 110 Solving printing problems 111 Solving option problems 113 Solving paper feed problems 114 Solvin...

Страница 5: ...inter to lift it off the optional drawer Use only the power cord provided with this product or the manufacturer s authorized replacement CAUTION SHOCK HAZARD If you are accessing the system board or i...

Страница 6: ...lightning storm Do not set up this product ormakeanyelectricalorcablingconnections suchasthefaxfeature powercord ortelephone duringalightning storm See the product User s Guide for additional safety...

Страница 7: ...nter Installing the printer software Setup documentation The setup documentation came with the printer and is also available on the Lexmark Web site at http support lexmark com Additional setup and in...

Страница 8: ...where purchased Warranty information Warranty information varies by country or region In the US See the Statement of Limited Warranty included with this printer or at http support lexmark com Rest of...

Страница 9: ...ht side 200 mm 8 in 3 Front 300 mm 12 in 4 Left side 12 7 mm 0 5 in 5 Top 300 mm 12 in Printer configurations Basic model The following illustration shows the printer front with its basic features or...

Страница 10: ...andard exit bin 4 Printer control panel 5 System board door 6 Standard 250 sheet tray Tray 1 7 Multipurpose feeder door 8 Front door The following illustration shows the printer back with its basic fe...

Страница 11: ...ar door 2 Ethernet port Note The Ethernet port is a feature on network models only 3 USB port 4 Parallel port 5 Printer power cord socket 6 Power switch 7 Locking device port Learning about the printe...

Страница 12: ...ay Tray 1 7 Optional 250 or 550 sheet drawer Tray 2 8 Multipurpose feeder door 9 Front door Using the standard exit bin and paper stop The standard exit bin holds up to 150 sheets of 20 lb paper It co...

Страница 13: ...Notes Do not leave the paper stop in the open position if you are printing on transparencies Doing so may cause creases in the transparencies When moving the printer to another location make sure the...

Страница 14: ...ry cards Printer memory Flash memory Fonts Accessing the system board to install internal options CAUTION SHOCK HAZARD If you are accessing the system board or installing optional hardware or memory d...

Страница 15: ...memory devices sometime after setting up the printer then turn the printer off and unplug the power cord from the wall outlet before continuing If you have any other devices attached to the printer t...

Страница 16: ...ard 4 Align the memory card with its connector on the system board 5 Push open the latches on both ends of the memory connector Warning Potential Damage Memory cards are easily damaged by static elect...

Страница 17: ...ick or click Start and then click Run b In the Start Search or Run box type control printers c Press Enter or click OK The printers folder opens 11 Right click your printer icon 12 Click Properties 13...

Страница 18: ...from the wall outlet before continuing If you have other devices attached to the printer then turn them off as well and unplug any cables going into the printer Warning Potential Damage System board e...

Страница 19: ...st the system board Be careful not to damage the connectors 5 Close the system board door Installing hardware options Installing a 250 or 550 sheet drawer CAUTION POTENTIAL INJURY The printer weight i...

Страница 20: ...printer then turn the printer off and unplug the power cord from the wall outlet before continuing If you have any other devices attached to the printer then turn them off as well and unplug any cable...

Страница 21: ...printers folder a Click or click Start and then click Run b In the Start Search or Run box type control printers c Press Enter or click OK The printers folder opens 9 Right click the icon of your prin...

Страница 22: ...e an Ethernet cable 2 Connect the power cord to the printer first and then to a wall outlet 1 Ethernet port 2 USB port Warning PotentialDamage Donottouch theUSBcable anynetwork adapter ortheprinter in...

Страница 23: ...ttached to a network print a network setup page to verify the network connection This page also provides important information that aids network printing configuration 1 Make sure the printer is on an...

Страница 24: ...ating system 4 Download the driver and install the printer software Updating available options in the printer driver Oncethe printersoftwareandanyoptionsareinstalled itmaybenecessarytomanuallyaddtheop...

Страница 25: ...rlier 1 From the Finder desktop choose Go Applications 2 Double click Utilities and then double click Print Center or Printer Setup Utility 3 Select the printer and then from the Printers menu choose...

Страница 26: ...ng chamber tests for different temperature and humidity conditions Lexmark has found no reason to discourage the use of today s recycled office papers but generally the following property guidelines a...

Страница 27: ...voiding jams on page 92 Saving energy Using Eco Mode Use Eco Mode to quickly select one or more ways to reduce your printer s environmental impact Note See the table for the multiple settings that cha...

Страница 28: ...specifications for your printer To select a Quiet Mode setting 1 From the printer control panel press 2 Press the arrow buttons until Settings appears and then press 3 Press the arrow buttons until G...

Страница 29: ...recycling program at www lexmark com recycle Recycling Lexmark products To return Lexmark products to Lexmark for recycling 1 Visit our Web site at www lexmark com recycle 2 Find the product type you...

Страница 30: ...es returned to Lexmark are either reused or demanufactured for recycling Boxes used to return the cartridges are also recycled To return Lexmark cartridges for reuse or recycling follow the instructio...

Страница 31: ...il the correct type appears and then press Submitting changes appears followed by Type Configuring Universal paper settings The Universal Paper Size is a user defined setting that lets you print on pa...

Страница 32: ...versal Setup menu 3 From the Universal Setup menu press the arrow buttons until Portrait Height appears and then press 4 Press the left arrow button to decrease the setting or the right arrow button t...

Страница 33: ...des to the correct position for the paper size you are loading For long paper like A4 or legal squeeze and slide the length guide backwards to accommodate the length of paper you are loading Loading p...

Страница 34: ...ded in Tray 2 Note Use the size indicators on the bottom of the tray to help position the guide 3 Flex a stack of paper back and forth to loosen the sheets and then fan them Do not fold or crease the...

Страница 35: ...l line Load letterhead with the top edge of the sheet toward the front of the tray and the design facedown 5 Squeeze and slide the guides to lightly touch the side of the stack Loading paper and speci...

Страница 36: ...use the multipurpose feeder when you print on different sizes and types of papers or specialty media such as card stock transparencies paper labels and envelopes You may also want to use the multipur...

Страница 37: ...dle and pull the extension forward 3 Grasp the handle and pull the extension so it flips forward 4 Guide the extension down gently so the multipurpose feeder is extended fully and open Loading paper a...

Страница 38: ...ts of paper or paper labels back and forth to loosen them and then fan them Do not fold or crease the paper or labels Straighten the edges on a level surface Hold transparencies by the edges and then...

Страница 39: ...r specialty media Notes Do not force any paper into the multipurpose feeder Overfilling may cause jams Do not exceed the maximum stack height by forcing paper orspecialty media under the stack height...

Страница 40: ...e shown to illustrate the proper orientation for loading envelopes Warning Potential Damage Never use envelopes with stamps clasps snaps windows coated linings or self stick adhesives These envelopes...

Страница 41: ...einstalled on theprinterat atime The maximum amount of paper that can be loaded depends on whether you have an optional 250 or 550 sheet tray Vinyl pharmacy ordual sided labels arenotsupported Usepape...

Страница 42: ...he specified Paper Type Paper may not be properly processed if an inaccurate Paper Type is selected Creating a custom name for a paper type If the printer is on a network you can use the Embedded Web...

Страница 43: ...d then press to select the tray The Paper Size menu appears 6 Press the arrow buttons until the Paper Type menu appears 7 Press 8 Press the arrow buttons until Custom Type x or another custom name app...

Страница 44: ...or dry conditions even in the trays can contribute to paper curling prior to printing and can cause feeding problems Smoothness Paper smoothness directly affects print quality If paper is too rough to...

Страница 45: ...s or documents Selecting paper Using appropriate paper prevents jams and helps ensure trouble free printing To help avoid jams and poor print quality Always use new undamaged paper Before loading pape...

Страница 46: ...the closest larger listed size For information on card stock and labels see the Card Stock Label Guide Paper types and weights supported by the printer The printer engine and the duplex path support 6...

Страница 47: ...lex path A4 210 x 297 mm 8 3 x 11 7 in A5 148 x 210 mm 5 8 x 8 3 in X A61 105 x 148 mm 4 1 x 5 8 in X X Executive 184 x 267 mm 7 3 x 10 5 in X Folio 216 x 330 mm 8 5 x 13 in JIS B5 182 x 257 mm 7 2 x...

Страница 48: ...X X X 9 Envelope 98 x 225 mm 3 9 x 8 9 in X X X 10 Envelope 105 x 241 mm 4 1 x 9 5 in X X X Other Envelope 229 x 356 mm 9 x 14 in X X X 1 A6 is supported only for grain long papers 2 If a paper size y...

Страница 49: ...e To print on a specific size or type of paper adjust the paper size or type settings to match the loaded paper or select the appropriate tray or feeder c Click OK and then click OK For Macintosh user...

Страница 50: ...placed facedown The top edge of the sheet with the logo is placed at the front of the tray Duplex two sided printing from trays Printed letterhead design is placed faceup The top edge of the sheet wit...

Страница 51: ...hese settings using the Embedded Web Server or from the printer control panel Paper menu To prevent print quality problems avoid getting fingerprints on the transparencies Before loading transparencie...

Страница 52: ...ct this setting using the Embedded Web Server or from the printer control panel Paper menu Label adhesives face sheet printable stock and topcoats can withstand up to 25 psi 172 kPa pressure without d...

Страница 53: ...nt sample list To print samples of the fonts currently available for your printer 1 Make sure the printer is on and Ready appears 2 From the printer control panel press 3 Press the arrow buttons until...

Страница 54: ...2 Press to confirm the deletion The Canceling screen appears Canceling a print job from the computer For Windows users 1 Open the printers folder a Click or click Start and then click Run b In the St...

Страница 55: ...to cancel 4 From the icon bar at the top of the window click the Delete icon In Mac OS X version 10 4 and earlier 1 From the Go menu choose Applications 2 Double click Utilities and then double click...

Страница 56: ...int Directory Asset Report Settings Network Ports General Settings Setup Menu Finishing Menu Quality Menu Utilities Menu PostScript Menu PCL Emul Menu Active NIC Network Menu2 USB Menu Parallel Menu 1...

Страница 57: ...is empty the job prints using the linked tray Size Type menu Menu item Description Select Source menu Tray 1 Tray 2 MP Feeder Manual Paper Manual Env Lets you specify the installed paper size and type...

Страница 58: ...nvelope Lets you specify the envelope size loaded in the multipurpose feeder Note 10 Envelope is the US factory default setting DL Envelope is the international factory default setting Set Type menu f...

Страница 59: ...vy Paper Rough Cotton Custom Type x Lets you specify the paper type loaded in the multipurpose feeder Note Plain Paper is the factory default setting Set Type menu for Manual Env Envelope Rough Envelo...

Страница 60: ...Labels Texture Smooth Normal Rough Specifies the relative texture of the labels loaded Note Normal is the factory default setting Bond Texture Smooth Normal Rough Specifies the relative texture of the...

Страница 61: ...Notes Normal is the factory default setting Settings appear only if the custom type is supported Paper Weight menu Menu item Description Plain Weight Light Normal Heavy Specifies the relative weight o...

Страница 62: ...cific tray Note Normal is the factory default setting Preprinted Weight Light Normal Heavy Specifies the relative weight of the paper loaded in a specific tray Note Normal is the factory default setti...

Страница 63: ...etting Colored Loading Off Duplex Determines the paper loading direction for all jobs that specify Colored as the paper type Note Off is the factory default setting Light Loading Off Duplex Determines...

Страница 64: ...order to print from that source Universal Setup menu These menu items are used to specify the height width and feed direction of the Universal Paper Size The Universal Paper Size is a user defined pap...

Страница 65: ...ge count alarms timeouts the printer control panel language the TCP IP address the status of supplies and the status of the network connection Device Statistics Prints a report containing printer stat...

Страница 66: ...er uses PostScript emulation if PS SmartSwitch is set to On It uses the default printer language specified in the Setup menu if PS SmartSwitch is set to Off PS SmartSwitch On Off Sets the printer to a...

Страница 67: ...s USB menu Menu item Description PCL SmartSwitch On Off Sets the printer to automatically switch to PCL emulation when a print job received through a USB port requires it regardless of the default pri...

Страница 68: ...inary PostScript print jobs Notes Auto is the factory default setting The Off setting filters print jobs using the standard protocol The On setting processes raw binary PostScript print jobs ENA Addre...

Страница 69: ...It uses the default printer language specified in the Setup menu if PCL SmartSwitch is set to Off NPA Mode Auto Off Sets the printer to perform the special processing required for bidirectional commu...

Страница 70: ...print jobs Notes Auto is the factory default setting The Off setting filters print jobs using the standard protocol The On setting processes raw binary PostScript print jobs ENA Address xxx xxx xxx x...

Страница 71: ...paper or specialty media Notes Off is the factory default setting Off resets the printer to its factory default settings The Energy setting minimizes the power used by the printer Performance may be...

Страница 72: ...y default setting Timeouts Print Timeout Disabled 1 255 Sets the amount of time in seconds the printer waits to receive an end of job message before canceling the remainder of the print job Notes 90 s...

Страница 73: ...ts Factory Defaults Do Not Restore Restore Now Returns the printer settings to the factory default settings Notes Do Not Restore is the factory default setting Do Not Restore keeps the user defined se...

Страница 74: ...rary downloads such as fonts and macros stored in RAM when the printer receives a job that requires more memory than is available Notes Off is the factory default setting Off sets the printer to retai...

Страница 75: ...ult setting The On setting stacks the print job sequentially Both settings print the entire job the number of times specified by the Copies menu setting Separator Sheets None Between Copies Between Jo...

Страница 76: ...fault setting The printer chooses between portrait and landscape N up Border None Solid Prints a border around each page image when using N up pages sides Note None is the factory default setting Qual...

Страница 77: ...tes 0 is the factory default setting A negative value will darken text images and graphics A positive value will lighten them and conserve toner Contrast 0 5 Adjusts the degree of difference between l...

Страница 78: ...vate is selected all data sent to the printer is printed in hexadecimal and character representation and control codes are not executed To exit Hex Trace turn the printer off or reset the printer Cove...

Страница 79: ...2U PC 850 is the international factory default setting PCL Emulation Settings Point Size 1 00 1008 00 Changes the point size for scalable typographic fonts Notes 12 is the factory default setting Poin...

Страница 80: ...return CR after a line feed LF control command Note Off is the factory default setting PCL Emulation Settings Auto LF after CR Off On Specifies whether the printer automatically performs a line feed L...

Страница 81: ...Menu item Description Tray Renumber Restore Defaults Yes No Returns all tray drawer and feeder assignments to the factory default settings Understanding printer menus 81...

Страница 82: ...mp cloth to clean the interior may cause damage to your printer 5 Make sure all areas of the printer are dry before beginning a new print job Storing supplies Choose a cool clean storage area for the...

Страница 83: ...and front to back several times to redistribute toner 3 Reinsert the cartridge and continue printing Note Repeat this procedure multiple times until the print remains faded and then replace the cartri...

Страница 84: ...ience faded print remove the toner cartridge Firmly shake it side to side and front to back several times to redistribute the toner and then reinsert it and continue printing When shaking the cartridg...

Страница 85: ...idge clicks into place when correctly installed 6 Close the front door Replacing the photoconductor kit The printer automatically notifies you before the photoconductor kit reaches a page maximum by s...

Страница 86: ...toconductor kit and toner cartridge out of the printer as a unit by pulling on the toner cartridge handle Note The photoconductor kit and toner cartridge form a unit Place the unit on a flat clean sur...

Страница 87: ...ure print jobs 6 Insertthe tonercartridgeintothe photoconductorkitbyaligningtherollersonthetonercartridgewiththetracks Push the toner cartridge until it clicks into place 7 Install the unit into the p...

Страница 88: ...drawer and set it aside instead of trying to lift the drawer and printer at the same time Note Use the handholds located on both sides of the printer to lift it off the optional drawer Use only the p...

Страница 89: ...n CD and the Embedded Web Server Administrator s Guide on the LexmarkTM Web site at www lexmark com Checking the virtual display The virtual display works as an actual display would work on a printer...

Страница 90: ...ing low or when the paper needs to be changed added or unjammed 1 Type the printer IP address into the address field of your Web browser Note If you do not know the IP address of the printer then you...

Страница 91: ...n click Click here to submit language 4 Click Printer Settings 5 Enter the IP addresses of the source and target printers Note To add additional target printers click the Add Target IP button 6 Click...

Страница 92: ...rinting or wait for a prompt to load it Do not load too much paper Make sure the stack height does not exceed the indicated maximum height Make sure the guides in the tray or the multipurpose feeder a...

Страница 93: ...201 235 202 231 234 231 234 Understanding jam messages and locations Note To resolve any message all paper or specialty media must be cleared from the entire paper path Open doors and covers and remo...

Страница 94: ...one or more of the following Remove Tray 1 Open the front door and then remove the photoconductor kit 202 231 Open the front door and then open the rear door 233 234 Try one or more of the following...

Страница 95: ...2 Remove the jam if you see it here 3 If you do not see it open the front door and then remove the photoconductor kit and toner cartridge unit Note When the photoconductor kit and toner cartridge are...

Страница 96: ...4 Lift the flap in front of the printer and remove any jammed sheets 5 Align and insert the unit 6 Close the front door 7 Insert the tray 8 Press Clearing jams 96...

Страница 97: ...e the risk of injury from a hot component allow the surface to cool before touching 1 Open the front door and then remove the unit 2 Lift the flap in front of the printer and then remove any jammed sh...

Страница 98: ...ght be hot To reduce the risk of injury from a hot component allow the surface to cool before touching 1 Open the front door and then remove the unit 2 Lift the flap in front of the printer and then r...

Страница 99: ...r door 7 Close the front door 8 Press 231 paper jam CAUTION HOT SURFACE The inside of the printer might be hot To reduce the risk of injury from a hot component allow the surface to cool before touchi...

Страница 100: ...3 Remove the jam 4 Close the rear door 5 Close the front door 6 Press If this does not clear the jam complete the steps in 233 paper jam on page 101 Clearing jams 100...

Страница 101: ...lex area 4 Insert the tray 5 Press If this does not clear the jam complete the steps in 231 paper jam on page 99 234 paper jam A single jamormultiple jamsare in the duplexarea ofthe printerwhen the pr...

Страница 102: ...ing a size of paper not supported for duplex printing A sheet is jammed in the standard exit bin 1 To remove the jam gently pull the jammed sheet out of the standard exit bin 2 Press 24x paper jam 1 R...

Страница 103: ...ress 251 paper jam A sheet of paper or specialty media failed to feed completely from the multipurpose feeder Part of it may still be visible If it is visible gently pull the jammed sheet from the fro...

Страница 104: ...steps 1 Open the front door and then remove the unit 2 Lift the flap at the front of the printer and then remove any jammed sheets of paper that are short lengths of paper 3 Align and insert the unit...

Страница 105: ...ng Cancel the current job Load input src with size Try one or more of the following Load the paper tray or other source with the correct paper type and size Cancel the current job Load input src with...

Страница 106: ...of the following Load the multipurpose feeder with the correct paper type and size Wait for the message to clear and then continue printing The printer manually overrides the request and then prints...

Страница 107: ...per is large enough for the data being printed Cancel the current print job 35 Insufficient memory to support Resource Save feature The printer lacks sufficient memory to save settings Install additio...

Страница 108: ...ed in flash memory Upgrade to a larger capacity flash memory Press and then press to cancel printing 53 Unformatted flash detected Try one or more of the following Press the arrow buttons until Contin...

Страница 109: ...printer off 2 Unplug the power cord from the wall outlet Note Optional trays lock together when stacked Remove stacked trays one at a time from the top down 3 Remove the additional tray s 4 Connect t...

Страница 110: ...otectors uninterrupted power supplies or extension cords Other electronic equipment plugged into the outlet is working The printer is turned on Check the printer power switch The printer cable is secu...

Страница 111: ...at www lexmark com MAKE SURE THE PRINTER IS CONNECTED TO THE NETWORK Print a network setup page and check that the status shows Connected If the status is Not Connected check the network cables and th...

Страница 112: ...k on to exit Hex Trace mode Tray linking does not work LOAD THE SAME SIZE AND TYPE OF PAPER IN EACH TRAY 1 Load the same size and type of paper in each tray 2 Move the paper guides to the correct posi...

Страница 113: ...arrow buttons until the value you want appears and then press Solving option problems Option does not operate correctly or quits after it is installed These are possible solutions Try one or more of...

Страница 114: ...rd Memory card Make sure the memory card is securely connected to the printer system board Solving paper feed problems Paper frequently jams These are possible solutions Try one or more of the followi...

Страница 115: ...does not reprint after you clear the jam In the Settings menu Jam Recovery is set to Off Set Jam Recovery to Auto or On 1 Press 2 Press the arrow buttons until Settings appears and then press 3 Press...

Страница 116: ...tandard tray Load the paper stack toward the back of the tray as shown with the recommended print side facedown Notice the maximum fill line on the side of the tray to guide you Do not overfill the tr...

Страница 117: ...jagged or uneven edges If you are using downloaded fonts verify that the fonts are supported by the printer the host computer and the software program Clipped images These are possible solutions Try o...

Страница 118: ...Darkness setting before sending the job to print Ghost images These are possible solutions Try one or more of the following THE PHOTOCONDUCTOR KIT IS DEFECTIVE Replace the photoconductor kit CHECK THE...

Страница 119: ...or the software program Paper curl These are possible solutions Try one or more of the following CHECK THE PAPER TYPE SETTING For Windows users From Print Properties make sure the Paper Type setting...

Страница 120: ...ntrast From the printer control panel Quality menu change these settings THE PAPER HAS ABSORBED MOISTURE DUE TO HIGH HUMIDITY Load paper from a fresh package Store paper in its original wrapper until...

Страница 121: ...l Quality menu change these settings THE PAPER HAS ABSORBED MOISTURE DUE TO HIGH HUMIDITY Load paper from a fresh package Store paper in its original wrapper until you use it CHECK THE PAPER Avoid tex...

Страница 122: ...e solutions Try one or more of the following THE TONER CARTRIDGE MAY BE DEFECTIVE Replace the toner cartridge THERE IS TONER IN THE PAPER PATH Contact Customer Support Toner rubs off These are possibl...

Страница 123: ...ly transparencies recommended by the printer manufacturer CHECK THE PAPER TYPE SETTING Load transparencies and make sure the Paper Type setting is set to Transparency Streaked horizontal lines These a...

Страница 124: ...ROM A SPECIFIC SOURCE From Print Properties the Print dialog or the printer control panel select another tray or feeder to feed paper for the job THE TONER CARTRIDGE IS DEFECTIVE Replace the toner car...

Страница 125: ...he tray or feeder MAKE SURE THE TONER IS DISTRIBUTED EVENLY IN THE TONER CARTRIDGE Removethe tonercartridgeandshakeitfromsideto sideto redistribute thetonertoextendthelifeofthecartridge and then reins...

Страница 126: ...dy taken to find a solution You need to know your printer model type and serial number For more information see the label on the inside top front cover of the printer The serial number is also listed...

Страница 127: ...ts or the programs described may be made at any time Referencesin this publication to products programs or services do notimply thatthe manufacturer intendsto make these available in all countries in...

Страница 128: ...d to provide reasonable protection against harmful interference when the equipment is operated in a residential installation This equipment generates uses and can radiate radio frequency energy and if...

Страница 129: ...ance with ISO 7779 and reported in conformance with ISO 9296 Note Some modes may not apply to your product 1 meter average sound pressure dBA Printing 53 dBA Ready N A Values are subject to change See...

Страница 130: ...ries Alliance www eiae org Temperature information Ambient temperature 16 C 32 C 60 F 90 F Shipping and storage temperature 20 C 40 C 4 F 104 F Laser notice The printer is certified in the U S to conf...

Страница 131: ...canning hard copy documents NA Ready The product is waiting for a print job 12 Power Saver The product is in energy saving mode 11 Off The product is plugged into a wall outlet but the power switch is...

Страница 132: ...ge Industry Canada compliance statement This Class B digital apparatus meets all requirements of the Canadian Interference Causing Equipment Standard ICES 003 Avis de conformit aux normes de l industr...

Страница 133: ...nada l utilisation d une antenne de gain sup rieur est strictement interdite Pouremp chertouteinterf renceradioauservicefaisantl objetd unelicence cetappareildoit treutilis l int rieur et loin des fen...

Страница 134: ...eutsch Hiermit erkl rt Lexmark International Inc dass sich das Ger t dieses Ger t in bereinstimmung mit den grundlegenden Anforderungen und den brigen einschl gigen Bestimmungen der Richtlinie 1999 5...

Страница 135: ...pr slu n ustanovenia smernice 1999 5 ES Slovensko Lexmark International Inc izjavlja da je ta izdelek v skladu z bistvenimi zahtevami in ostalimi relevantnimi dolo ili direktive 1999 5 ES Svenska H rm...

Страница 136: ...sent this product for warranty service remove all print cartridges programs data and removable storage media unless directed otherwise by Lexmark Forfurtherexplanationofyourwarrantyalternativesandthen...

Страница 137: ...you This limited warranty gives you specific legal rights You may also have other rights that vary from state to state LEXMARK SOFTWARE LIMITED WARRANTY AND LICENSE AGREEMENT PLEASE READ CAREFULLY BEF...

Страница 138: ...SOFTWARE LICENSE AGREEMENT SHALL BE TO SEEK TO RECOVER ONE OF THESE AMOUNTS UPON PAYMENT OF WHICH LEXMARK SHALL BE RELEASED AND DISCHARGED OF ALL FURTHER OBLIGATIONS AND LIABILITY TO YOU IN NO EVENT W...

Страница 139: ...ty 8 LIMITATION ON REVERSE ENGINEERING You may not alter decrypt reverse engineer reverse assemble reverse compile or otherwise translate the Software Program except as and to the extent expressly per...

Страница 140: ...ent to this License AgreementthatisincludedwiththeSoftwareProgram istheentireagreementbetweenyouandLexmarkrelating to the Software Program Except as otherwise provided for herein these termsand condit...

Страница 141: ...evice status on Embedded Web Server 89 checking virtual display on Embedded Web Server 89 cleaning exterior of the printer 82 Close front door 105 configurations printer 9 Configure MP menu 59 configu...

Страница 142: ...der 50 letterhead in trays 50 multipurpose feeder 36 trays 32 M memory card installing 15 troubleshooting 114 menu settings loading on multiple printers 91 menu settings page printing 23 menus Configu...

Страница 143: ...l 9 configurations 9 minimum clearances 8 moving 88 selecting a location 8 shipping 88 printer control panel factory defaults restoring 91 printer messages 30 yy Invalid refill change cartridge 106 31...

Страница 144: ...unresponsive printer 110 contacting Customer Support 126 solving basic printer problems 110 troubleshooting display display is blank 110 display shows only diamonds 110 troubleshooting paper feed mes...

Отзывы: