


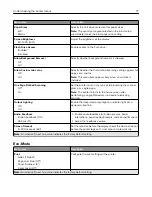


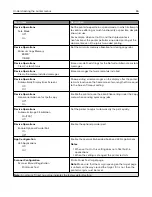


Accessibility
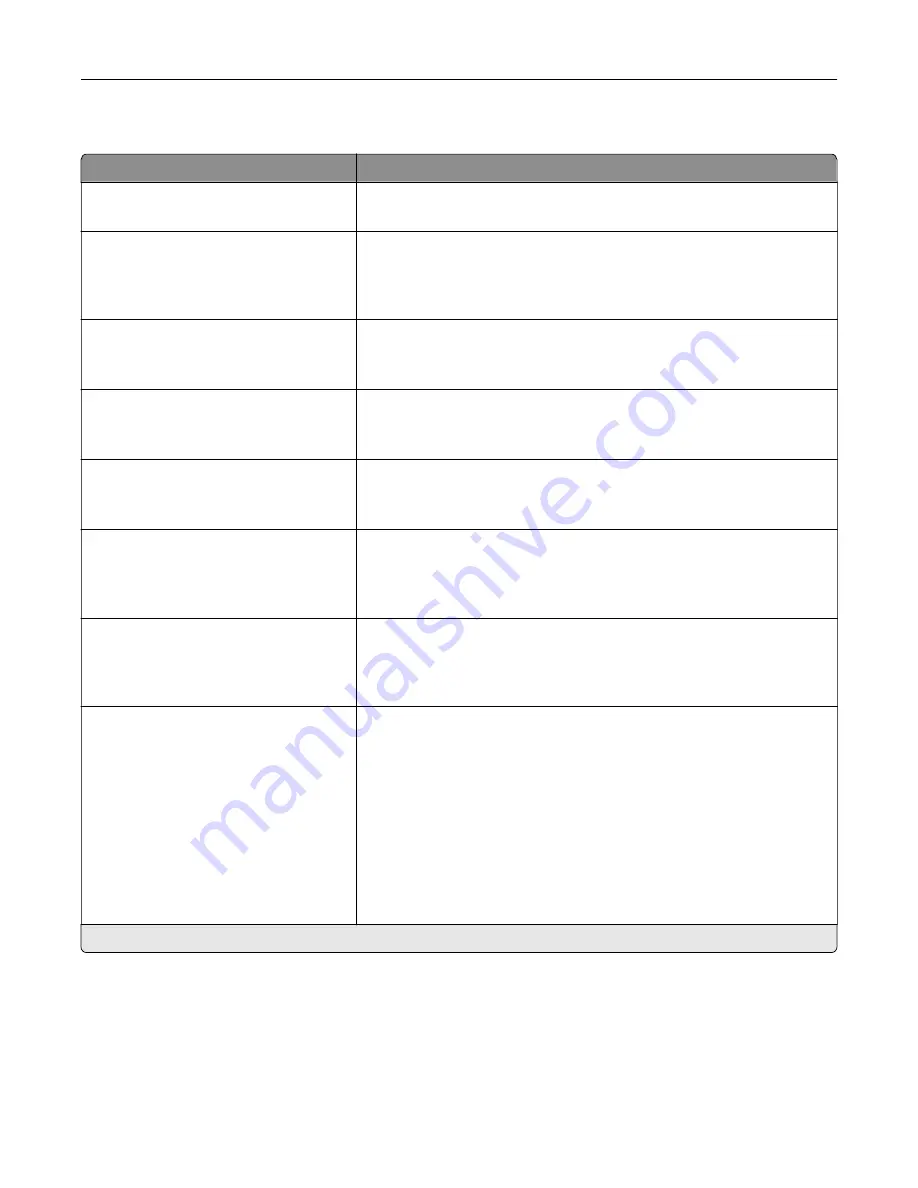
Menu item
Description
Duplicate Key Strike Interval
0–5 (0*)
Set the interval in seconds during which the printer ignores duplicate key
presses on an attached keyboard.
Key Repeat Initial Delay
0.25–5 (1*)
Set the initial length of delay in seconds before a repeating key starts
repeating.
Note:
This menu item appears only when a keyboard is attached to the
printer.
Key Repeat Rate
0.5–30 (30*)
Set the number of presses per second for a repeating key.
Note:
This menu item appears only when a keyboard is attached to the
printer.
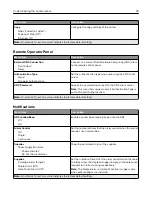
Prolong Screen Timeout
Off*
On
Let the user remain in the same location and reset the Screen Timeout
timer when it expires instead of returning to the home screen.
Headphone Volume
1–10 (5*)
Adjust the headphone volume.
Note:
This menu item appears only when a headphone is attached to
the printer.
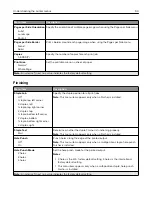
Enable Voice Guidance When
Headphone Is Attached
Off*
On
Enable Voice Guidance when a headphone is attached to the printer.
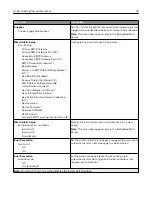
Speak Passwords/PINs
Off*
On
Set the printer to read out loud passwords or personal identification
numbers.
Note:
This menu item appears only when a headphone or a speaker is
attached to the printer.
Speech Rate
Very Slow
Slow
Normal*
Fast
Faster
Very Fast
Rapid
Very Rapid
Fastest
Set the Voice Guidance speech rate.
Note:
This menu item appears only when a headphone or a speaker is
attached to the printer.
Note:
An asterisk (*) next to a value indicates the factory default setting.
Understanding the printer menus
82
Содержание CX920
Страница 164: ... Scanner glass Scanner glass pad 3 Close the scanner cover Maintaining the printer 164 ...
Страница 167: ...2 Remove and then empty the hole punch box 3 Insert the hole punch box 4 Close the door Maintaining the printer 167 ...
Страница 172: ...5 Insert the new toner cartridge 6 Remove the waste toner bottle Maintaining the printer 172 ...
Страница 177: ...8 Insert the waste toner bottle and then close the door Maintaining the printer 177 ...
Страница 189: ...Replacing the ADF separator roller 1 Turn off the printer 2 Remove the ADF separator pad Maintaining the printer 189 ...
Страница 192: ...2 Open door B 3 Remove the ADF pick and feed rollers 4 Unpack the new pick and feed rollers Maintaining the printer 192 ...
Страница 194: ...2 Remove the empty staple cartridge 3 Unpack the new staple cartridge Maintaining the printer 194 ...
Страница 207: ... Below the fuser area Duplex area Clearing jams 207 ...
Страница 212: ...2 Open door J Clearing jams 212 ...
Страница 214: ... Areas H1 and H2 Area H6 Clearing jams 214 ...
Страница 218: ...2 Remove the staple cartridge holder 3 Remove the loose staples Clearing jams 218 ...
Страница 220: ...2 Remove the staple cartridge holder 3 Remove the loose staples Clearing jams 220 ...
Страница 222: ...2 Remove the staple cartridge holder 3 Remove the loose staples Clearing jams 222 ...
Страница 272: ...6 Remove the controller board shield 7 Unpack the printer hard disk Upgrading and migrating 272 ...
Страница 276: ...6 Remove the controller board shield Upgrading and migrating 276 ...
Страница 279: ...4 Remove the controller board shield Upgrading and migrating 279 ...
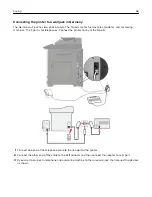
Страница 281: ...8 Attach the thumbscrews 9 Connect the wireless print server to the controller board Upgrading and migrating 281 ...
Страница 285: ...7 Connect the tray connector to the printer 8 Open trays 2 and 3 Upgrading and migrating 285 ...
Страница 290: ...9 Remove the stabilizing feet from the tray Upgrading and migrating 290 ...
Страница 294: ...17 Secure the tray cable with the clamp Upgrading and migrating 294 ...
Страница 295: ...18 Connect the tray cable to the printer 19 Attach the tray cable cover Upgrading and migrating 295 ...
Страница 296: ...20 Slide the tray until it clicks into place 21 Attach the stabilizing feet to the printer Upgrading and migrating 296 ...
Страница 301: ...7 Remove the paper guides 8 Attach the sensor cover Upgrading and migrating 301 ...
Страница 307: ...8 Attach the finisher to the printer Upgrading and migrating 307 ...


