


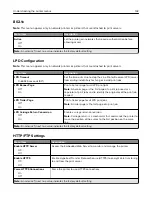


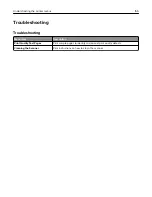
802.1x
Note:
This menu appears only in network printers or printers that are attached to print servers.
Menu item
Description
Active
Off*
On
Let the printer join networks that require authentication before
allowing access.
Note:
An asterisk (*) next to a value indicates the factory default setting.
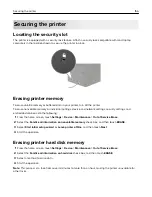
LPD Configuration
Note:
This menu appears only in network printers or printers that are attached to print servers.
Menu item
Description
LPD Timeout
0–65535 seconds (90*)
Set the time
‑
out value to stop the Line Printer Daemon (LPD) server
from waiting indefinitely for hung or invalid print jobs.
LPD Banner Page
Off*
On
Print a banner page for all LPD print jobs.
Note:
A banner page is the first page of a print job used as a
separator of print jobs and to identify the originator of the print job
request.
LPD Trailer Page
Off*
On
Print a trailer page for all LPD print jobs.
Note:
A trailer page is the last page of a print job.
LPD Carriage Return Conversion
Off*
On
Enable carriage return conversion.
Note:
Carriage return is a mechanism that commands the printer to
move the position of the cursor to the first position on the same
line.
Note:
An asterisk (*) next to a value indicates the factory default setting.
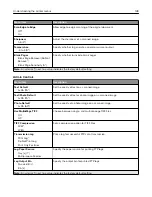
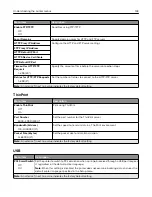
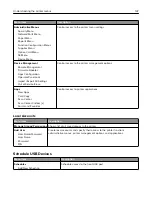
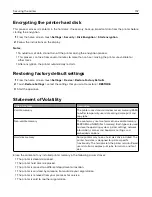
HTTP/FTP Settings
Menu item
Description
Enable HTTP Server
Off
On*
Access the Embedded Web Server to monitor and manage the printer.
Enable HTTPS
Off
On*
Enable Hypertext Transfer Protocol Secure (HTTPS) to encrypt data transferring
to and from the print server.
Force HTTPS Connections
On
Off*
Force the printer to use HTTPS connections.
Note:
An asterisk (*) next to a value indicates the factory default setting.
Understanding the printer menus
142
Содержание CX920
Страница 164: ... Scanner glass Scanner glass pad 3 Close the scanner cover Maintaining the printer 164 ...
Страница 167: ...2 Remove and then empty the hole punch box 3 Insert the hole punch box 4 Close the door Maintaining the printer 167 ...
Страница 172: ...5 Insert the new toner cartridge 6 Remove the waste toner bottle Maintaining the printer 172 ...
Страница 177: ...8 Insert the waste toner bottle and then close the door Maintaining the printer 177 ...
Страница 189: ...Replacing the ADF separator roller 1 Turn off the printer 2 Remove the ADF separator pad Maintaining the printer 189 ...
Страница 192: ...2 Open door B 3 Remove the ADF pick and feed rollers 4 Unpack the new pick and feed rollers Maintaining the printer 192 ...
Страница 194: ...2 Remove the empty staple cartridge 3 Unpack the new staple cartridge Maintaining the printer 194 ...
Страница 207: ... Below the fuser area Duplex area Clearing jams 207 ...
Страница 212: ...2 Open door J Clearing jams 212 ...
Страница 214: ... Areas H1 and H2 Area H6 Clearing jams 214 ...
Страница 218: ...2 Remove the staple cartridge holder 3 Remove the loose staples Clearing jams 218 ...
Страница 220: ...2 Remove the staple cartridge holder 3 Remove the loose staples Clearing jams 220 ...
Страница 222: ...2 Remove the staple cartridge holder 3 Remove the loose staples Clearing jams 222 ...
Страница 272: ...6 Remove the controller board shield 7 Unpack the printer hard disk Upgrading and migrating 272 ...
Страница 276: ...6 Remove the controller board shield Upgrading and migrating 276 ...
Страница 279: ...4 Remove the controller board shield Upgrading and migrating 279 ...
Страница 281: ...8 Attach the thumbscrews 9 Connect the wireless print server to the controller board Upgrading and migrating 281 ...
Страница 285: ...7 Connect the tray connector to the printer 8 Open trays 2 and 3 Upgrading and migrating 285 ...
Страница 290: ...9 Remove the stabilizing feet from the tray Upgrading and migrating 290 ...
Страница 294: ...17 Secure the tray cable with the clamp Upgrading and migrating 294 ...
Страница 295: ...18 Connect the tray cable to the printer 19 Attach the tray cable cover Upgrading and migrating 295 ...
Страница 296: ...20 Slide the tray until it clicks into place 21 Attach the stabilizing feet to the printer Upgrading and migrating 296 ...
Страница 301: ...7 Remove the paper guides 8 Attach the sensor cover Upgrading and migrating 301 ...
Страница 307: ...8 Attach the finisher to the printer Upgrading and migrating 307 ...


