


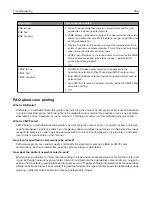


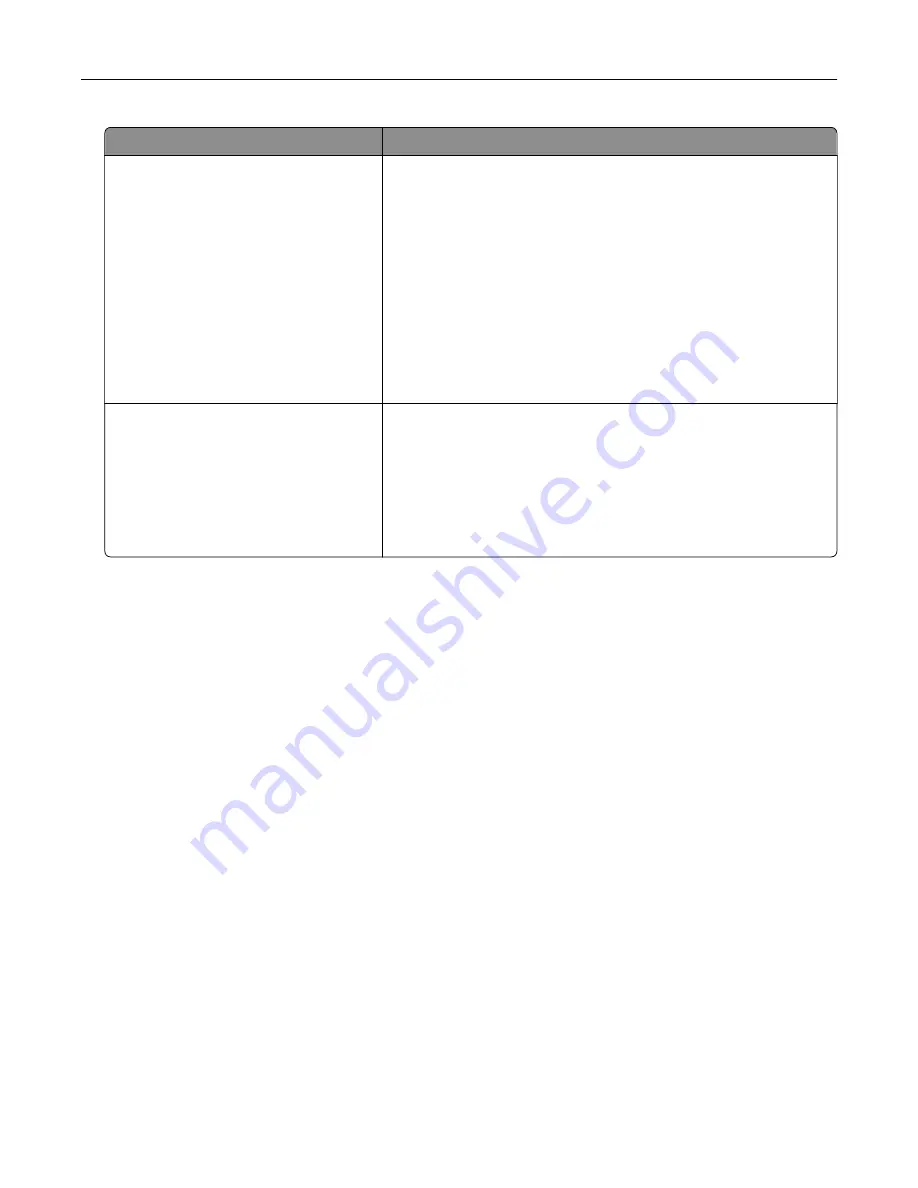
Object type
Color conversion tables
RGB Image
RGB Text
RGB Graphics
•
Vivid—Produces brighter, more saturated colors and may be
applied to all incoming color formats.
•
sRGB Display—Produces an output that approximates the colors
shown on a computer monitor. Black toner usage is optimized for
printing photographs.
•
Display
‑
True Black—Produces an output that approximates the
colors shown on a computer monitor. This setting uses only black
toner to create all levels of neutral gray.
•
sRGB Vivid—Provides an increased color saturation for the sRGB
Display color correction. Black toner usage is optimized for
printing business graphics.
•
Off
CMYK Image
CMYK Text
CMYK Graphics
•
US CMYK—Applies color correction to approximate the
Specifications for Web Offset Publishing (SWOP) color output.
•
Euro CMYK—Applies color correction to approximate Euroscale
color output.
•
Vivid CMYK—Increases the color saturation of the US CMYK color
correction setting.
•
Off
FAQ about color printing
What is RGB color?
RGB color is a method of describing colors by indicating the amount of red, green, or blue used to produce
a certain color. Red, green, and blue light can be added in various amounts to produce a large range of colors
observed in nature. Computer screens, scanners, and digital cameras use this method to display colors.
What is CMYK color?
CMYK color is a method of describing colors by indicating the amount of cyan, magenta, yellow, and black
used to reproduce a particular color. Cyan, magenta, yellow, and black inks or toners can be printed in various
amounts to produce a large range of colors observed in nature. Printing presses, inkjet printers, and color
laser printers create colors in this manner.
How is color specified in a document to be printed?
Software programs are used to specify and modify the document color using RGB or CMYK color
combinations. For more information, see the software program Help topics.
How does the printer know what color to print?
When printing a document, information describing the type and color of each object is sent to the printer and
is passed through color conversion tables. Color is translated into the appropriate amounts of cyan, magenta,
yellow, and black toner used to produce the color you want. The object information determines the application
of color conversion tables. For example, it is possible to apply one type of color conversion table to text while
applying a different color conversion table to photographic images.
Troubleshooting
256
Содержание CX920
Страница 164: ... Scanner glass Scanner glass pad 3 Close the scanner cover Maintaining the printer 164 ...
Страница 167: ...2 Remove and then empty the hole punch box 3 Insert the hole punch box 4 Close the door Maintaining the printer 167 ...
Страница 172: ...5 Insert the new toner cartridge 6 Remove the waste toner bottle Maintaining the printer 172 ...
Страница 177: ...8 Insert the waste toner bottle and then close the door Maintaining the printer 177 ...
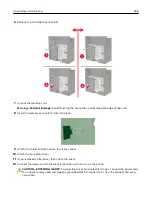
Страница 189: ...Replacing the ADF separator roller 1 Turn off the printer 2 Remove the ADF separator pad Maintaining the printer 189 ...
Страница 192: ...2 Open door B 3 Remove the ADF pick and feed rollers 4 Unpack the new pick and feed rollers Maintaining the printer 192 ...
Страница 194: ...2 Remove the empty staple cartridge 3 Unpack the new staple cartridge Maintaining the printer 194 ...
Страница 207: ... Below the fuser area Duplex area Clearing jams 207 ...
Страница 212: ...2 Open door J Clearing jams 212 ...
Страница 214: ... Areas H1 and H2 Area H6 Clearing jams 214 ...
Страница 218: ...2 Remove the staple cartridge holder 3 Remove the loose staples Clearing jams 218 ...
Страница 220: ...2 Remove the staple cartridge holder 3 Remove the loose staples Clearing jams 220 ...
Страница 222: ...2 Remove the staple cartridge holder 3 Remove the loose staples Clearing jams 222 ...
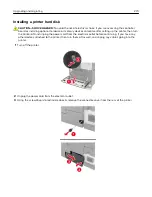
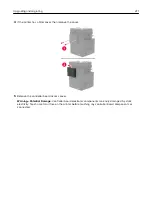
Страница 272: ...6 Remove the controller board shield 7 Unpack the printer hard disk Upgrading and migrating 272 ...
Страница 276: ...6 Remove the controller board shield Upgrading and migrating 276 ...
Страница 279: ...4 Remove the controller board shield Upgrading and migrating 279 ...
Страница 281: ...8 Attach the thumbscrews 9 Connect the wireless print server to the controller board Upgrading and migrating 281 ...
Страница 285: ...7 Connect the tray connector to the printer 8 Open trays 2 and 3 Upgrading and migrating 285 ...
Страница 290: ...9 Remove the stabilizing feet from the tray Upgrading and migrating 290 ...
Страница 294: ...17 Secure the tray cable with the clamp Upgrading and migrating 294 ...
Страница 295: ...18 Connect the tray cable to the printer 19 Attach the tray cable cover Upgrading and migrating 295 ...
Страница 296: ...20 Slide the tray until it clicks into place 21 Attach the stabilizing feet to the printer Upgrading and migrating 296 ...
Страница 301: ...7 Remove the paper guides 8 Attach the sensor cover Upgrading and migrating 301 ...
Страница 307: ...8 Attach the finisher to the printer Upgrading and migrating 307 ...


