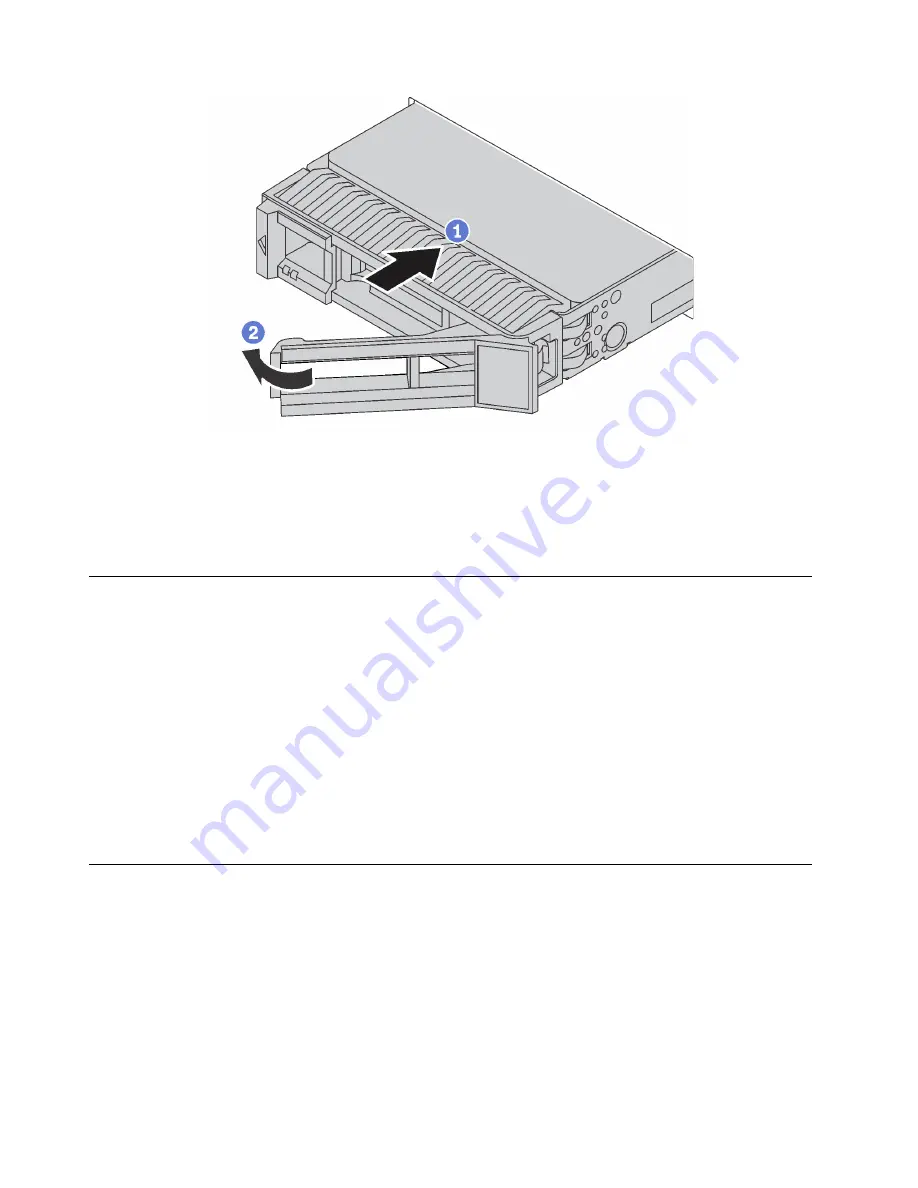
Figure 71. Hot-swap drive installation
Step 1. Slide the release latch to open the tray handle. Then, slide the drive into the drive bay until it snaps
into position.
Step 2. Close the tray handle to lock the drive in place.
Cable the server
Attach all external cables to the server. Typically, you will need to connect the server to a power source, to
the data network, and to storage. In addition, you will need to connect the server to the management
network.
Connect to power
Connect the server to power.
Connect to the network
Connect the server to the network.
Connect to storage
Connect the server to any storage devices.
Power on the server
After the server performs a short self-test (power status LED flashes quickly) when connected to input power,
it enters a standby state (power status LED flashes once per second).
The server can be turned on (power LED on) in any of the following ways:
• You can press the power button.
• The server can restart automatically after a power interruption.
• The server can respond to remote power-on requests sent to the Lenovo XClarity Controller.
For information about powering off the server, see “Power off the server” on page 109.
108
ThinkSystem ST550 Setup Guide
Содержание ThinkSystem ST550
Страница 1: ...ThinkSystem ST550 Setup Guide Machine Types 7X09 and 7X10 ...
Страница 4: ...ii ThinkSystem ST550 Setup Guide ...
Страница 60: ...56 ThinkSystem ST550 Setup Guide ...
Страница 68: ...Step 2 Remove the PCIe adapter holder in the direction as shown 64 ThinkSystem ST550 Setup Guide ...
Страница 114: ...110 ThinkSystem ST550 Setup Guide ...
Страница 122: ...118 ThinkSystem ST550 Setup Guide ...
Страница 130: ...126 ThinkSystem ST550 Setup Guide ...
Страница 132: ...128 ThinkSystem ST550 Setup Guide ...
Страница 135: ......
Страница 136: ......


