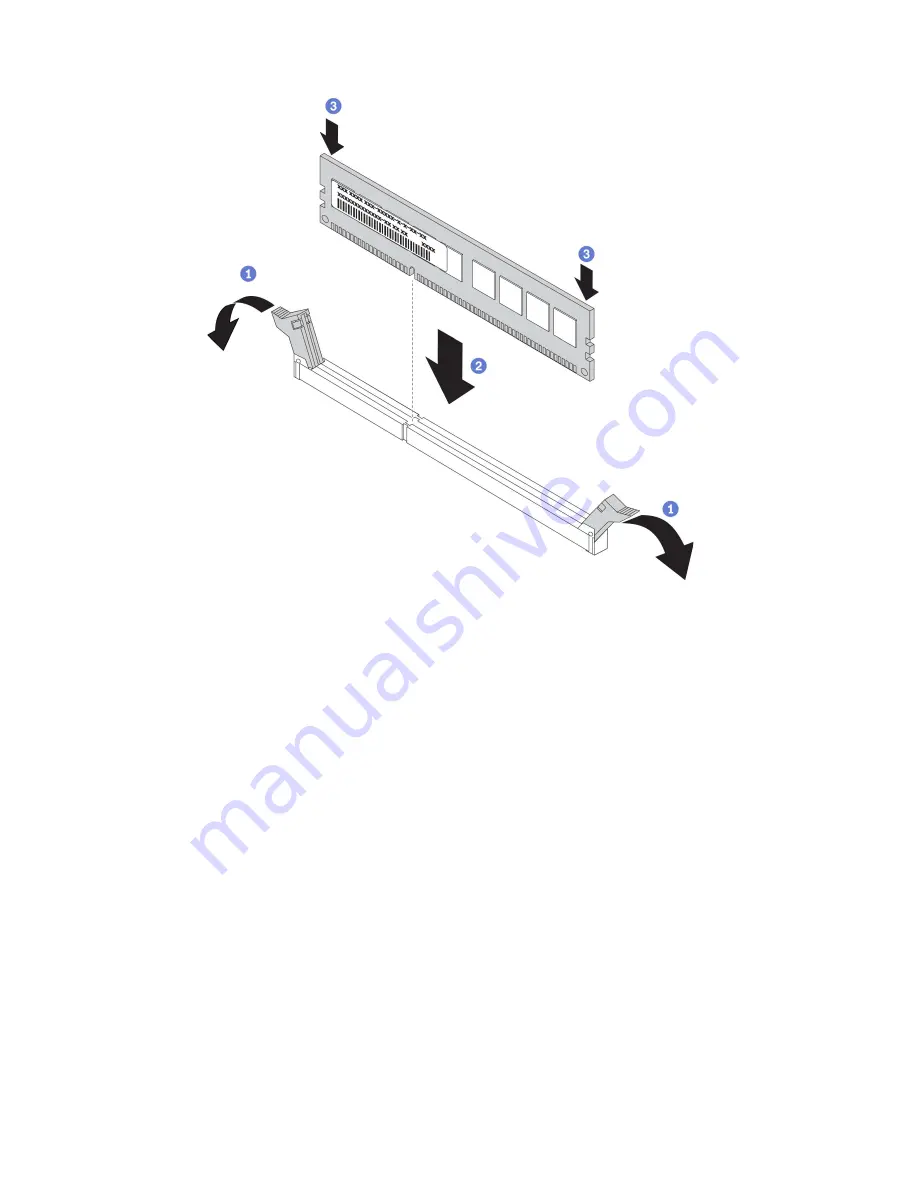
Figure 35. DIMM installation
Step 1. Open the retaining clips on each end of the DIMM slot. Then, install the DIMM into the slot.
Attention:
To avoid breaking the retaining clips or damaging the DIMM slots, open and close the
clips gently.
Step 2. Firmly press the DIMM straight down into the slot by applying pressure on both ends of the DIMM
simultaneously. The retaining clips snap into the locked position when the DIMM is firmly seated in
the slot.
Note:
If there is a gap between the DIMM and the retaining clips, the DIMM has not been correctly
inserted; open the retaining clips, remove the DIMM, and then reinsert it.
DIMM installation rules
DIMMs must be installed in a specific order based on the memory configuration that you implement on your
server.
Your server has 12 DIMM slots. It supports up to 6 DIMMs when one processor is installed, and up to 12
DIMMs when two processors are installed. It has the following features:
For Intel Xeon SP Gen 1 processors
• Minimum: 8 GB (one processor and one 8GB registered DIMM (RDIMM)installed)
• Maximum:
– 384 GB using RDIMMs (two processors and twelve 32 GB registered DIMMs (RDIMMs)installed)
– 768 GB using LRDIMMs (two processors and twelve 64 GB load-reduced DIMMs (LRDIMMs) installed)
• Type:
70
ThinkSystem ST550 Setup Guide
Содержание ThinkSystem ST550
Страница 1: ...ThinkSystem ST550 Setup Guide Machine Types 7X09 and 7X10 ...
Страница 4: ...ii ThinkSystem ST550 Setup Guide ...
Страница 60: ...56 ThinkSystem ST550 Setup Guide ...
Страница 68: ...Step 2 Remove the PCIe adapter holder in the direction as shown 64 ThinkSystem ST550 Setup Guide ...
Страница 114: ...110 ThinkSystem ST550 Setup Guide ...
Страница 122: ...118 ThinkSystem ST550 Setup Guide ...
Страница 130: ...126 ThinkSystem ST550 Setup Guide ...
Страница 132: ...128 ThinkSystem ST550 Setup Guide ...
Страница 135: ......
Страница 136: ......


