© Copyright Lenovo 2017
Chapter 5: Initializing the NE1032T
81
Connecting to the Switch
Use
the
switch
Command
‐
Line
Interface
(CLI)
to
perform
additional
configuration
tasks.
You
can
access
the
CLI
using
the
serial
console
port
or
management
port.
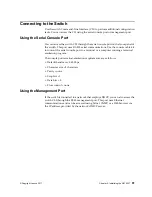
Using the Serial Console Port
You
can
access
the
switch
CLI
through
the
serial
console
port
on
the
front
panel
of
the
switch.
This
port
uses
RS
‐
232
serial
communications.
Use
the
console
cable
kit
to
connect
the
serial
console
port
to
a
terminal
or
a
computer
running
a
terminal
emulation
program.
The
console
port
terminal
‐
emulation
requirements
are
as
follows:
Default
baud
rate
=
9,600
bps
Character
size
=
8
characters
Parity
=
none
Stop
bits
=
1
Data
bits
=
8
Flow
control
=
none
Using the Management Port
If
the
switch
is
connected
to
a
network
that
employs
DHCP,
you
can
also
access
the
switch
CLI
through
the
RJ
‐
45
management
port.
This
port
uses
Ethernet
communications
and
can
be
accessed
using
Telnet,
SNMP,
or
a
Web
browser
via
the
IP
address
provided
by
the
network’s
DHCP
server.
Содержание ThinkSystem NE1032T
Страница 1: ...Lenovo ThinkSystem NE1032T RackSwitch Installation Guide For Lenovo Cloud Network OS ...
Страница 6: ...6 Lenovo G8296 Installation Guide ...
Страница 14: ...14 NE1032T Installation Guide ...
Страница 18: ...18 NE1032T Installation Guide ...
Страница 19: ... Copyright Lenovo 2017 19 Chapter 2 Switch Components This chapter describes the NE1032T hardware components ...
Страница 32: ...32 NE1032T Installation Guide ...
Страница 78: ...78 NE1032T Installation Guide ...
Страница 94: ...94 NE1032T Installation Guide ...
Страница 100: ...100 NE1032T Installation Guide ...
Страница 120: ...120 NE1032T Installation Guide ...


