


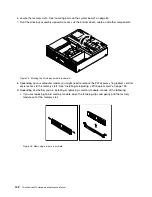
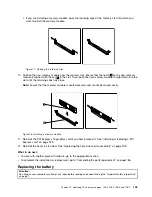


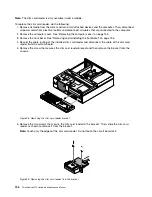
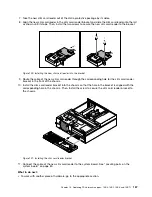
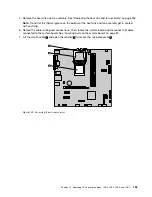
7. Remove the four screws that secure the solid-state drive to the bracket. Then, slide the drive as shown
to remove it from the bracket.
Figure 88. Removing the solid-state drive from the bracket
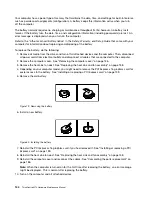
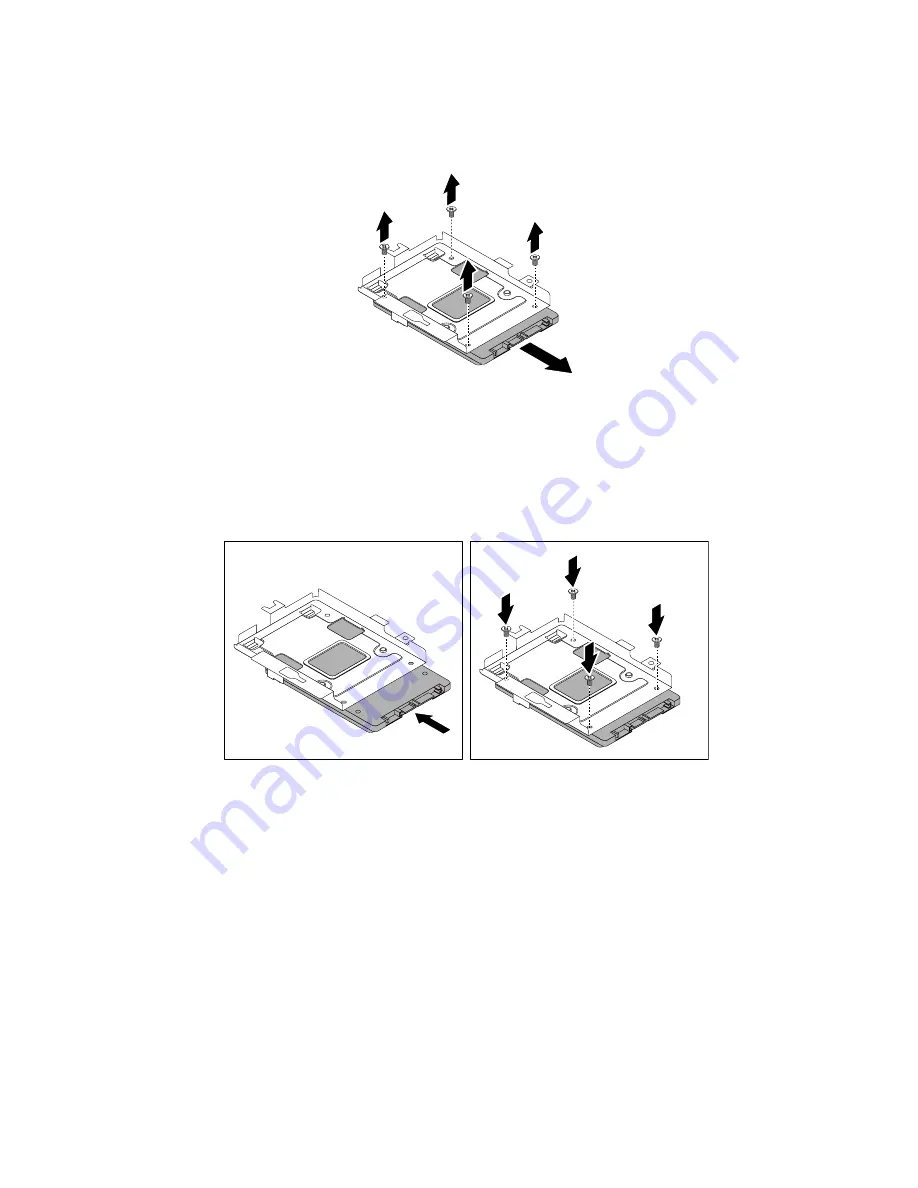
8. Take the new solid-state drive out of the static-protective package.
9. Slide the new solid-state drive into the solid-state drive bracket as shown until the four holes in the
drive are aligned with the corresponding holes in the bracket. Then, install the four screws to secure the
new solid-state drive to the bracket.
Figure 89. Installing the solid-state drive into the bracket
150
ThinkCentre M73 Hardware Maintenance Manual
Содержание 10AX
Страница 6: ...iv ThinkCentre M73 Hardware Maintenance Manual ...
Страница 8: ...2 ThinkCentre M73 Hardware Maintenance Manual ...
Страница 15: ...Chapter 2 Safety information 9 ...
Страница 19: ...Chapter 2 Safety information 13 ...
Страница 20: ...1 2 14 ThinkCentre M73 Hardware Maintenance Manual ...
Страница 21: ...1 2 Chapter 2 Safety information 15 ...
Страница 26: ...1 2 20 ThinkCentre M73 Hardware Maintenance Manual ...
Страница 27: ...1 2 Chapter 2 Safety information 21 ...
Страница 30: ...24 ThinkCentre M73 Hardware Maintenance Manual ...
Страница 34: ...28 ThinkCentre M73 Hardware Maintenance Manual ...
Страница 40: ...34 ThinkCentre M73 Hardware Maintenance Manual ...
Страница 74: ...68 ThinkCentre M73 Hardware Maintenance Manual ...
Страница 92: ...86 ThinkCentre M73 Hardware Maintenance Manual ...
Страница 140: ...134 ThinkCentre M73 Hardware Maintenance Manual ...
Страница 194: ...188 ThinkCentre M73 Hardware Maintenance Manual ...
Страница 248: ...242 ThinkCentre M73 Hardware Maintenance Manual ...
Страница 258: ...252 ThinkCentre M73 Hardware Maintenance Manual ...
Страница 259: ......
Страница 260: ......