Page 35
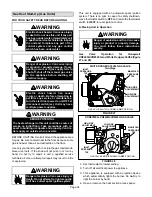
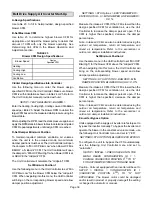
5- Turn gas valve switch to
OFF
. See figure 27. On
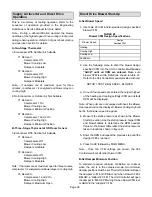
Honeywell VR8305Q gas valves, turn the knob on the
gas valve clockwise
to
“OFF”
. Do not force. See
figure 28.
6- Wait five (5) minutes to clear out any gas. If you then
smell gas,
STOP!
Immediately call your
gas supplier from a neighbor's phone. Follow the gas
supplier's instructions. If you do not smell gas, go to
the next step.
7- Turn gas valve switch to
ON
. See figure 27. On
Honeywell VR8305Q gas valves, turn the knob on the
gas valve counterclockwise
to
“ON”
. Do not
force. See figure 28.
8- Close or replace the heat section access panel.
9- Turn on all electrical power to appliance.
10- Set thermostat to desired setting.
11- The ignition sequence will start.
12- If the appliance does not light the first time (gas line
not fully purged), it will attempt up to two more
ignitions before locking out.
13- If lockout occurs, repeat steps 1 through 10.
14- If the appliance will not operate, follow the
instructions “Turning Off Gas to Appliance” and call
your service technician or gas supplier.
Turning Off Gas to Unit
1- If using an electromechanical thermostat, set to the
lowest setting.
2- Before performing any service, turn off all electrical
power to the appliance.
3- Open or remove the heat section access panel.
4- Turn gas valve switch to
OFF
. On Honeywell
VR8305Q gas valves, turn the knob on the gas valve
clockwise
to
“OFF”
. Do not force.
5- Close or replace the heat section access panel.
WARNING
Danger of explosion. Can cause injury or
death. Do not attempt to light manually.
Unit has a direct spark ignition system.
Heating Operation and Adjustments
(Gas Units)
A-Heating Sequence of Operation
1- On a heating demand the combustion air inducer
starts immediately.
2- Combustion air pressure switch proves inducer
operation. After a 30-second pre-purge, power is
allowed to ignition control. Switch is factory set and
requires no adjustment.
3- Spark ignitor energizes and gas valve solenoid
opens.
4- Spark ignites gas, ignition sensor proves the flame
and combustion continues.
5- If flame is not detected after first ignition trial, ignition
control will repeat steps 3 and 4 two more times
before locking out the gas valve.
6- For troubleshooting purposes, an ignition attempt
after lock out may be re-established manually. Move
thermostat to “OFF” and return thermostat switch to
“HEAT” position.
B-Limit Controls
Limit controls are factory-set and are not adjustable. The
primary limit is located on the blower deck to the right of
the blower housing.
C-Heating Adjustment
Main burners are factory-set and do not require adjustment.
The following manifold pressures are listed on the gas valve.
Natural Gas Units - Low Fire - 1.6” w.c.
(not adjustable)
Natural Gas Units - High Fire - 3.7” w.c.
LP Gas Units - Low Fire - 5.5” w.c.
(not adjustable)
LP Gas Units - High Fire - 10.5” w.c.
Electric Heat Start-Up (Cooling Units)
Factory- or Field-Installed Option
Electric heat will stage on and cycle with thermostat
demand. Number of stages of electric heat will vary
depending on electric heat assembly. See electric heat
wiring diagram on unit for sequence of operation.
SCR Electric Heat Controller (LCH Units)
Optional factory-installed SCR (A38) will provide small
amounts of power to the electric heat elements to
efficiently maintain warm duct air temperatures when
there is no heating demand. The SCR maintains duct
air temperature based on input from a field-provided
and installed thermostat (A104) and duct sensor
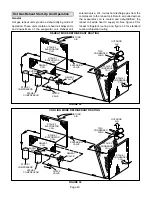
(RT20). SCR is located in the electric heat
compartment in front of the elements. Use only with a
thermostat or Novar control system.
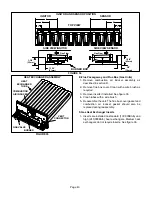
Use the instructions provided with the thermostat to set
DIP switches as follows: S1 On, S2 Off, S3 Off. Use the
instructions provided with the duct sensor to install sensor
away from electric element radiant heat and in a location
where discharge air is a mixed average temperature.
Once power is supplied to unit, zero SCR as follows:
1- Adjust thermostat (A104) to minimum position.
2- Use a small screwdriver to slowly turn the ZERO
potentiometer on the SCR until the LED turns solid red.
3- Very slowly adjust the potentiometer the opposite
direction until the LED turns off.


