Page 38
Supply Air Inverter and Direct Drive
Operation
This is a summary of cooling operation. Refer to the
sequence of operation provided in the Engineering
Handbook or Service Manual for more detail.
Note - During a dehumidification demand the blower
operates at the highest speed. Free cooling is locked-out
during reheat operation. Refer to hot gas reheat start-up
and operation section for details.
A-Two-Stage Thermostat
1-Economizer With Outdoor Air Suitable
Y1 Demand -
Compressors Off
Blower Cooling Low
Dampers modulate
Y2 Demand -
Compressors Off
Blower Cooling High
Dampers Modulate
Note - If dampers are at maximum open for three
minutes, compressor 1 is energized and blower stays on
cooling high.
2-No Economizer or Outdoor Air Not Suitable
Y1 Demand -
Compressor 1 On
Blower Cooling Low
Dampers Minimum Position
Y2 Demand -
Compressor 1 and 2 On
Blower Cooling High
Dampers Minimum Position
B-Three-Stage Thermostat OR Room Sensor
1-Economizer With Outdoor Air Suitable
Y1 Demand -
Compressors Off
Blower Cooling Low
Dampers modulate
Y2 Demand -
Compressors Off
Blower Cooling High
Dampers Modulate
Note - If dampers are at maximum open for three minutes,
compressor 1 is energized and blower stays on cooling high.
Y3 Demand -
Compressors 1 and 2 On
Blower Cooling High
Dampers Maximum Open
Direct Drive Blower Start-Up
A-Set Blower Speed
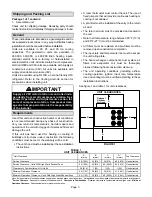
1- Use table 26 to fill in field-provided, design specified
blower CFM.
TABLE 26
Blower CFM Design Specifications
Blower Speed
Design
Specified CFM
Heating
Cooling High
Cooling Low
Ventilation
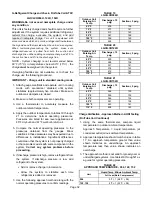
2- Use the following menu to enter the blower design
specified CFM into the Unit Controller.
Don't press
“SAVE” until all CFM are entered.
Make sure
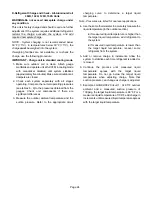
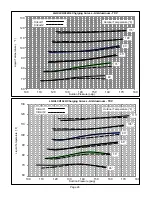
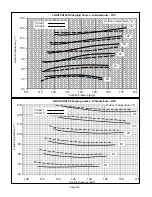
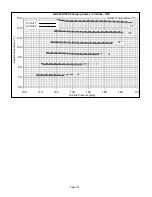
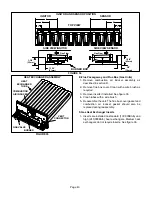
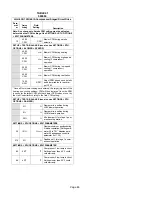
blower CFM is within limitations shown in table 27.
Refer to the Unit Controller manual provided with unit.
SETUP > TEST & BALANCE > BLOWER
3- Once all four speeds are entered, the target (highest
of the heating and cooling settings) CFM and default
RPM will be displayed.
Note - When units are not equipped with heat, the Blower
Heat speed will not be displayed. Blower Cooling High will
be the first blower speed to appear.
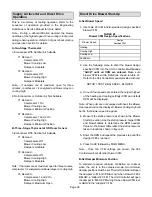
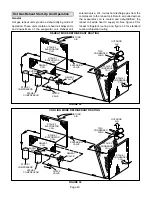
4- Measure the static pressure as shown in the
Blower
Start-Up
section. Use the static pressure, target CFM
and blower tables to determine the RPM needed.
Values in the blower table reflect the static pressures
taken in locations shown in figure 21.
5- Enter the RPM and repeat the previous step until the
design CFM is reached.
6- Press SAVE followed by MAIN MENU.
Note - Once the CFM settings are saved, the Unit
Controller will set all other blower CFM.
B-Set Damper Minimum Position
To maintain required minimum ventilation air volumes
when the unit is in the occupied mode, two minimum
damper positions must be set. The Unit Controller will open
the dampers to “Min OCP Blwr Low” when blower CFM is
BELOW a “midpoint” CFM. The Unit Controller will open
the damper to “Min OCP Blwr High” when blower CFM is at
or ABOVE the “midpoint” CFM.

