


7. 3D ASSIST DISPLAY FEATURE
62
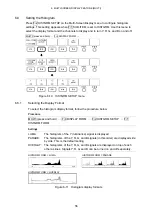
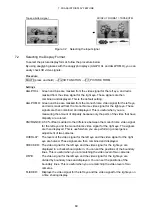
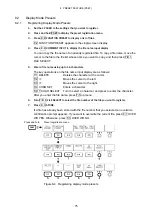
7.3
Configuring Checkerboard Display Settings
When F•1 PICTURE FORM is set to CHECKER, use the 3D FUNCTION menu to move the
boundary lines.
Press F•D 1 to move the left-right boundary lines and F•D 2 to move the top-bottom
boundary lines in a way that makes each square the same size in the checkerboard pattern.
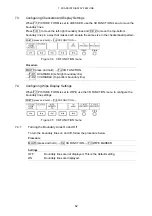
MULTI (press and hold)
→
F•2 3D FUNCTION
→
Figure 7-4 3D FUNCTION menu
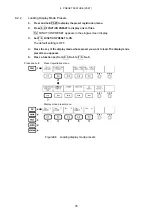
Procedure
MULTI (press and hold)
→
F•2 3D FUNCTION
→
F•D 1 H VARIABLE (Left-right boundary line)
→
F•D 2 V VARIABLE (Top-bottom boundary line)
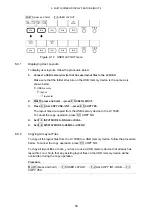
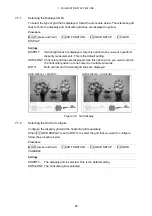
7.4
Configuring Wipe Display Settings
When F•1 PICTURE FORM is set to WIPE, use the 3D FUNCTION menu to configure the
boundary line settings.
MULTI (press and hold)
→
F•2 3D FUNCTION
→
Figure 7-5 3D FUNCTION menu
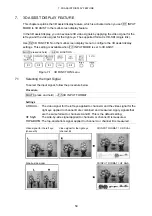
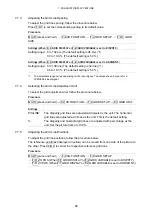
7.4.1
Turning the Boundary Lines On and Off
To turn the boundary lines on and off, follow the procedure below.
Procedure
MULTI (press and hold)
→
F•2 3D FUNCTION
→
F•3 WIPE MARKER
Settings
OFF:
Boundary lines are not displayed. This is the default setting.
ON:
Boundary lines are displayed.