


6
14.
Turn on the power to the dispenser by flipping the power
switch, located underneath kickstand. (See previous page)
15. Unhook the kickstand and lower the head of the tower to
access the touchscreen.
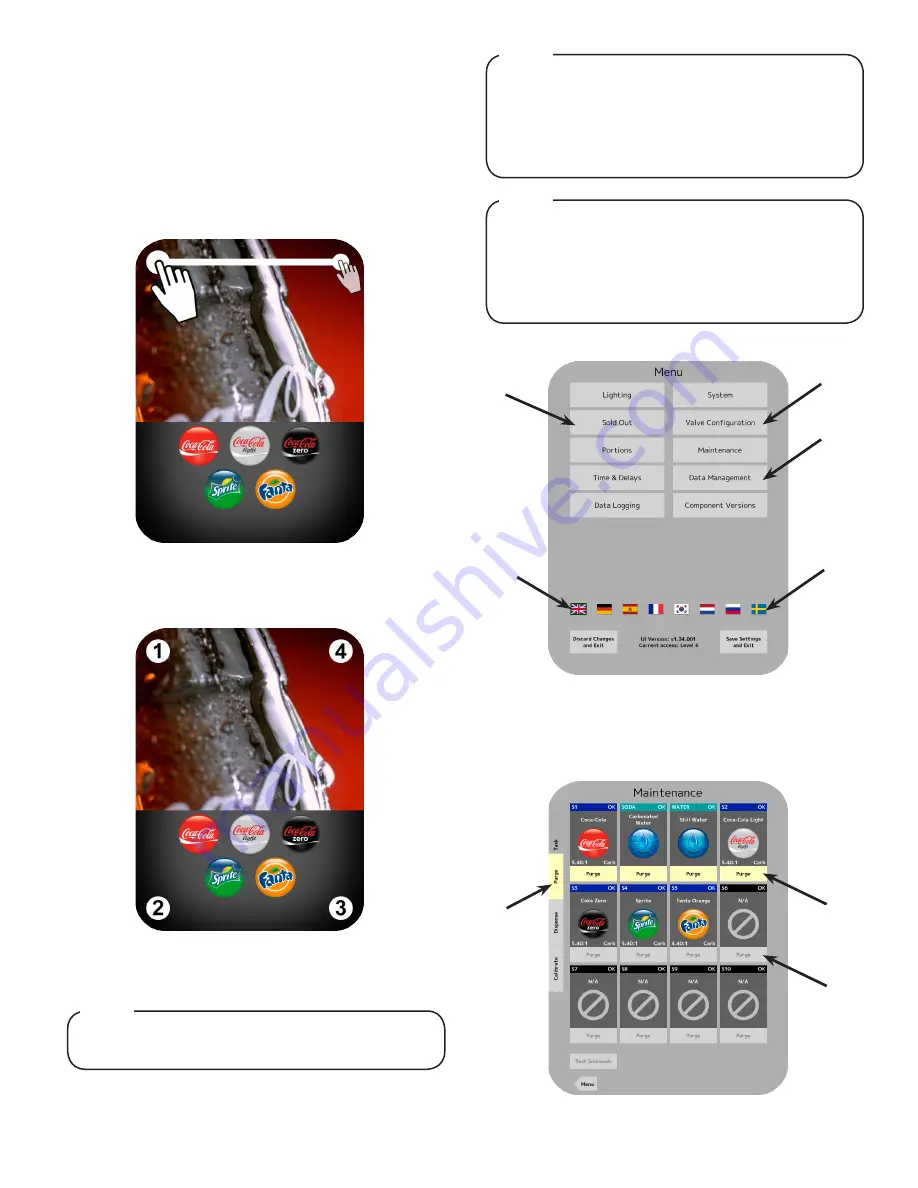
16. Once the screen has booted up, access the service menu by
placing your finger at the top, right corner of the screen.
17.
In one swift, fluid motion slide your finger along the top of the
screen to the left till you reach the upper left corner of the
screen, then hold your finger to the screen for a minimum of
two (2) seconds.
To put the dispenser in “sleep” mode or to lock the
dispenser, press and hold the upper right corner of the
screen for five (5) seconds then enter your “lock code”
(3.14) To lock the dispenser. This mode prevents users
from dispensing drinks and acts as a power saving
tool while the unit is not in use.
NOTE
21. Press the purge tab on the far left side of the screen.
22. Press the Purge buttons for both the plain water and the
carbonated water modules.
20. From the service menu press the maintenance button.
18.
After you have held your finger to the upper left corner for
a minimum of two (2) seconds, tap all four corners of the
screen in any order.
19. A keypad will appear, enter the designated pin number to
access the service menu.
For manager’s access to the service menu, press
and hold the upper right corner of the screen for five
(5) seconds then enter pin number (6655). The
manager’s access to the service menu allows access
to both the sold out screen (See page 12) and portions
control screen.
NOTE
- Slide Finger to Left and Hold
- Tap Four Corners of Screen
A. Purge Tab
B. Up to 4 Purge Buttons Selected
C. ‘Greyed Out’ Purge Button
A
B
C
Contact Lancer Customer Service for the units’
designated pin number.
NOTE
B
D
A
C
D
A. Valve Configuration Button C. Maintenance Button
B. Sold Out Button
D. Locale Change


