StorView RAID Module
74
7.5 Creating a SAN LUN Mapping
The following are the steps to create a SAN LUN Mapping. The process involves identifying the Host Port,
creating a user defined name, assigning your mapping a LUN number, establishing the access
permissions, and selecting the controller port to make available the mapped logical drive.
Important
If you intend to make your Snapshots available as logical drives (VLUNs), you must SAN LUN Map
all logical drives. That includes regular logical drives and the snapshot logical drives.
1
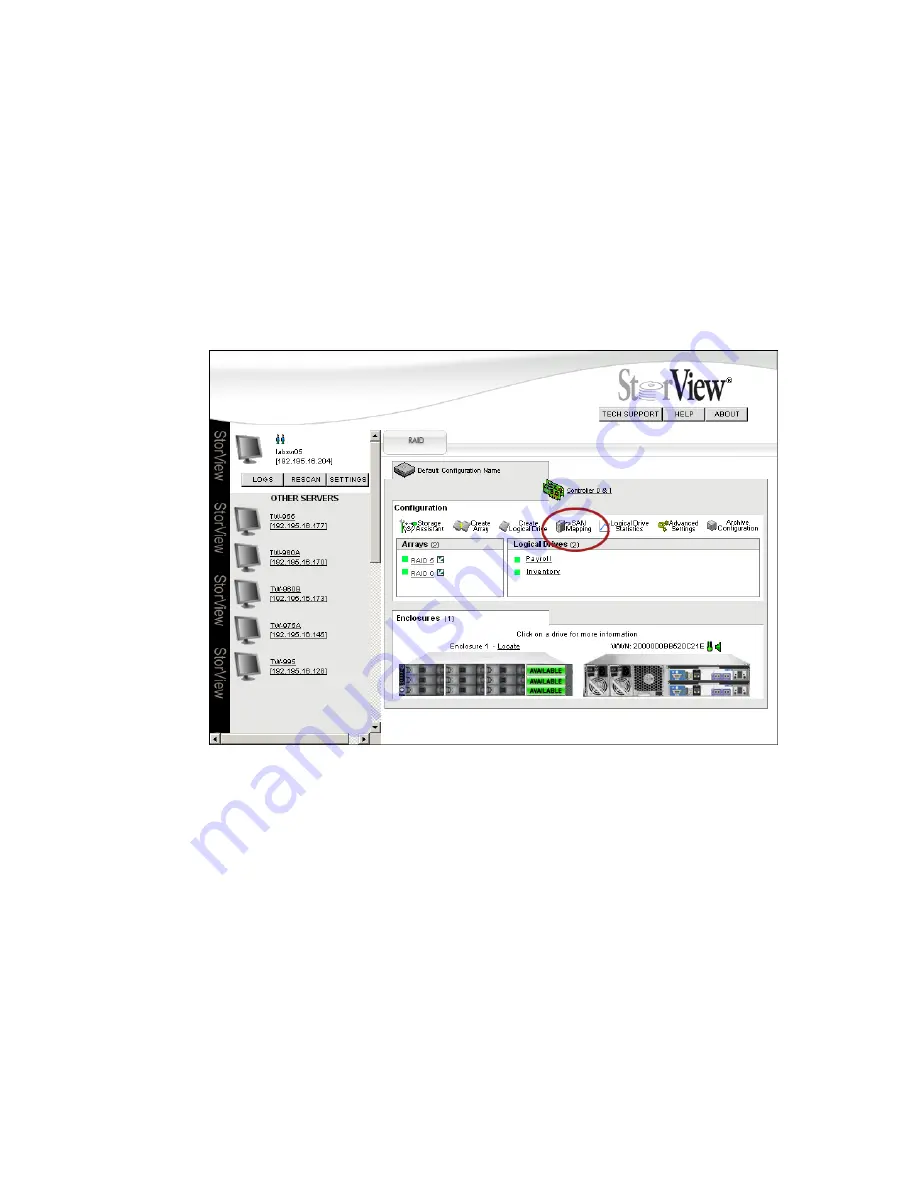
From the Main screen click the
SAN Mapping
icon in the Tool Bar.
2
Select and name the Host HBA port or Host HBA Initiator ID.
In the “HBA Ports Name” section, select an unnamed port and identify it using the displayed HBA Node
WWN and HBA Port WWN in the NAME HOST section.
3
In the “NAME HOST” section, enter a user defined name for the HBA Port and click the
ASSIGN NAME
button. Refer to the illustrations on the following page.
You may use up to 32 ASCII characters, however only 11 characters are displayed in the HBA Ports
Name field.
Figure 7–4
Main Screen (RS-1220-F4-5412E Shown)
Содержание 131018 - StorView Snapshot - Mac
Страница 1: ...StorView Storage Management Software RAID Module User Guide Part No 90254 01A Issue 1 0 March 30 2007...
Страница 28: ...StorView RAID Module 20...
Страница 34: ...StorView RAID Module 26...
Страница 76: ...StorView RAID Module 68...
Страница 79: ...SAN LUN Mapping 71 Figure 7 2 SAN LUN Mapping Screen RS 1220 F4 5402E Shown...
Страница 88: ...StorView RAID Module 80...
Страница 98: ...StorView RAID Module 90...
Страница 150: ...StorView RAID Module 142...
Страница 184: ...StorView RAID Module 176...
Страница 202: ...StorView RAID Module 194...
Страница 208: ...StorView RAID Module 200...
Страница 214: ...StorView RAID Module 206...


