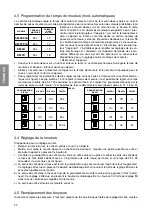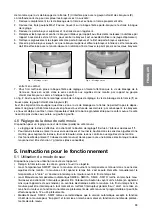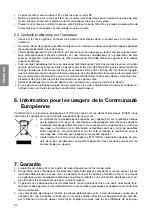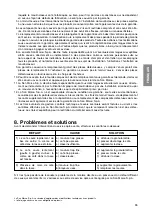
21
Unscrew the upper grinder support and remove it from its seat.
Replace the grinders and align the lower grinder with the three scraping teeth (the distance from these teeth
is 0,9 mm; to center the machine we suggest using a thickness gauge).
Clean the grinder seats and the thread of the upper grinder support accurately.
Screw the upper grinder support down to where the upper grinder grazes the lower one; this operation
should be carried out with the coffee grinder-dispenser in rotation in order to determine the exact point at
which the two grinders come into contact with each other.
Finally, insert the adjusting ring nut, making sure that the hopper locking screw is slightly ahead of the
grinder stop pin, in a counterclockwise direction, as shown in figure 1. Figure 2 shows a faulty installation of
the adjusting ring nut: the hopper locking screw (
1
) is after the grinder stop pin (
2
).
It is important to remember that in this case the hopper locking screw will not allow the grinder stop pin to
be passed in the grinder opening phase, which, since the grinders are already in contact with each other,
would make it impossible to grind the coffee to the proper degree of fineness, and the brewed coffee would
not flow out of the spout or would just drip out.
4.6 Adjusting the quantity of ground coffee
Instructions for properly adjusting the quantity (grams) of ground coffee:
• The batch of ground coffee is controlled by means of the adjusting knob
13
located inside the dispenser
11
.
• To decrease the amount, remove the lid from the dispenser and turn the knob clockwise; to increase the
amount, turn the knob counterclockwise.
• we suggest dispensing ten batches of ground coffee and weighing them with an electronic balance. The
average batch should be about 7 grams (suggested quantity).
5. operating instructions
5.1 Using the grinder-dispenser
Instructions for a proper use of the appliance:
• Fill the hopper
4
with coffee beans and open the gate
6
.
• Timer model SM92T: start the coffee grinding by turning the manual timer clockwise; grinding stops when
the set time has elapsed. Turn the timer back to "zero" if you wish to stop grinding before the set time.
• Manual model with the automatic timer SM92A - SM97A - SMLK - SMTK: start the grinder-dispenser by
pressing the main switch
3
; the green LED lights up in the push button (showing that the unit is con
-
nected). The electronic control unit stops grinding at the end of the set time; grinding can be stopped at
any time by turning the main switch
3
to position "zero". Motor restart based on the number of ground
coffee servings is programmable and may take place after 6, 12, 18, or 24 servings.
• Manual model SM92 - SM97: same characteristics as the automatic version, except for the “overflow”
grinding shutdown function and motor restart based on the number of ground coffee servings.
• The ground coffee is dispensed from the dispenser
11
by operating the lever
15
.
• Place the filter cup on the support fork
16
and pull the lever (toward the operator) to dispense a batch of
ground coffee. Every complete movement of the lever corresponds to one batch.
• Press the ground coffee using the press
14
; insert the filter cup in the machine serving unit and start the
coffee serving.
Fig. 1 - Proper installation.
Fig. 2 - Faulty installation
2
1
2
1
english
Содержание SM 92 INSTANT
Страница 2: ...italiano maCinadosatore sm 92 97 lK tK Istruzioni originali ...
Страница 13: ...12 italiano ...
Страница 14: ...english grinder dispenser sm 92 97 lK tK Translation of the original instructions ...
Страница 25: ...24 english ...
Страница 26: ...français moulin doseur sm 92 97 lK tK Traduction de la version originale du mode d emploi ...
Страница 37: ...36 français ...
Страница 38: ...deutsCh dosiermÜhle sm 92 97 lK tK Übersetzung der Original Anweisungen ...
Страница 49: ...48 deutsch ...
Страница 50: ...espaÑol molinillo dosifiCator sm 92 97 lK tK Traducción de las instrucciones originales ...
Страница 61: ...60 espaÑol ...
Страница 62: ...portuguÊs moinho doseador sm 92 97 lK tK Tradução das instruções originais ...
Страница 73: ...72 portuguÊs ...
Страница 74: ...e i a O iMeTPiKO MY O Kaºe SM 92 97 lK tK Μετάφραση των αρχικών οδηγιών ...
Страница 85: ...84 e i a ...


