Assembly Instructions
Perks
™
P
ri
n
te
d
in
U
.S
.A
.
©
2
0
0
8
K
im
b
a
ll
In
te
rn
a
ti
o
n
a
l,
In
c
.
T
8
0
0
.4
8
2
.1
8
1
8
F
8
1
2
.4
8
2
.8
3
0
0
Proper product installation, in accordance with these instructions, is the responsibility of the installing agent.
If you have any questions concerning these instructions, please call Kimball Office Customer Service.
Part No. 2066782
Revision A-08
Page 1 of 1
Panel Mount
Markerboard or Tackboard
Tools Required
■
Tape Measure
■
Phillips Screwdriver
■
Level
■
Drill
Package Contents
■
1 Markerboard
■
2 End Panel Brackets
or Tackboard
■
5 #10 x 1" Truss Head
■
1 Pencil Tray
Phillips Sheet Metal Screws
(Markerboard only)
(Markerboard only)
■
2 Cabinet Spacers
■
4 1
1
⁄
2
" Screws for
■
8 #8 x
5
⁄
8
"Panhead
Marker Tray
Phillips Sheet Metal Screws
Installation
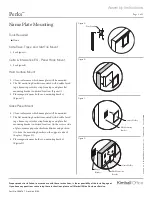
1. Attach pencil tray to front of board using four 1
1
⁄
2
" screws
provided. (Figure A).
2. Attach end panel brackets to top rear side of board, and
attach cabinet spacers to bottom rear side of board using
5
⁄
8
"
sheet metal screws provided as shown. Make sure hooks on
end panel brackets are pointing down. (Figure B).
3. Hold the board securely in front of desired location in panel
run. (Figure C). Tilt top of board slightly toward panel and
insert top hooks of both end panel brackets into openings
in “J” members between panels. Rotate board to enable bot-
tom hooks of end panel brackets to engage “J” members.
Press down firmly to lock into
position. (Figure D).
Figure A
Figure B
Figure D
Cabinet
Spacer
Hooks must
point down
End
Panel
Bracket
Rear Surface
PRESS
down to
lock into
position
Top
“J” Member
openings
Figure C
Front surface of
Markerboard
Pencil Tray used on
Markerboard only
1
1
⁄
2
"
5
⁄
8
"


