


KETRON SD9 Manual & Tutorial
75
Tip:-
An additional feature to BASS and CHORDS (1-5) is that not only can you modify the Bass and Chord lines
by making a selection from the database on the left, but you can also change the actual instrument being played
(
bass instrument in this case
) by touching the BASS icon on the right and selecting a new Bass Guitar from those
displayed. (
Don’t forget to turn the data wheel to display even more instruments and press EXIT when done
).
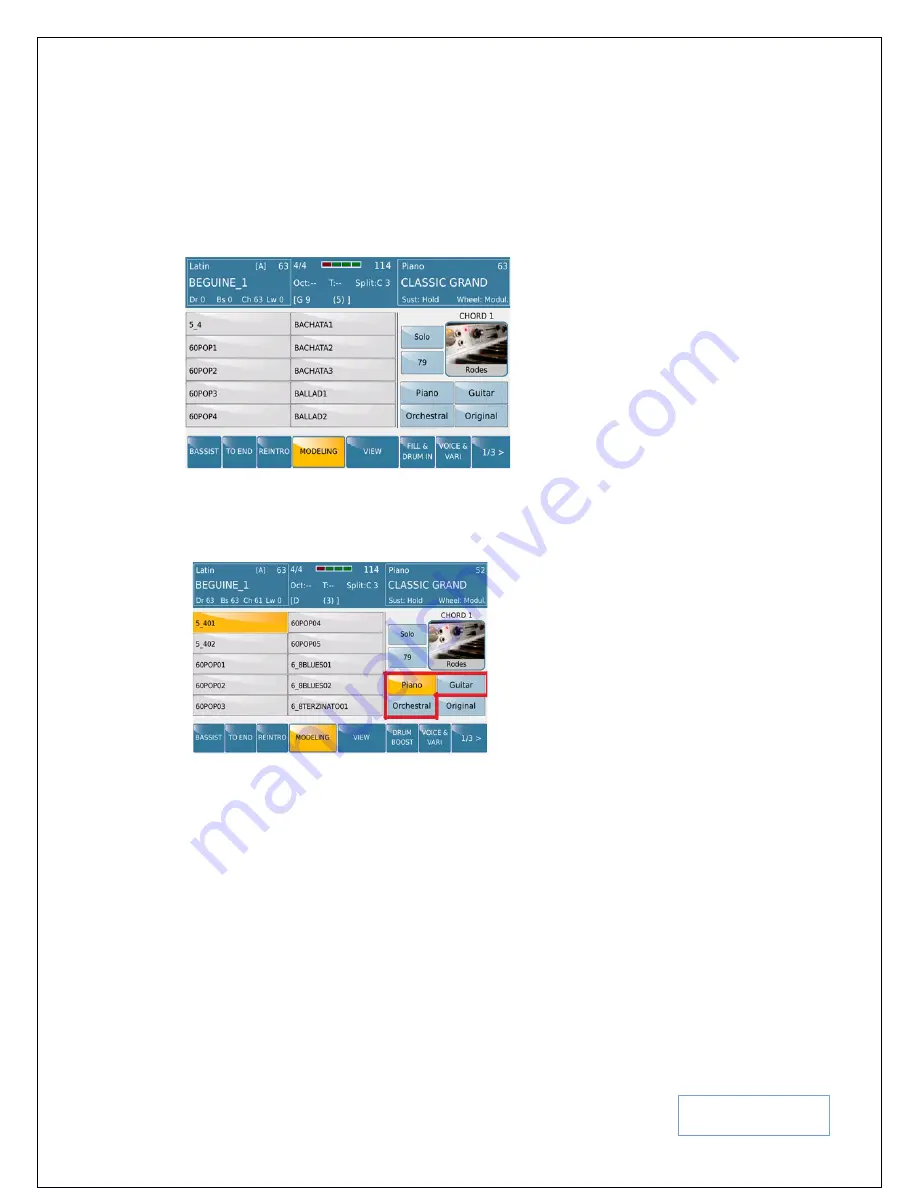
Let’s MODEL one of the CHORDS – CHORD 1. Touch the CHORD 1 icon from the MODELING main screen to
display a page similar to this below –
Fig. 105. Style Modeling - Chords
Now, with the CHORDS, you can actually select, from 3 different phrase banks, which kind of arrangement you
want to use for CHORD 1 (
or any chord you have selected
) by touching any of the phrase banks PIANO, GUITAR
or ORCHESTRAL. For this example, the
PIANO
bank has been selected.
Fig. 106. Style Modeling – Phrase Banks
Based on your selection, the left side of the screen will display the relevant arrangements available (
in this case,
PIANO was touched and so the left side of the screen displays 2 rows of 10 Piano Arrangements available for use in
CHORD 1. Turn the data wheel to display even more and touch the one you want
). If the style is playing, as you
touch, you can sample/hear the arrangement in real time – then keep the one you like. Remember this arrangement
selected only impacts the current ARRANGER/VARIATION. You can select different arrangements for CHORD 1
of Arranger B, Arranger C and Arranger D – a very flexible and intuitive design by KETRON.
NB:-
The Fill ins, Breaks and Intro/Endings are not affected by Modeling!
Once you have competed modeling your style, you will need to save it as a USER STYLE, or else all changes are
lost once you select a new style or turn off the instrument. To save the new style as a USER style, simply press
SAVE
on the panel.


