


KETRON SD9 Manual & Tutorial
162
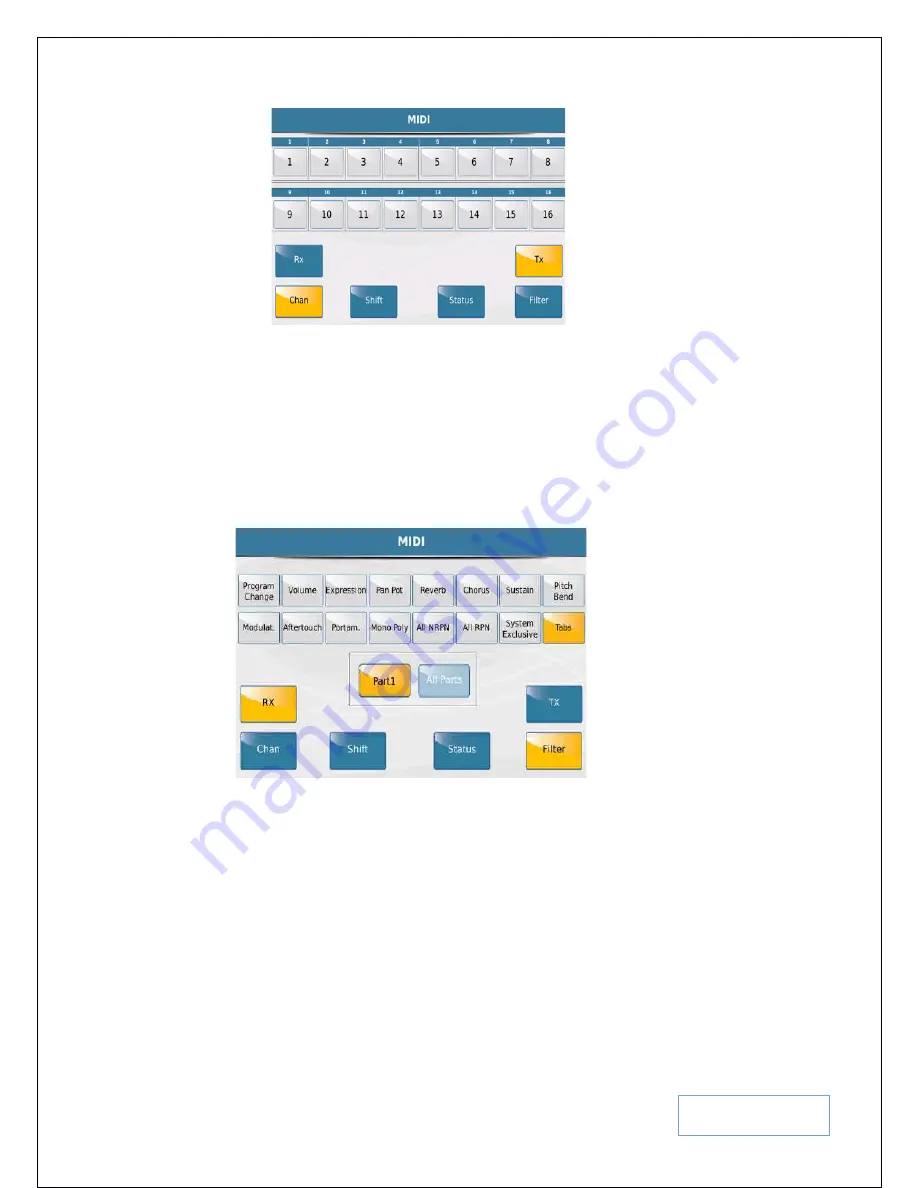
Fig. 203a3. MIDI – CHAN TX
From this screen, you can manually assign each channel to its individual track by touching the channel and
turning the data wheel to assign it to a track. Remember that this can be done for both Midi Receive (RX)
and Transmit (TX) channels so make sure you touch either TX or RX before modifying the channels as you
see fit.
*** FILTER:-
This allows you to customize each channel’s data flow separately. In other words,
you can set channels to respond to program changes, while others respond to Volume, Expression, Reverb,
System Exclusive messages … etc. To do so, simply touch the
FILTER
icon on the screen above to
display the following screen –
Fig. 203a4. MIDI – FILTER
For each part displayed at the center of the screen, the 16 parameters (
Program Change, Volume
… etc
) displayed above can either be turned off (
blue background – meaning this part will respond to this
selection
) or on (
Yellow background meaning this part will NOT respond to this parameter
). In the case
above, PART1 will NOT respond to Tabs (buttons pressed on an external keyboard or controller). You can
turn the data wheel to change to Part 2, Part 3 … Part 16 and for each part, turn on or off (FILTER OUT)
what you want each part to respond to or to ignore. Touch
ALL PARTS
to make Filter changes to all parts
at once!
*** STATUS:-
This allows you to determine each midi channels status of each of the GM parts.
When status is touched, the status of all the 16 channels is displayed as shown on the screen below -


