


Replacing a DC Power Supply
61
CHAPTER 10: Replacing Hardware Components
2.
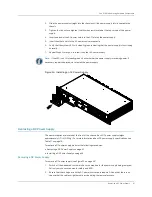
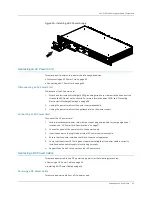
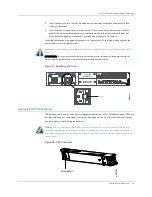
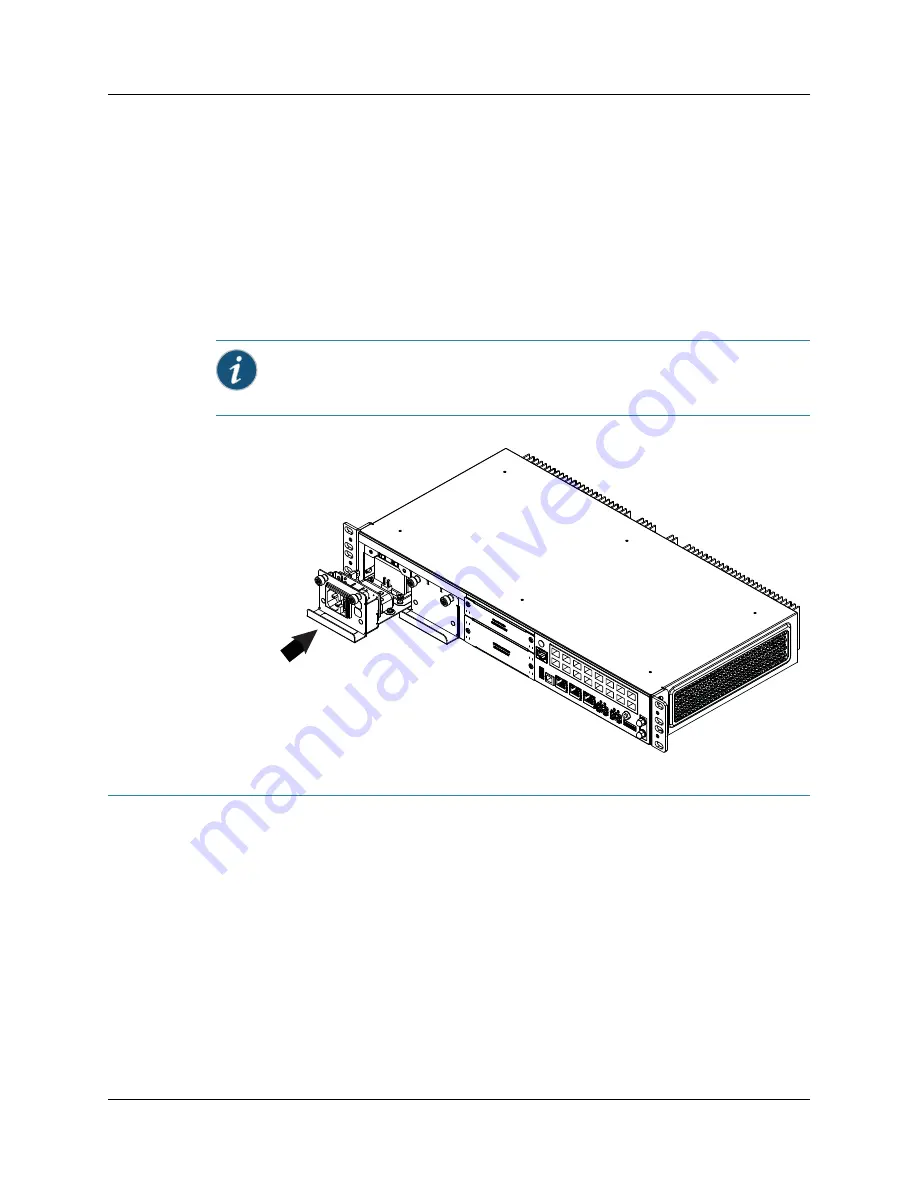
Slide the power supply straight into the chassis until the power supply is fully seated in the
chassis.
3.
Tighten (but do not overtighten) the thumbscrews located at the top corners of the power
supply.
4.
Insert one end of the AC power cord into the AC inlet on the power supply.
5.
Insert the other end into the AC power source receptacle.
6.
Verify that the system LED is lit steadily green, indicating that the power supply is functioning
normally.
7.
Repeat Steps 2 through 4 to install the other AC power supply.
Figure 24: Installing an AC Power Supply
Replacing a DC Power Supply
The power supplies are located at the front of the chassis. Each DC power supply weighs
approximately 0.71 lb (0.32 kg). For more information about DC power supply specifications, see
To replace a DC power supply, perform the following procedures:
z
Removing a DC Power Supply on page 61
z
Installing a DC Power Supply on page 62
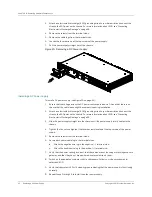
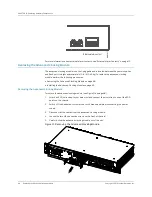
Removing a DC Power Supply
To remove a DC power supply (see Figure 25 on page 62):
1.
Switch off the dedicated customer site circuit breakers for the power supply being removed.
Follow your site's procedures for safety and ESD.
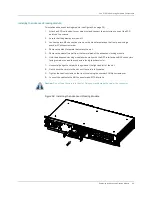
2.
Ensure that the voltage across the DC power source cable leads is 0 V and that there is no
chance that the cables might become active during the removal process.
Note:
If the LED is not lit steadily green, check whether the power supply is receiving power. If
necessary, repeat the procedure to install the power supply.
Содержание BX7000
Страница 10: ... x Copyright 2010 Juniper Networks Inc ...
Страница 12: ... xii Copyright 2010 Juniper Networks Inc ...
Страница 18: ...About This Guide xviii Requesting Support Copyright 2010 Juniper Networks Inc ...
Страница 20: ... 2 Copyright 2010 Juniper Networks Inc ...
Страница 36: ...CHAPTER 1 BX7000 Multi Access Gateway Overview 18 Advanced Clocking Module Copyright 2010 Juniper Networks Inc ...
Страница 60: ...CHAPTER 6 Grounding and Powering the Gateway 42 Powering Off the Gateway Copyright 2010 Juniper Networks Inc ...
Страница 64: ...CHAPTER 7 Accessing and Configuring the Gateway 46 Initial Setup Copyright 2010 Juniper Networks Inc ...
Страница 66: ... 48 Copyright 2010 Juniper Networks Inc ...
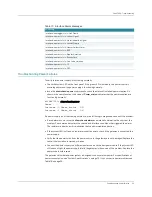
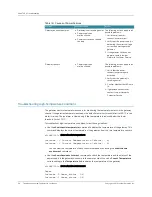
Страница 76: ...CHAPTER 9 Troubleshooting 58 Troubleshooting the Advanced Clocking Module Copyright 2010 Juniper Networks Inc ...
Страница 90: ... 72 Copyright 2010 Juniper Networks Inc ...
Страница 122: ... 104 Hardware Compliance Copyright 2010 Juniper Networks Inc ...
Страница 131: ...Copyright 2010 Juniper Networks Inc 113 Appendix E Declaration of Conformity ...
Страница 132: ... 114 Copyright 2010 Juniper Networks Inc ...
Страница 133: ...Copyright 2011 Juniper Networks Inc 115 PART 4 Index z Index on page 117 ...
Страница 134: ... 116 Copyright 2010 Juniper Networks Inc ...