


CHAPTER 4: Installing the Gateway
30
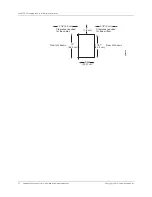
Wall-Mounted Installation
Copyright © 2010, Juniper Networks, Inc.
Wall-Mounting Screws
The screws provided in the wall-mounting kit are 1 in. (2.54 cm) in length and can be inserted into
wood or plastic walls of thickness 1 in. or more. Table 15 on page 30 specifies the screws that you
can use for mounting the gateway on a wall.
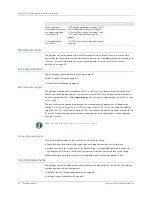
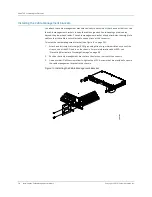
Installing the Gateway on a Wall
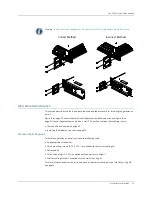
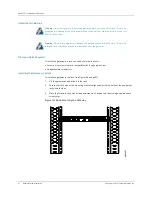
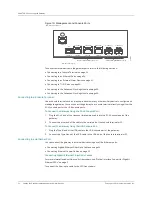
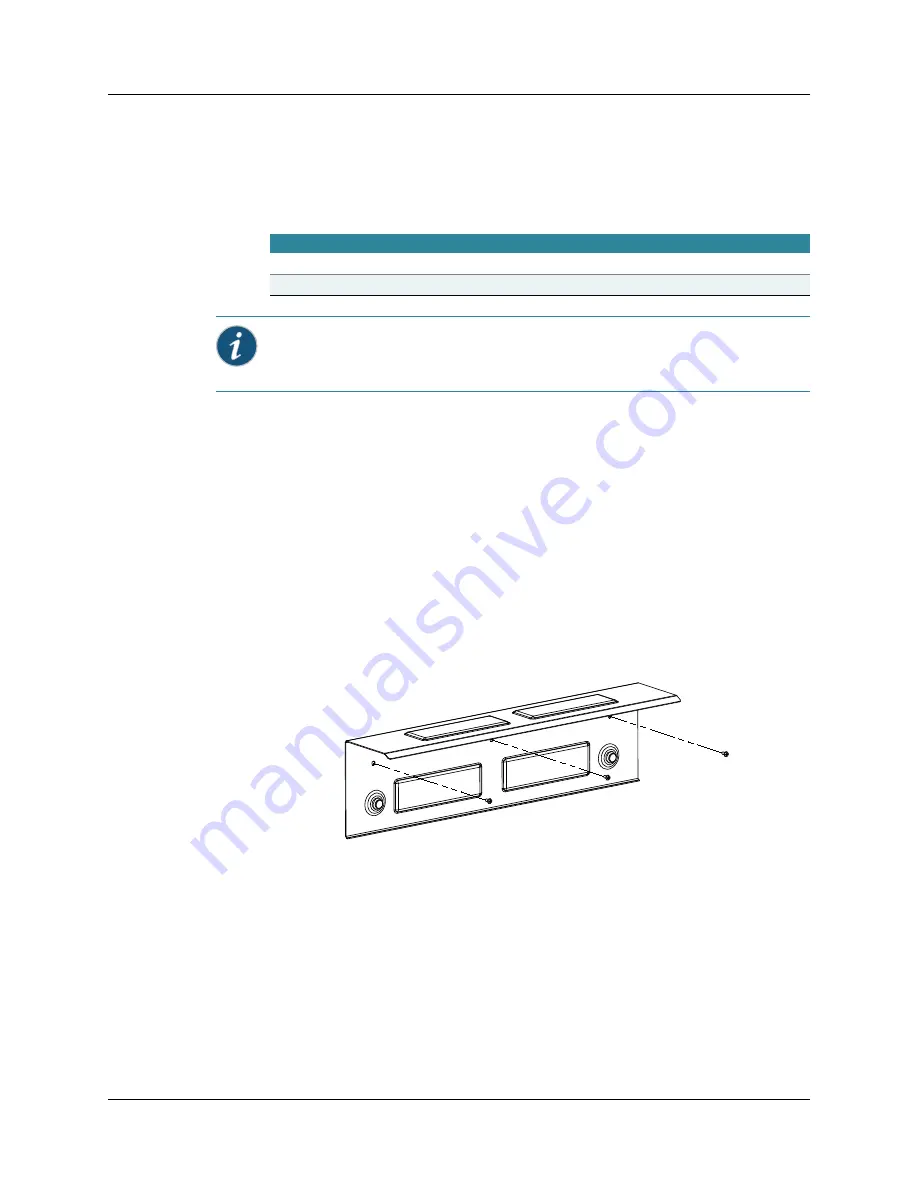
To install the gateway on a wall (see Figure 16):
1.
Ensure that the wall is smooth, flat, dry, and sturdy.
2.
Mark the points on the wall where you plan to drive the nail using the wall-mounting bracket
as a template.
3.
Make holes in the marked points using a powered drill.
4.
Insert the plug into the holes made.
5.
Position the wall-mounting bracket and place the screws in the plugs. Use a screwdriver to
secure them at all three mounting points (see Figure 15 on page 30).
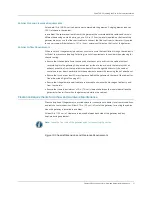
6.
Hang the gateway on the two studs provided on the wall-mounting bracket (see Figure 16 on
Figure 15: Installing the Wall-Mounting Bracket
Figure 16: Wall-Mounting the Gateway
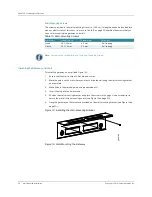
Table 15: Wall-Mounting Screws
Type of Wall
Screw Size (d x l)
Head Diameter
Screw Type
Wood
3.5 X 25 mm
6.9 mm
Self tapping
Plastic
3.5 X 25 mm
6.9 mm
Self tapping
Note:
For concrete or brick walls, use Type 5 self-tapping screws.
g002904
Содержание BX7000
Страница 10: ... x Copyright 2010 Juniper Networks Inc ...
Страница 12: ... xii Copyright 2010 Juniper Networks Inc ...
Страница 18: ...About This Guide xviii Requesting Support Copyright 2010 Juniper Networks Inc ...
Страница 20: ... 2 Copyright 2010 Juniper Networks Inc ...
Страница 36: ...CHAPTER 1 BX7000 Multi Access Gateway Overview 18 Advanced Clocking Module Copyright 2010 Juniper Networks Inc ...
Страница 60: ...CHAPTER 6 Grounding and Powering the Gateway 42 Powering Off the Gateway Copyright 2010 Juniper Networks Inc ...
Страница 64: ...CHAPTER 7 Accessing and Configuring the Gateway 46 Initial Setup Copyright 2010 Juniper Networks Inc ...
Страница 66: ... 48 Copyright 2010 Juniper Networks Inc ...
Страница 76: ...CHAPTER 9 Troubleshooting 58 Troubleshooting the Advanced Clocking Module Copyright 2010 Juniper Networks Inc ...
Страница 90: ... 72 Copyright 2010 Juniper Networks Inc ...
Страница 122: ... 104 Hardware Compliance Copyright 2010 Juniper Networks Inc ...
Страница 131: ...Copyright 2010 Juniper Networks Inc 113 Appendix E Declaration of Conformity ...
Страница 132: ... 114 Copyright 2010 Juniper Networks Inc ...
Страница 133: ...Copyright 2011 Juniper Networks Inc 115 PART 4 Index z Index on page 117 ...
Страница 134: ... 116 Copyright 2010 Juniper Networks Inc ...