background image

91

TOUCAN Duo

Updated 06-2015

 Models

ECO SMART DISPLAY

VII-4

VII-4

Содержание TOUCAN DUO

Страница 1: ...33 9533 Tel 171 485 5161 Fax 717 485 6417 C E JLG Manufacturing Europe Breitwaterstraat 12A Oude Bunders 1034 B 3630 Maasmechelen Tel 32 0 89 774 974 Fax 32 0 89 777 427 FRANCE JLG France SAS Z I de F...

Страница 2: ......

Страница 3: ...3 TOUCAN Duo Updated 06 2015 Models MA0323 05 Models N ________________...

Страница 4: ......

Страница 5: ...earings 3 7 Locks 3 8 Loctite 3 9 Fasteners and torque values 3 10 Torque values tables 3 11 Hydraulic system 3 12 Lubricants 3 13 Gasket 3 14 Electrical wires and cables 3 15 Charger 3 16 Battery dis...

Страница 6: ...attery discharge indicator setting option 4 13 SCHEMATICS 5 Electrical schematics 5 1 Standardmachine 5 1 1 Battery cut and hourmeter 5 1 2 Hydraulic schematic 5 2 REMOVAL INSTALLATION PROCEDURES 6 In...

Страница 7: ...cription 7 1 Screen Operation 7 2 Connection 7 3 Menus Displays 7 4 Display 7 4 1 Slave controller 7 4 2 Master controller 7 4 3 Calibration of the Stering Cylinder Potentiometer 7 5 Main Parameters 7...

Страница 8: ...Updated 06 2015 TOUCAN Duo models 8 This page has been left blank intentionally...

Страница 9: ...CHAPTER 1 INTRODUCTION...

Страница 10: ...rating and safety procedures described in the corresponding Operator s and SafetyHandbook To perform the procedures described in this manual a basic knowledge in mechanics hydraulics and electricy is...

Страница 11: ...otify JLG If the distributor is unknown and or cannot be reached please contact USA JLG Industries Inc Product Safety Reliability Department 1 JLG Drive McConnellsburg PA USA 17233 9533 Toll Free 877...

Страница 12: ...PPLYALSODURINGOPERATINGCHECKS MAINTENANCEANDREPAIRS THEYDONOT REPLACE NATIONAL STATE OR LOCAL WORK REGULATIONS INDUSTRY STANDARDSOREMPLOYER SWORKRULES Do not perform any operating control maintenance...

Страница 13: ..._____________ Page s Affected _______________________________________________________________ Reason for submitting SMCAR use additinal paper or back if necessary ____________________ ________________...

Страница 14: ...Updated 06 2015 TOUCAN Duo models 14 This page has been left blank intentionally...

Страница 15: ...CHAPTER 2 WORK PLATFORM CHARACTERISTICS...

Страница 16: ...led from the upper control box located at the front of the platform The upper control panel consists of an enable and steering handle on the left hand side of a drive handle on the right hand side and...

Страница 17: ...wn ring Telescopic mast Steeringwheels Platform Uppercontrolpanel Batteries Drivingwheels Chargerextensionreel Emergency control panel Shelfpowerunit notshown Breakdowncontrolpanel Manual lowering con...

Страница 18: ...us 0 Outer steering radius 1 59 m PLATFORM Length 0 65 m Width 0 75 m Rated load 130 kg SHELF Length 0 50 m Width 0 75 m Rated load 70 kg HYDRAULIC CIRCUIT MAST ELEVATION Power unit reservoir capacity...

Страница 19: ...CHAPTER 3 GENERAL...

Страница 20: ...work platform can only return to service after a thorough functional check All covers and protections must be installed GENERAL III 1 III 1 Malfunction Identification of symptoms Identification of ca...

Страница 21: ...adjustable lifting attachment All supporting members cables chains straps should be parallel to each other and as near perpendicular as possible to the surface of the top of the object being lifted If...

Страница 22: ...bearings if the races and balls or rollers are pitted scored or burned If the bearing is serviceable coat it with oil and wrap it in clean waxed paper Do not unwrap new bearings until time of install...

Страница 23: ...lts are not to be rethreaded rewelded or reworked All lower grade fasteners must be properly tightened to ensure correct assembly This tightening can be achieved by applying a measured torque In order...

Страница 24: ...0 covers all the hand tools Nut identification Bolt identification HEXAGONAL HEADBOLD 8 8 10 9 12 9 8 8 10 9 12 9 Grade8 8 Grade10 9 Grade12 9 C H C BOLT 8 10 12 Grade8 8 Grade10 9 Grade12 9 8 8 Grade...

Страница 25: ...blems The multi purpose grease applied during manufacture is of lithium base Use of a non compatible grease could result in damage to equipment Telescopic mast profiles shelf profiles and steering bar...

Страница 26: ...ed by three leds Red Led Charger is in default See the fault code description below Yellow Led This led remains lit as long as the battery is not fully charged Green Led This Led lights up when the ba...

Страница 27: ...he battery must imperatively be charged Continuingtousethemachinewilldamagethe battery NOTE A red indicator light is located on the platform control panel and has the same functions as the one located...

Страница 28: ...NAUX1 auxiliary output Not connected A10 Ground of the control card connected to A14 A11 DI6 contact input Not connected A12 DI8 contact input Drive speed input n 2 A13 DI10 contact input Drive speed...

Страница 29: ...The electrical cylinder enables the turning of the work platform s steering wheels It consists of an electrical motor a reducer a nut and worm mechanism and of a potentiometer The potentiometer is li...

Страница 30: ...round the filler neck before opening the tank Immediately cover all disconnected lines fitting and various openings The fine particles that cause abrasive wear are usually not visible to the eye The s...

Страница 31: ...n the hydraulic system which was insufficiently flushed after a previous failure Metal particle damage may be gradual or fairly sudden depending on the quantity and size of the particles Metal particl...

Страница 32: ...high check the manufacturer s recommendations and fill with correct fluid refer to 3 13 f If a part is worn or damaged inside the pump determine the cause of the failure repair the parts or replace th...

Страница 33: ...nthetank andforanyrestrictionintheinletline or for any clogged filter c Ifabrasivecontaminantsinthefluidgoingthrough the filter check the fluid in the reservoir check the inlet line for any restrictio...

Страница 34: ...Updated 06 2015 TOUCAN Duo models 34 This page has been intentionnally left blank...

Страница 35: ...CHAPTER 4 ADJUSTMENTS...

Страница 36: ...nd that these operations are performed by authorized and qualified personnelonly If you have any queries concerning operating control or adjustment procedures please contact your JLG approveddistribut...

Страница 37: ...the cotter pins on the clevis pins Location of inspection areas x Area A Area B NOTE To check the presence of cotter pins and clevis pins on the chains in area B 1 open the electrical box remove the 4...

Страница 38: ...the assembly works correctly NOTE The shelf elevation movement is interrupted by the shelf sensor refer to 4 12 4 2 Lifting chains tension adjustment The lifting chains must be tensioned so that the m...

Страница 39: ...locknuts of the slide blocks setting screws 3 Screw unscrew the setting screws of each 4 blocks in order to center the shelf in the platform and limit the transversal play at most Setting screw Block...

Страница 40: ...blished Setting values of the relief valves are indicated in chapters 4 5 1 and 4 5 2 If the setting of a relief valve is not within 5 of the indicated setting adjust it to its correct value Do not ex...

Страница 41: ...e pressure relief valve on the shelf power unit the setting of the pressure switch on the shelf cylinder must be checked adjusted refer to 4 6 1 Place the shelf rated load increased by 10 on the shelf...

Страница 42: ...ting can only be performed by a qualified technician trained for the maintenance of the machine Control 1 Position the control panel selector on Emergency control panel and raise the mast by approxima...

Страница 43: ...metrically in the 1 2 direction Correct the symetry fault by tightening or loosening the nuts A or B If the tilt indicator does not work symetrically in the 3 4 direction Correct the symetry fault by...

Страница 44: ...device enables you to collect the oil escaping from the bleeding screw without any spillage on the machine or on the ground During the bleeding process the mast may come down Ensure there are no obsta...

Страница 45: ...cated in the drawing below 4 Move the sensor until the angle a equals 0 see drawing below when the wheels are steered to the left 5 Tighten the sensor on the chassis 6 Straighten the wheels and fully...

Страница 46: ...heard when the sensor is triggered 6 Open and close the side gate several times to ensure the sensor is correctly set NOTE If one of the two gates is open Only the shelf elevation and lowering movemen...

Страница 47: ...charge station The battery discharge state if determined by comparing the battery voltage when the work platform operates at a predetermined reference voltage then by integration of the time period du...

Страница 48: ...Updated 06 2015 TOUCAN Duo models 48 This page has been intentionnally left blank...

Страница 49: ...CHAPTER 5 SCHEMATICS...

Страница 50: ...Updated 06 2015 TOUCAN Duo models 50 This page has been intentionnally left blank...

Страница 51: ...UCHE LEFT CONTROLLER VARIATEUR GAUCHE LEFT MOTOR MOTEUR GAUCHE LEFT OPENING OUVERTURE GAUCHE LEFT STEERING RELAY RELAIS DIRECTION GAUCHE LOWERING CONTROL BOX BOITIER BAS MANIFOLD LOWERING DISTRIBUTEUR...

Страница 52: ...Updated 06 2015 TOUCAN Duo models 52 5 1 Electrical schematics 5 1 1 Standard machine Functional diagramme R f ELE258 half left SCHEMATICS V 1 V 1...

Страница 53: ...53 TOUCAN Duo Updated 06 2015 Models R f ELE258 half right SCHEMATICS V 1 V 1...

Страница 54: ...Updated 06 2015 TOUCAN Duo models 54 Wiring diagramme Power SCHEMATICS V 1 V 1...

Страница 55: ...55 TOUCAN Duo Updated 06 2015 Models Wiring diagramme Controls SCHEMATICS V 1 V 1...

Страница 56: ...Updated 06 2015 TOUCAN Duo models 56 Upper control box SCHEMATICS V 1 V 1...

Страница 57: ...57 TOUCAN Duo Updated 06 2015 Models Shelf box SCHEMATICS V 1 V 1...

Страница 58: ...Updated 06 2015 TOUCAN Duo models 58 Cardbox SCHEMATICS V 1 V 1...

Страница 59: ...59 TOUCAN Duo Updated 06 2015 Models Lower control box SCHEMATICS V 1 V 1...

Страница 60: ...Updated 06 2015 TOUCAN Duo models 60 5 1 2 Machine with battery cut out and hourmeter option Functional diagramme Ref ELE258 SCHEMATICS V 1 V 1...

Страница 61: ...61 TOUCAN Duo Updated 06 2015 Models SCHEMATICS V 2 V 2 5 2 Hydraulic sch matic Ref FL0148_04...

Страница 62: ...Updated 06 2015 TOUCAN Duo models 62 This page has been intentionnally left blank...

Страница 63: ...CHAPTER 6 REMOVAL INSTALLATION PROCEDURES...

Страница 64: ...ling equipment and equipment We recommend that these operations are performed by qualified and authorized personnelonly Contact your JLG distributor for any question on removal installation procedureo...

Страница 65: ...ove any load from the work platform platform and shelf and disconnect the battery inner cover outer cover shelf shelf power unit cover platform support platform shelf control box back up cable bar she...

Страница 66: ...ft truck overhead crane 6 Slide the shelf up in the guide rails using the fork lift truck or the overhead crane When the shelf reaches its highest position remove the outer cover at the same time as t...

Страница 67: ...lay between the slide blocks and the guide rails is nul For further information see 4 4 Ensure a certain thickness of the slide blocks which is out of its housing is equal on either side As indicated...

Страница 68: ...n the last mast section secured by 4 bolts and nuts and the 4 screws securing the platform floor to the platform support 6 Remove the controls handlebar from the platform secured by 2 screws on the pl...

Страница 69: ...the mast section n 1 so the cables do no longer contact the mast 7 Disconnect the coil and its connector from the breakdown solenoid valve see 6 5 4 fig 6 9 located on the mast cylinder manifold 8 Di...

Страница 70: ...cated on fig 6 2 2 Position the assembly cylinder brackets on the mast 3 Turn the cylinder barrel to position the cylinder bleeding screw opposite the hole on mast section n 2 see fig 4 5 4 8 4 Secure...

Страница 71: ...s on the chain equalizers to adjust the tension of the lifting chains see 4 2 6 Grease the mast s sliding surfaces refer to the Operator s Manual Torque value 7 5 N Loctite 243 Play Shims Slide blocks...

Страница 72: ...ast assembly from the chassis see 6 2 2 Remove the mast cylinder see 6 3 1 3 On the lower part of each mast section mark the position of the mounting plate for the back up cable Remove both plates REM...

Страница 73: ...Remove the pulley pin see fig 6 6 from the greyed mast section mast section n 1 Remove the split pins and clevis pins securing the chains to the chain clevis and remove the chains Position the assemb...

Страница 74: ...oved use only new clevis pins cotter pins and retaining rings during chains installation 3 Install the lifting chains in reverse order from the removal and disassembly procedure see 6 3 5 NOTE Use Loc...

Страница 75: ...f the driving wheels rear wheels Removal 1 Lower the platform 2 Chock the front wheels lengthways 3 Lift the chassis of the platform and place a block under the rear of the chassis 4 Remove both bolts...

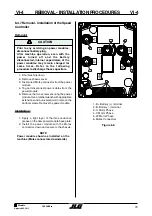
Страница 76: ...sible damage to the sensor 8 Disconnect both brake wires on each motor 9 Remove the step and the motor protection plated secured by 4 screws and washers 10 Lift the chassis of the machine and place a...

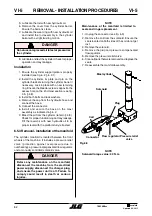
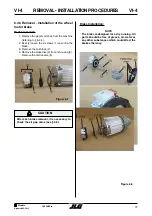
Страница 77: ...loosen the 3 screws 1 securing the brake 3 Remove the coil block 2 4 Remove the brake disc 3 from its housing 4 Remove the friction disc 5 After each brake removal it is necessary to check the air gap...

Страница 78: ...ibed quantity of grease see 3 13 and the Operator s Manual on the bearing and inner periphery CAUTION P u n c h e d mark CAUTION CAUTION REMOVAL INSTALLATION PROCEDURES VI 4 VI 4 1 Insert the 3 screws...

Страница 79: ...r module 4 Tag and disconnect power cables from the power module 5 Remove the two screws securing the power module Use a ratchet wrench with appropriate extensions and a universal joint to remove the...

Страница 80: ...refer to section 7 6 5 Hydraulic components 6 5 1 Mast cylinder disassembly 1 Remove the mast assembly from the chassis as indicated in 6 2 2 Remove the mast cylinder as indicated in 6 3 1 3 Remove th...

Страница 81: ...th a solvent and dry them with compressed air Inspect all parts for serviceability Before installing new seals and rings clean all surfaces and carefully remove burrs and nicks Parts displaying excess...

Страница 82: ...cylinder refer to 4 8 Check for proper functionning and any leakage Fill the reservoir with new hydraulic oil to its proper level with the platform fully retracted 6 5 4 Removal Installation of the ma...

Страница 83: ...5 Remove the filter check valve torque value 20 0 2N m 6 Remove the solenoid torque value 30 0 5 N m 7 Loosen the nut securing the solenoid to the solenoidvalveandremovethesolenoid torque value 5 N m...

Страница 84: ...Updated 06 2015 TOUCAN Duo models 84 NOTES...

Страница 85: ...85 TOUCAN Duo Updated 06 2015 Models CHAPTER 7 ECO SMART DISPLAY...

Страница 86: ...Updated 06 2015 TOUCAN Duo models 86 This page has been intentionnally left blank...

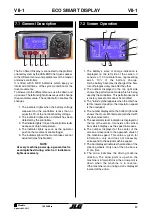
Страница 87: ...The battery s state of charge indication is displayed on the left side of the screen It consists of 10 horizontal bars representing each 10 of the battery charge As the battery becomes discharged the...

Страница 88: ...VII 3 VII 3 7 3 Connection The Eco Smart Display is fitted with a Molex connector 6 pins Pin n 1 Supply negative reference Pin n 2 Supply negative reference Pin n 3 CAN signal high Pin n 4 CAN signal...

Страница 89: ...89 TOUCAN Duo Updated 06 2015 Models ECO SMART DISPLAY VII 4 VII 4 7 4 Menus display 7 4 1 Display...

Страница 90: ...Updated 06 2015 TOUCAN Duo models 90 ECO SMART DISPLAY VII 4 VII 4 7 4 2 Slave Controller...

Страница 91: ...91 TOUCAN Duo Updated 06 2015 Models ECO SMART DISPLAY VII 4 VII 4...

Страница 92: ...Updated 06 2015 TOUCAN Duo models 92 ECO SMART DISPLAY VII 4 VII 4...

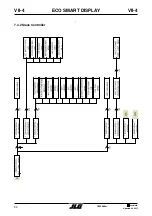
Страница 93: ...93 TOUCAN Duo Updated 06 2015 Models 7 4 3 Master Controller ECO SMART DISPLAY VII 4 VII 4...

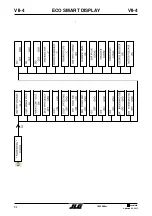
Страница 94: ...Updated 06 2015 TOUCAN Duo models 94 ECO SMART DISPLAY VII 4 VII 4...

Страница 95: ...95 TOUCAN Duo Updated 06 2015 Models ECO SMART DISPLAY VII 4 VII 4...

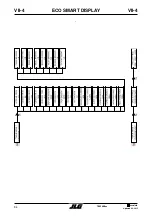
Страница 96: ...Updated 06 2015 TOUCAN Duo models 96 ECO SMART DISPLAY VII 4 VII 4...

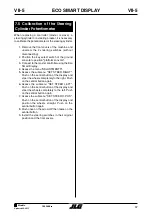
Страница 97: ...he master controller using the Eco Smart Display 4 Access the menu ADJUSTMENTS 5 Access the submenu SET STEER RIGHT Push on the central button of the display and steer the wheels completely to the rig...

Страница 98: ...UCAN Duo models 98 7 6 Main Parameters NOTE When the machine has left its lowered position mast raised the maximum travel speeds are reduced to 20 of the maximum speed in lowered position ECO SMART DI...

Страница 99: ...99 TOUCAN Duo Updated 06 2015 Models CHAPTER 8 ALARMS AND WARNINGS...

Страница 100: ...Updated 06 2015 TOUCAN Duo models 100 This page has been intentionnally left blank...

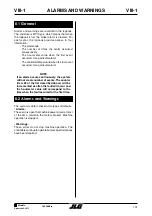
Страница 101: ...r a particular alarm NOTE If an alarm occurs continuously the system will not create number of events The counter item 2 of the list described above will be incremented as often the fault will occur a...

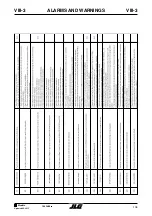
Страница 102: ...Updated 06 2015 TOUCAN Duo models 102 8 3 Alarms ALARMS AND WARNINGS VIII 3 VIII 3...

Страница 103: ...103 TOUCAN Duo Updated 06 2015 Models ALARMS AND WARNINGS VIII 3 VIII 3...

Страница 104: ...Updated 06 2015 TOUCAN Duo models 104 ALARMS AND WARNINGS VIII 3 VIII 3...

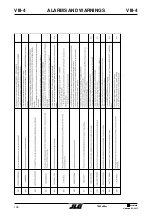
Страница 105: ...105 TOUCAN Duo Updated 06 2015 Models ALARMS AND WARNINGS VIII 4 VIII 4 8 4 Warnings...

Страница 106: ...Updated 06 2015 TOUCAN Duo models 106 ALARMS AND WARNINGS VIII 4 VIII 4...

Страница 107: ...107 TOUCAN Duo Updated 06 2015 Models ALARMS AND WARNINGS VIII 4 VIII 4...

Страница 108: ...Updated 06 2015 TOUCAN Duo models 108 This page has been intentionnaly left blank...

Отзывы: