SECTION 13—BATTERIES
Part No. 1106645
57
R51™and R51LXP
CAUTION
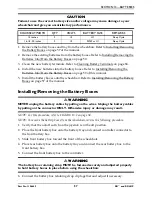
Failure to use the correct battery size and/or voltage may cause damage to your
wheelchair and give you unsatisfactory performance.
1. Remove the battery boxes and tray from the wheelchair. Refer to Installing/Removing
the Battery Boxes on page 57 of the manual.
2. Remove the existing batteries from the battery boxes. Refer to Installing/Removing the
Batteries Into/From the Battery Boxes on page 59.
3. Clean the new battery terminals. Refer to Cleaning Battery Terminals on page 68.
4. Install the new batteries into the battery boxes. Refer to Installing/Removing the
Batteries Into/From the Battery Boxes on page 59 of this manual.
5. Install the battery boxes onto the wheelchair. Refer to Installing/Removing the Battery
Boxes on page 57 of the manual.
Installing/Removing the Battery Boxes
WARNING
NEVER unplug the battery cables by pulling on the wires. Unplug the battery cables
by pulling on the connector ONLY. Otherwise injury or damage may result.
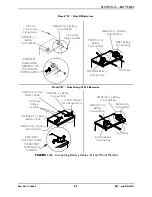
NOTE: For this procedure, refer to FIGURE 13.2 on page 58.
NOTE: To remove the battery boxes from the wheelchair, reverse the following procedure.
1. Verify that the on/off switch on the joystick is in the off position.
2. Place the front battery box onto the battery tray and connect controller connector to
the front battery box.
3. Slide front battery box toward the front of the wheelchair.
4. Place rear battery box onto the battery tray and connect the rear battery box to the
front battery box.
5. Connect the front battery box to the controller.
WARNING
The battery box retaining strap MUST be fastened securely and adjusted properly
to hold battery boxes in place before using the wheelchair.
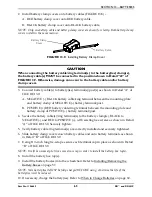
6. Connect the battery box retaining strap clip together and adjust if necessary.
CHAIRSEATWIDTH
QTY
VOLTS
BATTERY SIZE
REMARKS
14 inches
2
12
U1
Deep Cycle
16, 18, 20 inches
2
12
22NF or U1
Deep Cycle


