CN70 Barcode Scanner
Knowledge Guide
9 of 25
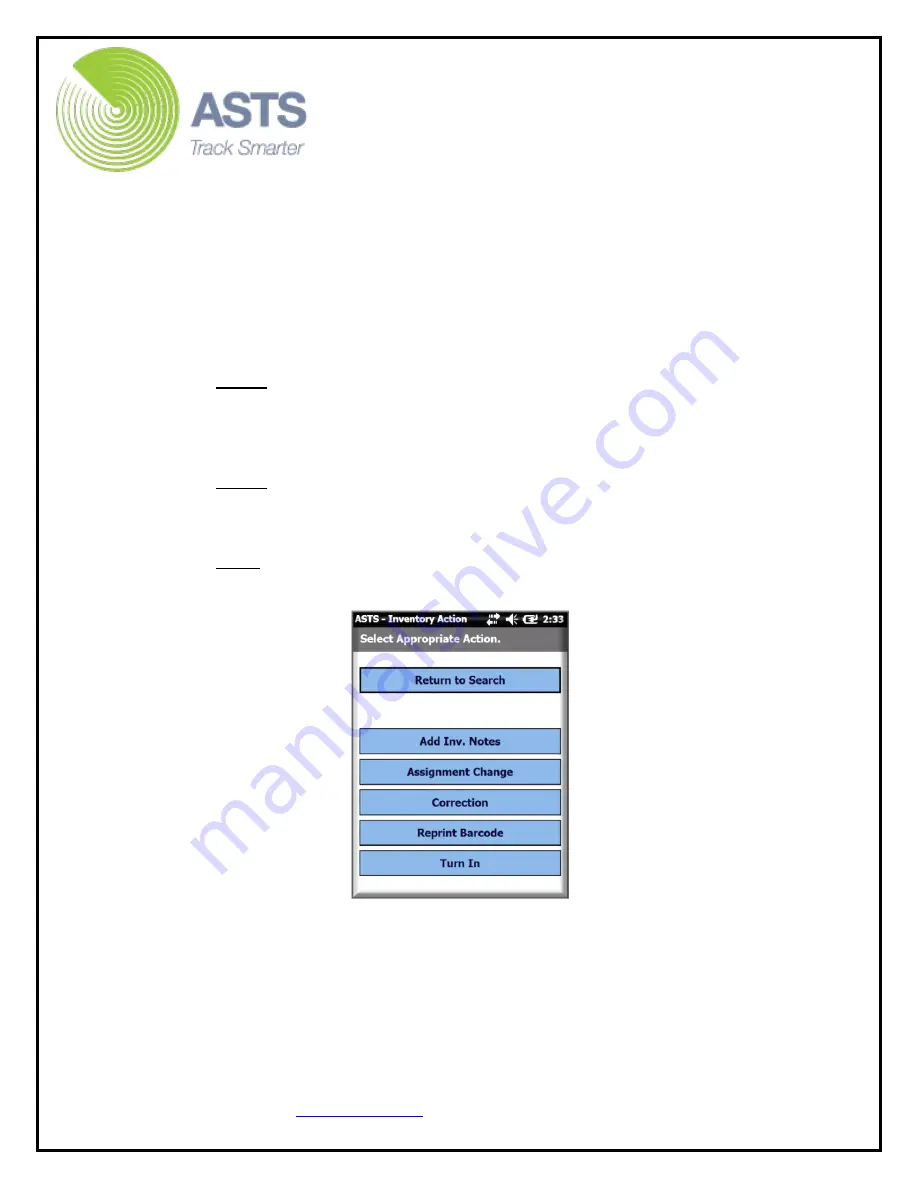
b.
Select the “Add Inv. Notes” button to enter an Inventory Note for the
item just scanned.
c.
Select the “Assignment Change” button to create a Sub Hand Receipt
Assignment Alert (on the ASTS home page). This facilitates a Sub HR
assignment change after the scanner inventory file has been uploaded.
d.
Select the “Correction” button to edit item information. This will
create a Correction Alert on the ASTS home page. This facilitates a
correction transaction after the scanner inventory file has been
uploaded.
Note:
Item information allowed to be entered as a correction is:
item’s serial number, model number, nomenclature, manufacturer,
year of manufacturer (YOM), or cost, etc.
e.
Select the “Reprint Barcode” button to create a “Barcode Reprint” alert
on the ASTS home page.
Note:
This is simply a reminder in case the barcode label is damaged
and needs to be replaced.
f.
Select the “Turn In” button to create a “Turn In” alert on the ASTS
home page.
Note
: This is simply a reminder in case the item later needs to be
Turned In.