User Guide
50 of 67
002-32601 Rev. *C
2021-12-02
EZ-
PD™ PMG1 MCU prototyping kits guide
CY7110/CY7111/CY7112/CY7113
Application development on CY711x kits using ModusToolbox™ software
4.
Connect the kit to the host PC through the KitProg3 USB Type-C Port. Ensure that LED1 and LED2 glow
amber. LED2, which is KitProg3 power LED, indicates that the KitProg3 module is powered. LED1, which is
the status LED, indicates the programming/debug mode and status, and is ON when KitProg3 is powered.
5.
On the
quick panel
,
click
<Application name> Program (KitProg3_MiniProg4)
from the
Launches
section
to download the firmware into the kit.
6.
After program download completes, change the jumper to short 1
–
2 of the power section jumper (J5) to
configure the kit in the operational mode for debugging.
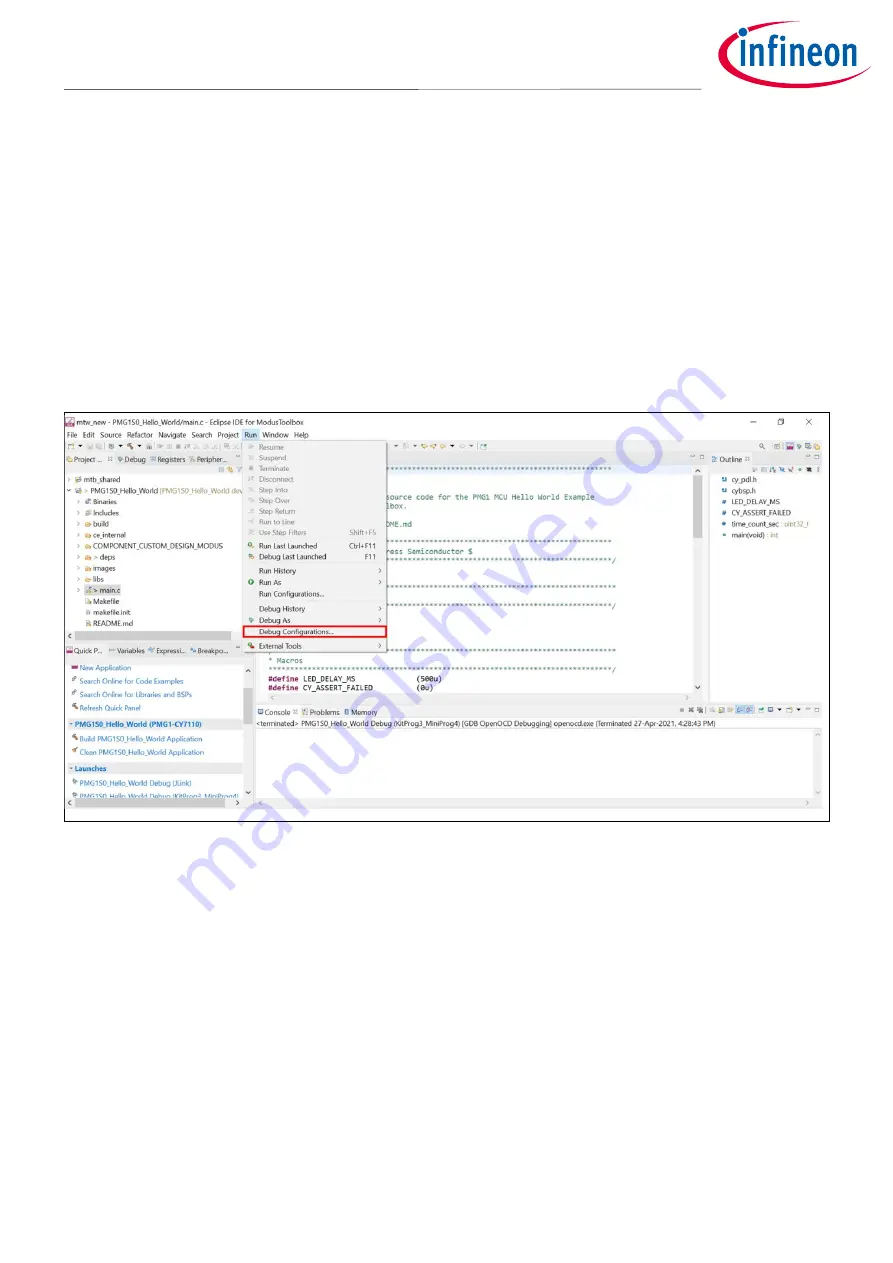
7.
Select
Run
>
Debug configurations
, as shown in
8.
Under GDB OpenOCD Debugging, select
<Application name> Attach (KitProg3_MiniProg4)
and click on
Debug
as shown in
This will start a debugging session attaching to a running target without programming or reset. For more
information on debug configurations, see the MTB user guide
Figure 43
Selecting debug configurations from the Run menu


