3-29 ENGINE
◉
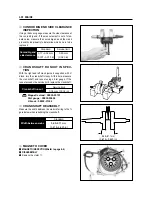
CONROD BIG END SIDE CLEARANCE
INSPECTION
Using a thickness gauge, measure the side clearance at
the conrod big end. If the measurement is out of stan-
dard value, measure the conrod big end and the crank
pin widths individually to determine which one is to be
replaced.
Standard
0.17~0.32 mm
(0.007~0.013 in)
Service limit
0.50 mm
(0.020 in)
Conrod big end
side clearance
◉
CRANKSHAFT RUNOUT INSPEC-
TION
With the right and left crank journals supported with V-
block, turn the crankshaft slowly. At this time, measure
the crankshaft end runout using a dial gauge. If the
runout exceeds the service limit, replace the crankshaft.
Crankshaft runout
Service limit
0.05 mm (0.002 in)
◉
CRANKSHAFT REASSEBLY
Measure the width between the webs referring to the fi-
gure below when rebuilding the crankshaft.
Width between webs
Standard
96.9~97.1 mm
(3.815~3.823 in)
96.9~97.1mm
(3.815
~
3.823 in)
◉
MAGNETO COVER
■
MAGNETO INSPECTION(Refer to page 6-4)
■
DISASSEMBLY
●
Remove the stator
①.
Magnetic stand : 09900-20701
Dial gauge : 09900-20606
V-block : 09900-21304
①
Содержание GT 650
Страница 5: ...NOTE Difference between photographs and actual motorcycles depends on the markets ...
Страница 13: ...1 7 GENERAL INFORMATION EXTERIOR ILLUSTRATION ...
Страница 102: ...CARBURETOR 4 3 FUEL SYSTEM ...
Страница 138: ...LAMP HEADLAMP TURN SIGNAL LAMP TAIL BRAKE LAMP ELECTRICAL SYSTEM 6 16 ...
Страница 158: ...7 15 CHASSIS FRONT FORK ...
Страница 210: ...Prepared by HYOSUNG MOTORS MACHINERY INC 2nd Ed JUN 2004 Manual No 99000 94810 Printed in Korea ...


