3-21 ENGINE
●
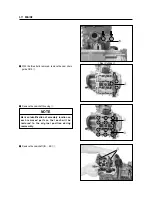
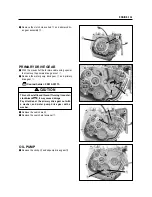
Remove the crankshaft by using the special tool.
Crankcase separator : 09920-13120
Cylinder head
distortion
Service limit
0.05 mm (0.002 in)
�
Valve head thickness
�
�
Service limit
0.5 mm (0.02 in)
Valve stem runout
Service limit
0.05 mm (0.002 in)
ENGINE COMPONENT
INSPECTION AND SERVICE
Thickness gauge : 09900-20806
Vernier calipers : 09900-20101
◉
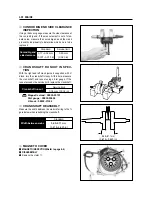
VALVE FACE WEAR
Visually inspect each valve face for wear. Replace any
valve with an abnormally worn face. The thickness of
the valve face decreases as the face wears. Measure
the valve head thickness
�
. If it is out of specification,
replace the valve with a new one.
◉
VALVE STEM RUNOUT
Check the valve stem for abnormal wear or bend.
Place the valve on V-blocks and measure runout.
If the service limit is exceeded or abnormal condi-
tion exists, replace the valve.
Dial gauge : 09900-20606
Magnetic stand : 09900-20701
V-block : 09900-21304
◉
CYLINDER HEAD DISTORTION
Decarbonate in combustion chamber.
Check the gasketed surface of the cylinder head for dis-
tortion with a straightedage and thickness gauge, taking
a clearance reading at several places as indicated. If the
largest reading at any position of the straightedge
exceeds the limit, replace the cylinder head.
CAUTION
Be sure to identify each removed part as to its loca-
tion, and lay the parts out in groups designated as
“
Front cylinder
”
,
“
Rear cylinder
”
,
“
Exhaust
”
,
“
Intake
”
, so that each will be restored to the origi-
nal location during assembly.
Содержание GT 650
Страница 5: ...NOTE Difference between photographs and actual motorcycles depends on the markets ...
Страница 13: ...1 7 GENERAL INFORMATION EXTERIOR ILLUSTRATION ...
Страница 102: ...CARBURETOR 4 3 FUEL SYSTEM ...
Страница 138: ...LAMP HEADLAMP TURN SIGNAL LAMP TAIL BRAKE LAMP ELECTRICAL SYSTEM 6 16 ...
Страница 158: ...7 15 CHASSIS FRONT FORK ...
Страница 210: ...Prepared by HYOSUNG MOTORS MACHINERY INC 2nd Ed JUN 2004 Manual No 99000 94810 Printed in Korea ...

