Setup 34
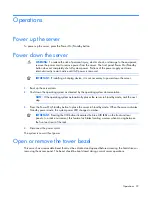
WARNING:
To reduce the risk of personal injury, electric shock, or damage to the equipment,
remove the power cord to remove power from the server. The front panel Power On/Standby
button does not completely shut off system power. Portions of the power supply and some
internal circuitry remain active until AC power is removed.
CAUTION:
Protect the server from power fluctuations and temporary interruptions with a
regulating uninterruptible power supply (UPS). This device protects the hardware from damage
caused by power surges and voltage spikes and keeps the system in operation during a power
failure.
CAUTION:
Do not operate the server for long periods with the access panel open or removed.
Operating the server in this manner results in improper airflow and improper cooling that can
lead to thermal damage.
Identifying tower server shipping carton contents
Unpack the server shipping carton and locate the materials and documentation necessary for installing the
server.
The contents of the server shipping carton include:
•
Server
•
Power cord
•
Keyboard
•
Mouse
•
Tower feet
•
Hardware documentation, Documentation CD, and software products
In addition to the supplied items, you may need:
•
Hardware options
•
Operating system or application software
•
PDU
Identifying rack server shipping carton contents
Unpack the server shipping carton and locate the materials and documentation necessary for installing the
server. All the rack mounting hardware necessary for installing the server into the rack is included with the
rack or the server.
The contents of the server shipping carton include:
•
Server
•
Power cord
•
Hardware documentation, Documentation CD, and software products
•
Rack-mounting hardware
In addition to the supplied items, you may need:
Содержание ProLiant DL370
Страница 1: ...HP ProLiant DL ML370 G6 Server User Guide Part Number 513482 001 March 2009 First Edition ...
Страница 16: ...Component identification 16 SFF hard drives LFF hard drives ...
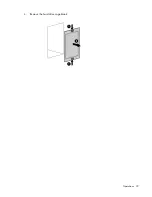
Страница 29: ...Operations 29 6 Remove the hard drive cage blank ...
Страница 83: ...Hardware options installation 83 o Rear 1 o Front 2 17 Remove the chassis from the tower side panels ...
Страница 94: ...Cabling 94 Drive cage bay 2 Drive cage bay 3 ...
Страница 95: ...Cabling 95 Six bay LFF backplane cabling Drive cage bay 1 Drive cage bay 2 ...
Страница 97: ...Cabling 97 Battery cabling for BBWC DVD ROM drive cabling ...
Страница 98: ...Cabling 98 Slimline optical drive cabling ...
Страница 123: ...Troubleshooting 123 ...
Страница 146: ...Technical support 146 ...
Страница 147: ...Technical support 147 ...

